> For the complete documentation index, see [llms.txt](https://captivatehelp.newbluelive.com/llms.txt). Markdown versions of documentation pages are available by appending `.md` to page URLs; this page is available as [Markdown](https://captivatehelp.newbluelive.com/set-up-your-production/chapter-index-3/setting-up-transitions.md).
# Set up transitions
When switching between two or more live video sources in the Switcher panel, you have the option of adding transitions. There are stinger graphics within various collections within your graphics library, as well as a number of general transitions to choose from.
Captivate includes two types of transitions, selected from the same Switcher controls:
* **Stingers** are graphic titles with embedded animation, audio, and a cut point. A stinger fires immediately when triggered; the incoming source is cut in at the stinger’s cut point.
* **FX transitions** are procedural pixel effects applied to the video frame as it transitions. An FX transition is scheduled to run after the outgoing layer plays out.
You select either type from the same Switcher dropdowns; the type used is determined by the transition you pick.
* [Using transitions in the Live Video Switcher](#using-transitions-in-the-live-video-switcher)
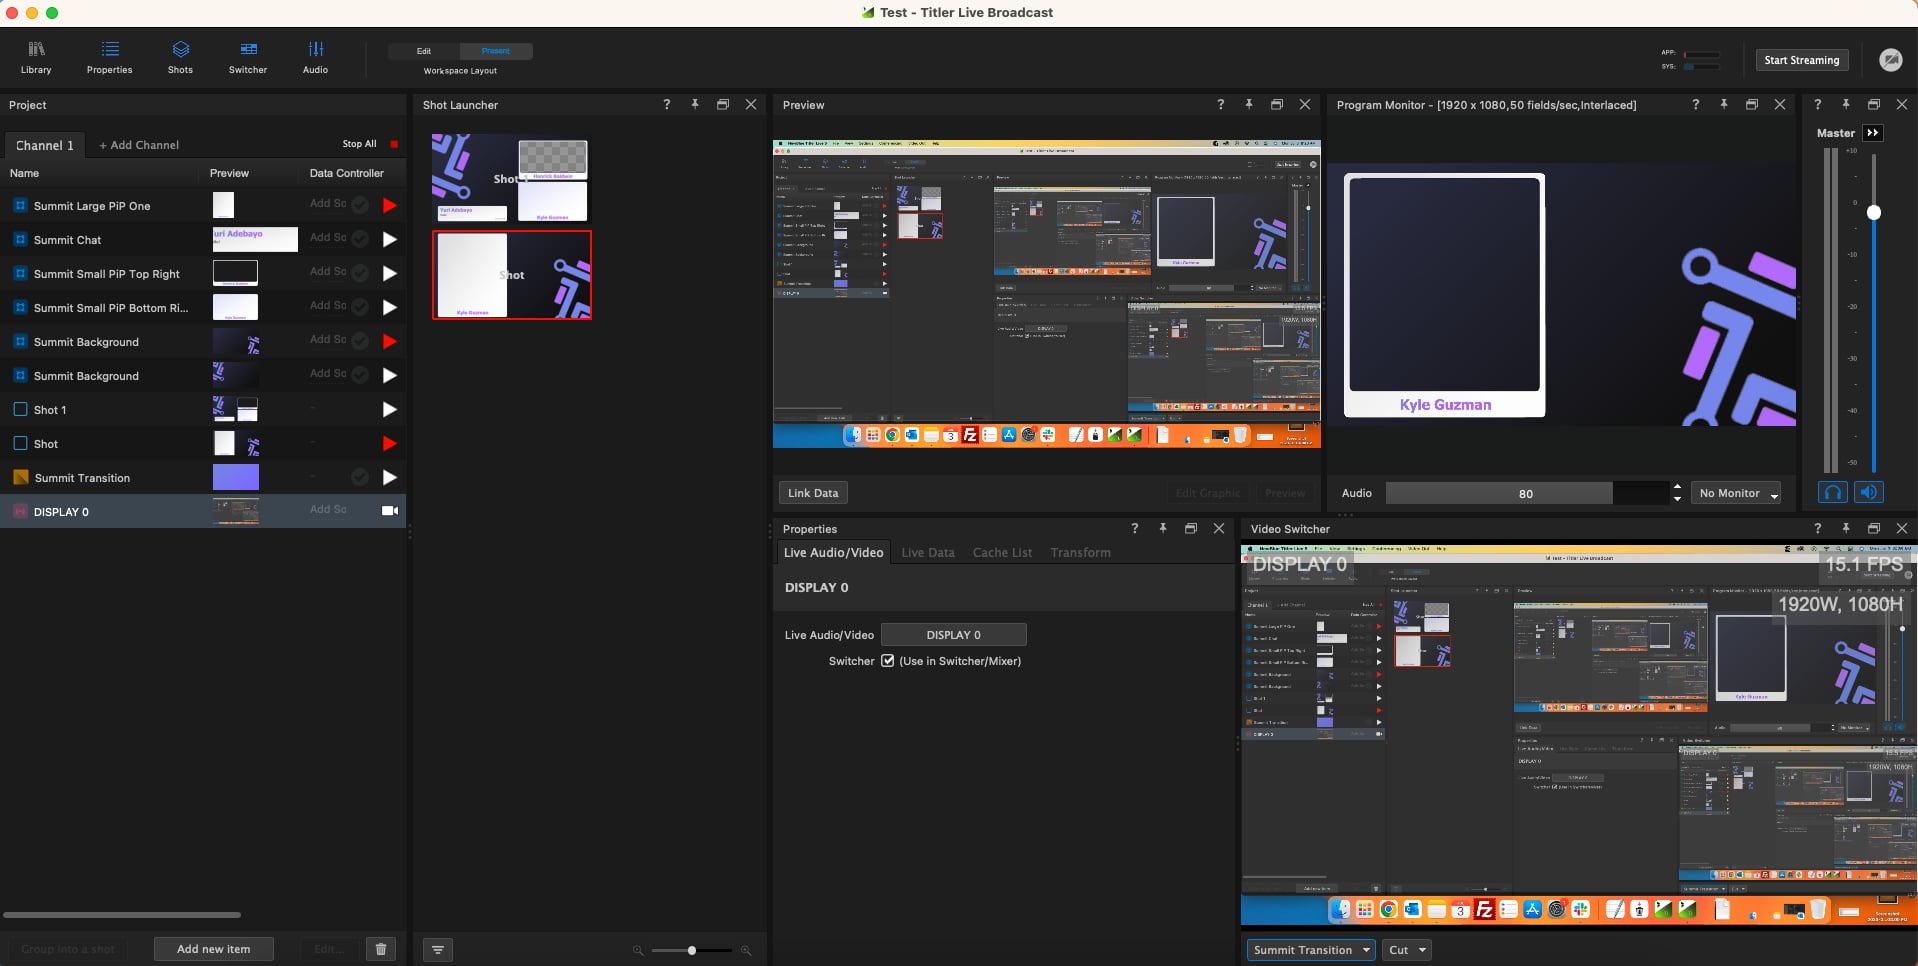
* [Using transitions with the Shot Launcher](#using-transitions-with-the-shot-launcher)
## Using Transitions in the Live Video Switcher
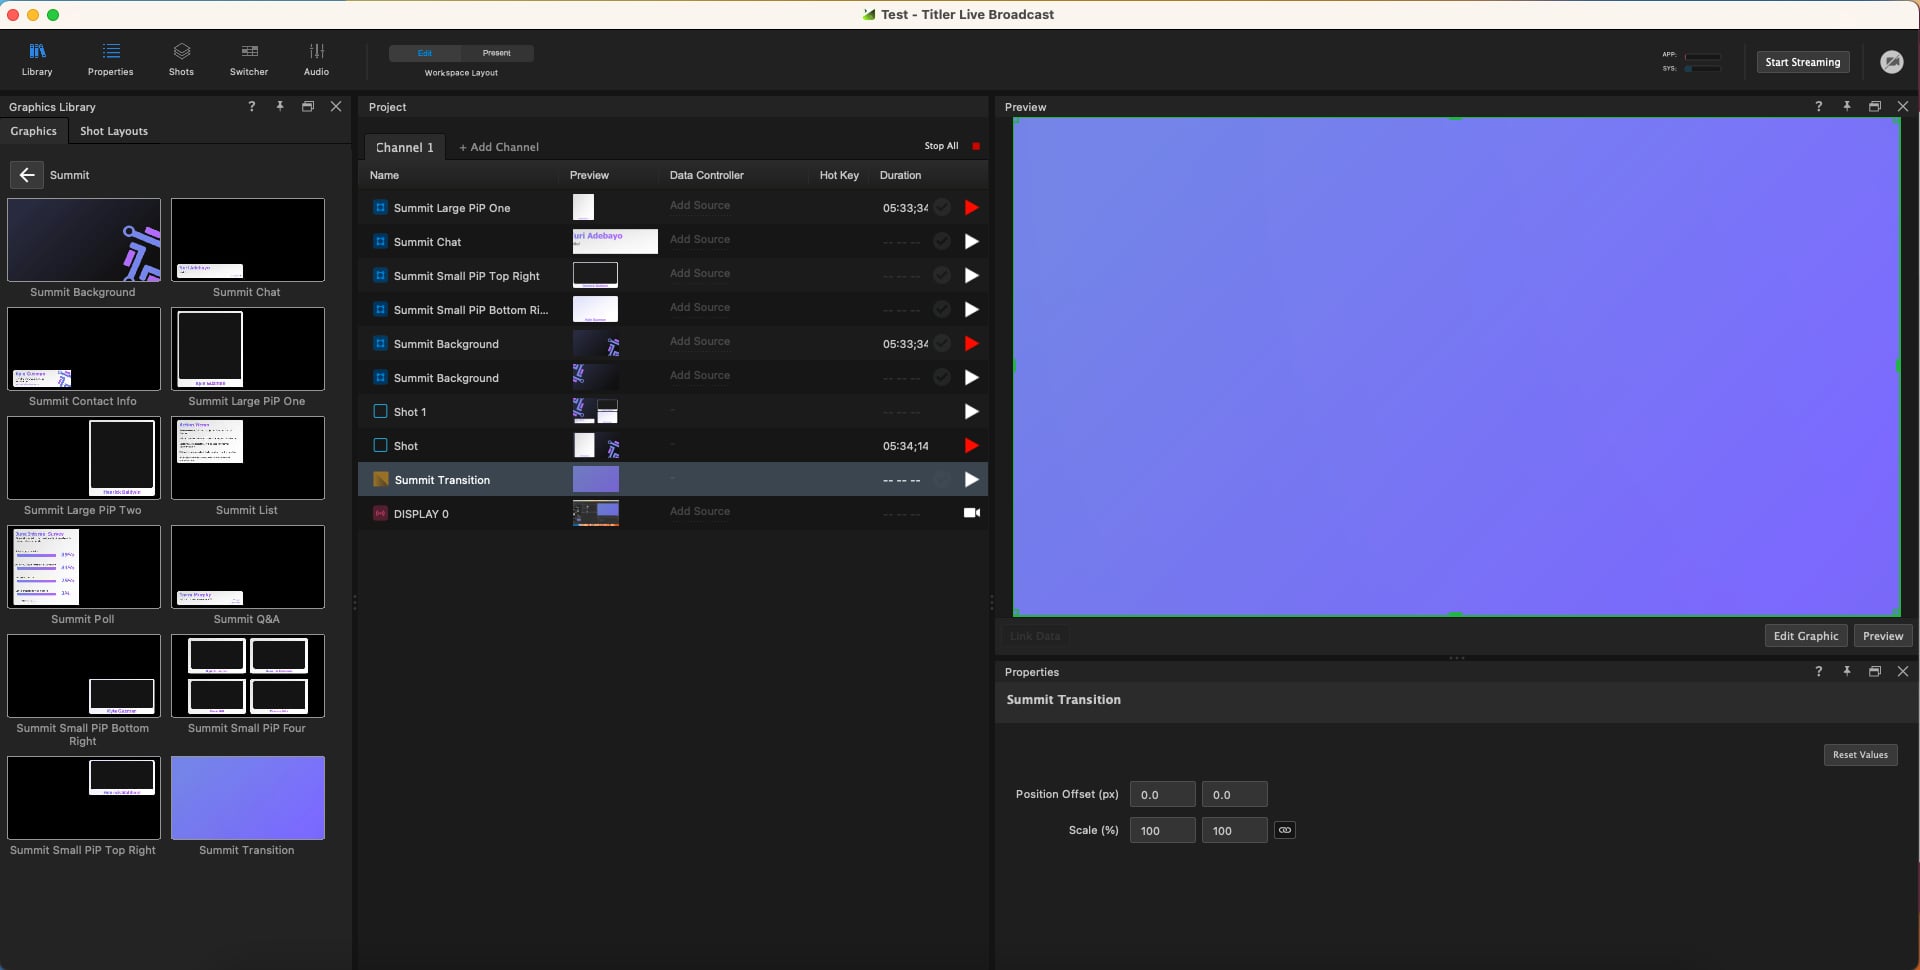
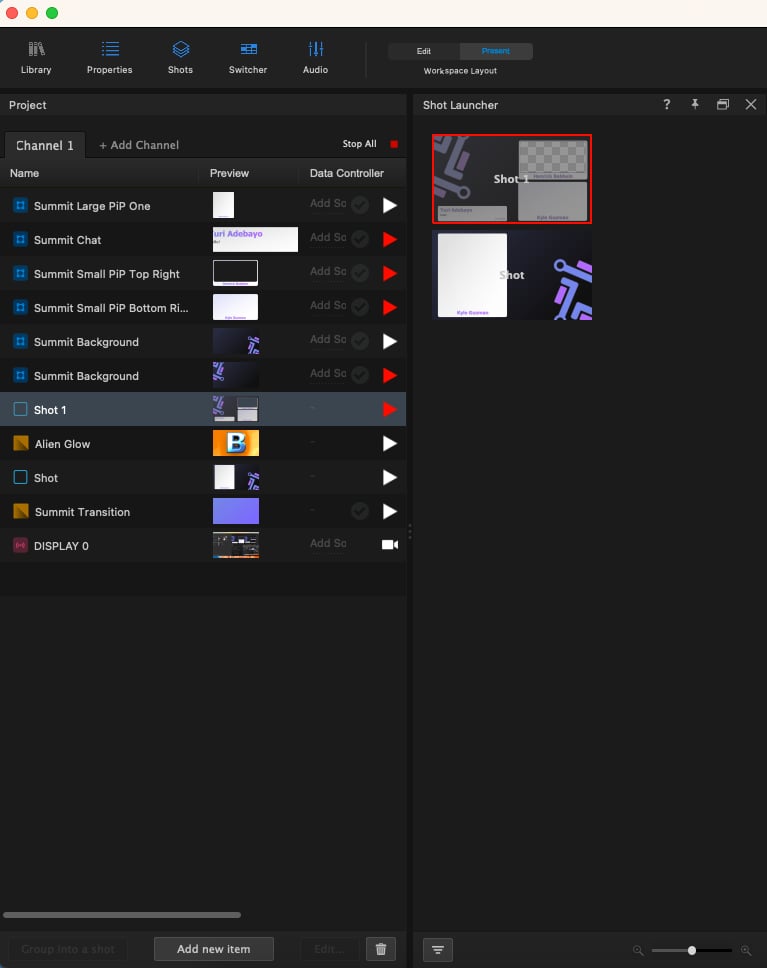
1. From the Setup workspace, drop the stinger transition from the graphics library into your Project List.
**📌 NOTE**\
Any graphic can also be enabled as a transition by right-clicking in the Project List > **Enable As Transition**.
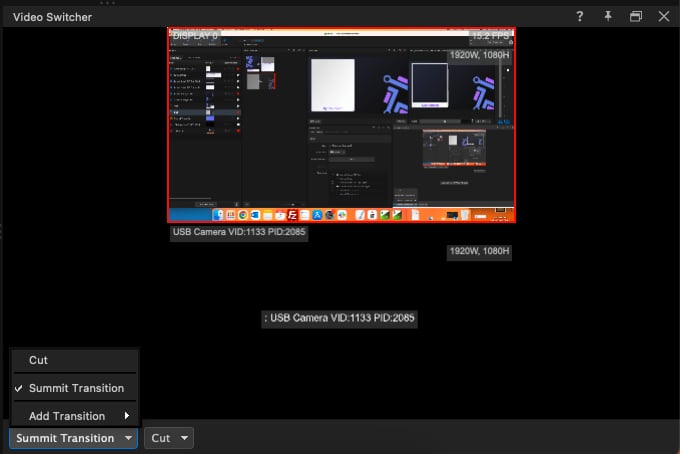
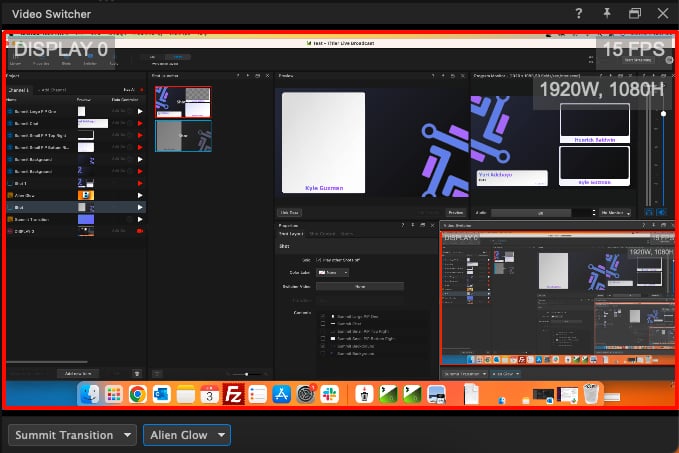
2. In the Live workspace, navigate to the bottom right corner of the Video Switcher panel and change one of the two **Cut** transition buttons to the Stinger Transition you just added to the Project List, with the drop-down menu.
3. Select that transition so there is a blue border indicating it will be played when switching between video sources.
4. Switch between the live video sources within the Switcher panel to play your transition.
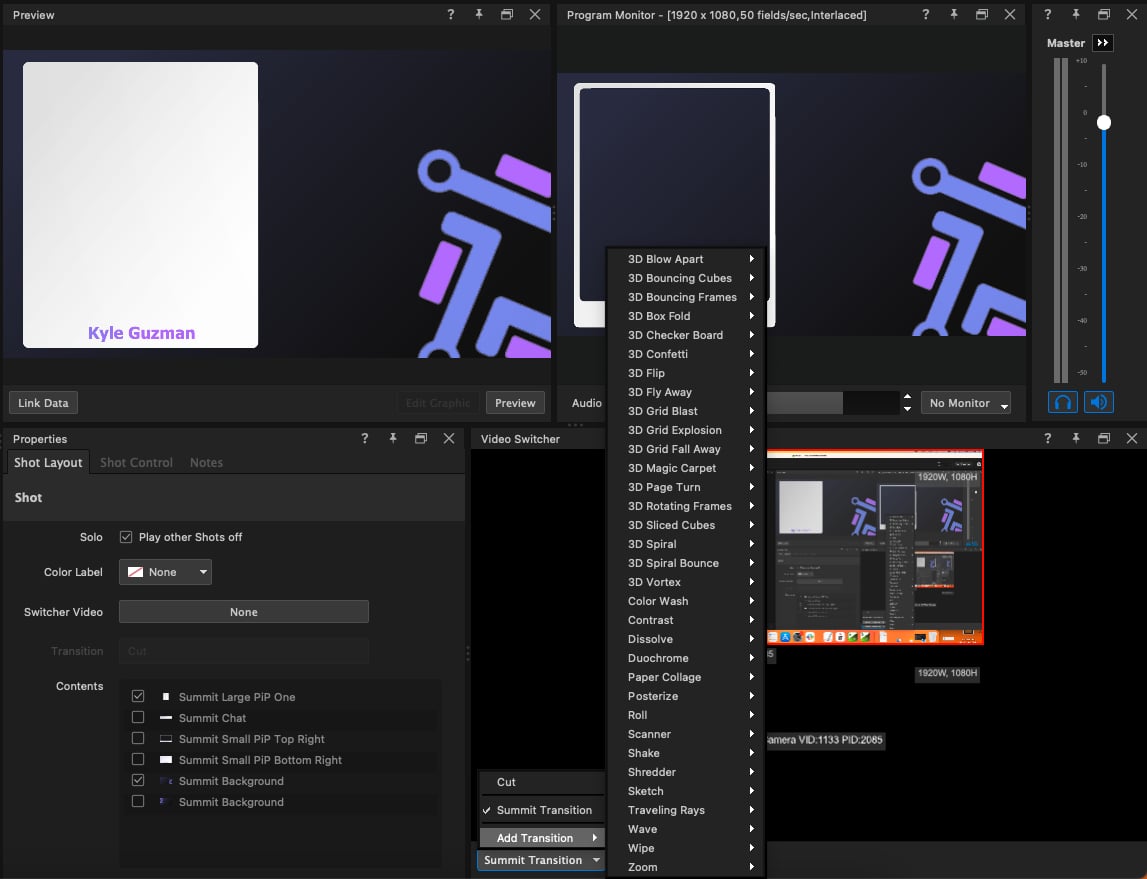
5. Add a second transition using a general transition by selecting the second dropdown **Cut** > **Add Transition** > choose from a list of all NewBlue transitions.
**📌 NOTE**\
Each new general transition you add will appear in your Project List and in the dropdown menu’s list of available transitions.
**💡 TIP**\
Delete any of the transitions from your Project List by highlighting the transition > right-clicking > **Delete**.
6. Selecting the transition in the Project List will display the control options in the Properties panel such as duration, preset, background, etc. Each transition will vary slightly.
7. Switch between transitions during broadcast by selecting the desired transition so the blue border indication is present in the Video Switcher panel.
## Using Transitions with the Shot Launcher
There is the option to add a transition to any of your Shots as well, as long as one of the live video sources is enabled as a background.
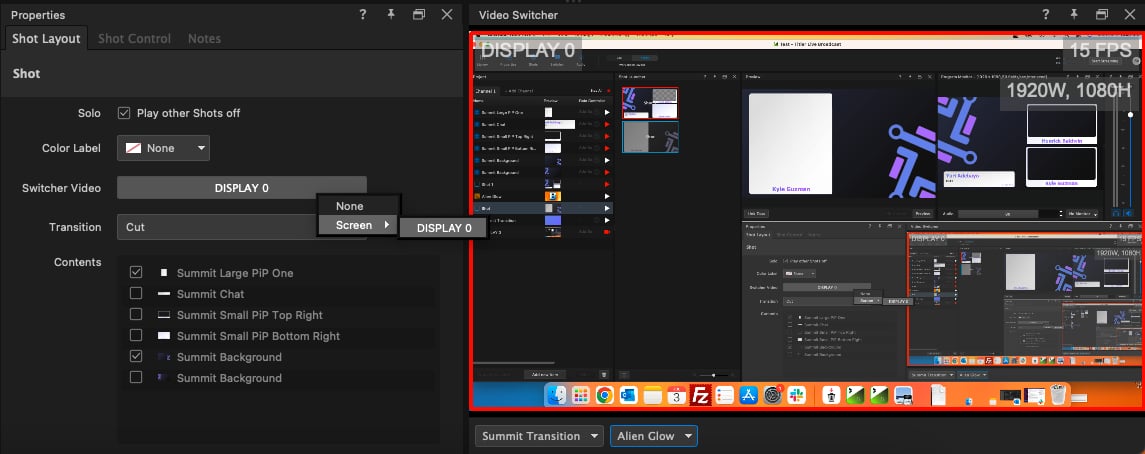
1. Select the Shot in the Project List to display the Shot Properties tab in the Properties panel.
2. Choose the live video source for the background to open transition options.
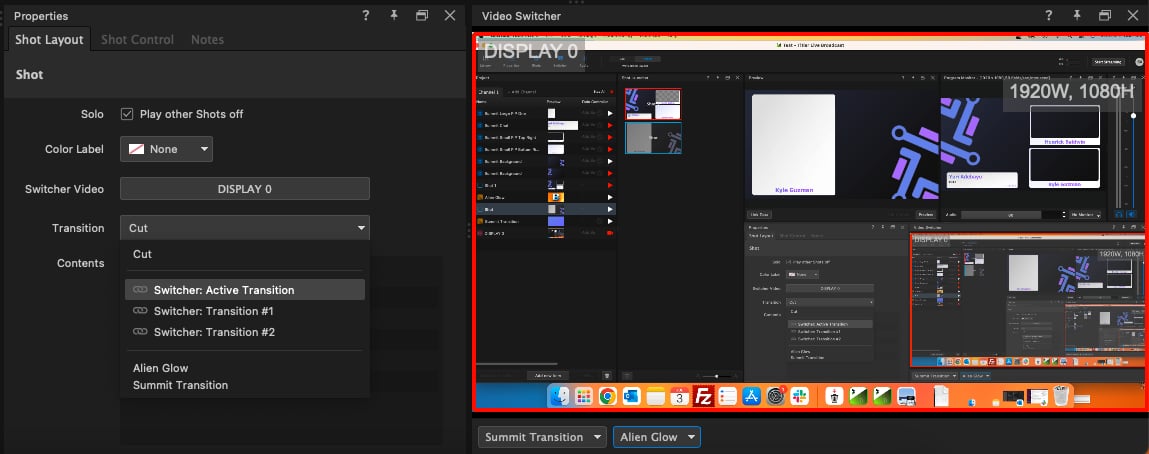
3. Choose the transition from the dropdown menu.
The selected transition should now be triggered when your Shot is played on/off air.
---
# Agent Instructions
This documentation is published with GitBook. GitBook is the documentation platform designed so that both humans and AI agents can read, navigate, and reason over technical content effectively. Learn more at gitbook.com.
## Querying This Documentation
If you need additional information that is not directly available in this page, you can query the documentation dynamically by asking a question.
Perform an HTTP GET request on the current page URL with the `ask` query parameter, and the optional `goal` query parameter:
```
GET https://captivatehelp.newbluelive.com/set-up-your-production/chapter-index-3/setting-up-transitions.md?ask=&goal=
```
`ask` is the immediate question: it should be specific, self-contained, and written in natural language.
`goal` is optional and describes the broader end goal you are ultimately trying to accomplish on behalf of the user. GitBook uses it to tailor the answer towards what is most useful for that goal.
The response will contain a direct answer to the question and relevant excerpts and sources from the documentation.
Use this mechanism when the answer is not explicitly present in the current page, you need clarification or additional context, or you want to retrieve related documentation sections.