> For the complete documentation index, see [llms.txt](https://captivatehelp.newbluelive.com/llms.txt). Markdown versions of documentation pages are available by appending `.md` to page URLs; this page is available as [Markdown](https://captivatehelp.newbluelive.com/play-and-update-graphics/chapter-index-3/connect-zoom-manager.md).
# Connect Zoom Manager (Meeting Workflow)
> *Availability — included in Broadcast and Enterprise.*
Captivate introduces a type of project item named a **Workflow**. Workflows offer tailored experiences for varying situations. They serve as dynamic interfaces for setting and presenting data and provide effective control over Captivate’s actions. The Meeting Workflow was designed to streamline the integration of participants into live productions. It proves particularly helpful when your production includes participants from different sources such as conferencing services like Zoom or Microsoft Teams.
* [Add a New Meeting](#add-a-new-meeting)
* [Set up your Participants](#set-up-your-participants)
* [Integrating Participants into Graphics](#integrating-participants-into-graphics)
* [Define Meeting Details](#define-meeting-details)
## Add a New Meeting
To add a new Meeting Workflow (you only need one):
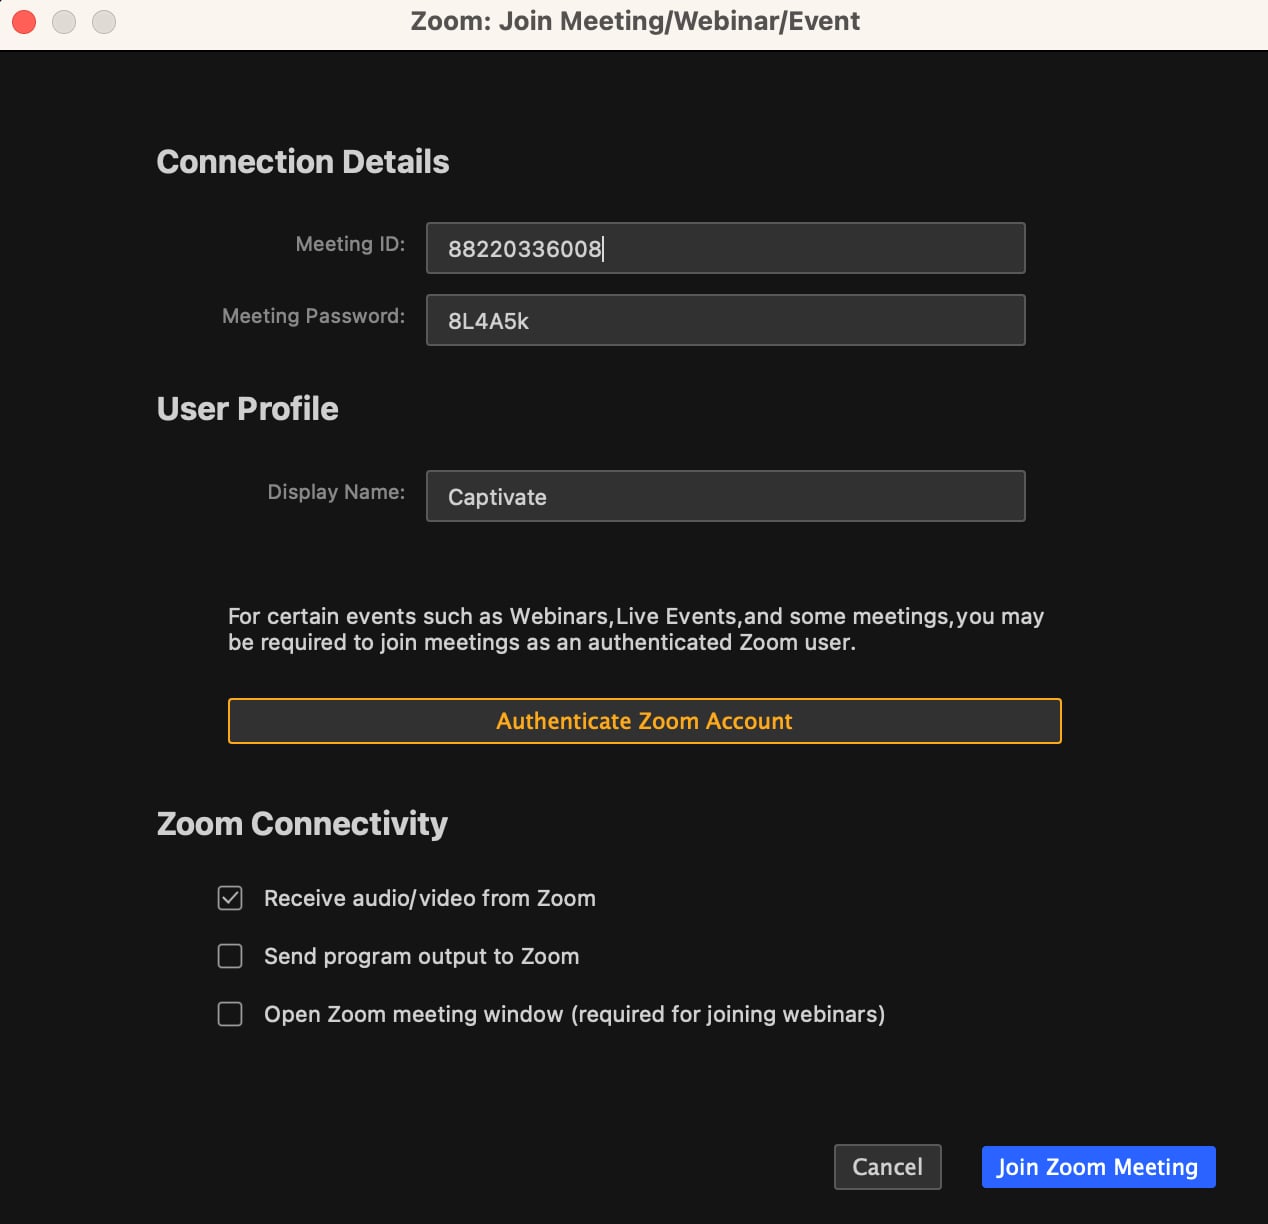
1. First, you will want to have your meeting source set up and running. See [Zoom Integration Setup](/play-and-update-graphics/chapter-index-3/authenticate-zoom.md) or [Connect Microsoft Teams](/play-and-update-graphics/chapter-index-3/connect-microsoft-teams.md) for details on setting up a meeting for Captivate to connect to.
2. Choose **Receive Audio/Media from Zoom** under Zoom Connectivity.
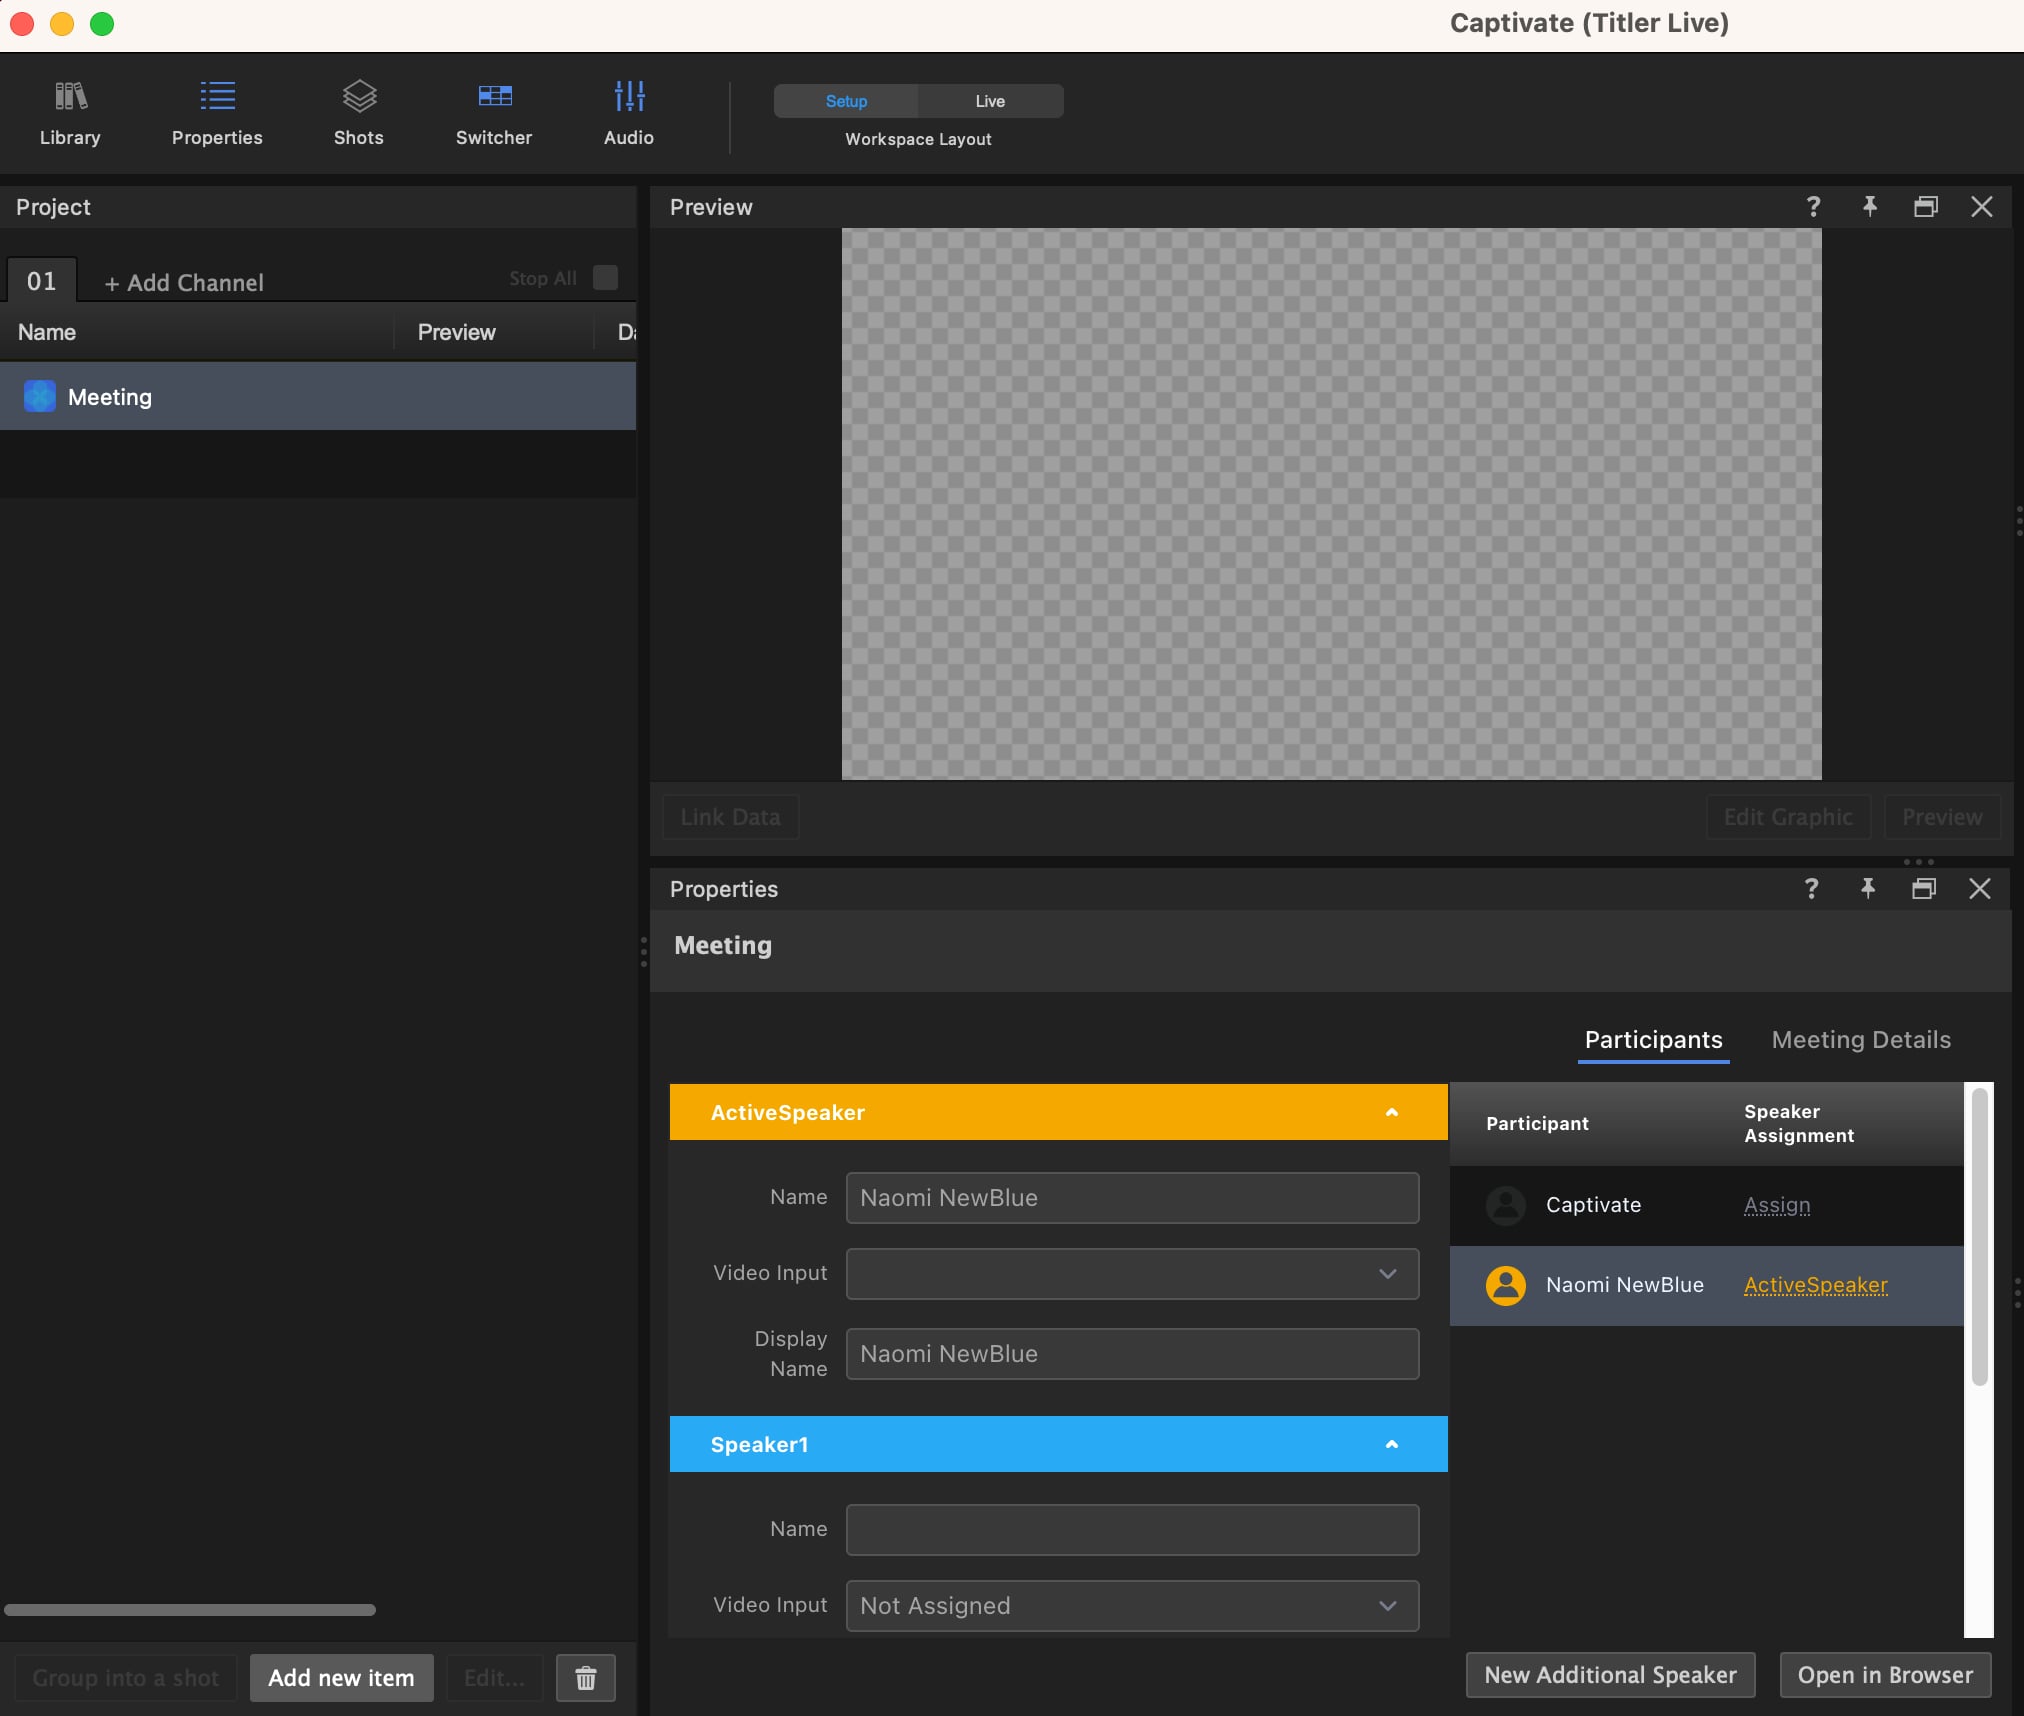
3. In Captivate, click **Add new item** at the bottom of the Project panel.
4. Select **Workflow** > **People**. (The Meeting Workflow has been renamed to **People**.)
5. Select the People Workflow object in your Project panel.
6. Ensure that the Properties panel is visible in the playout interface (**View** > **Properties** | F3). When Properties are showing, the Meeting Workflow’s Meeting controls will be presented in the Properties panel.
The Meeting Workflow has two selectable views:
* **Participants**
* **Meeting Details**
## Set up your Participants
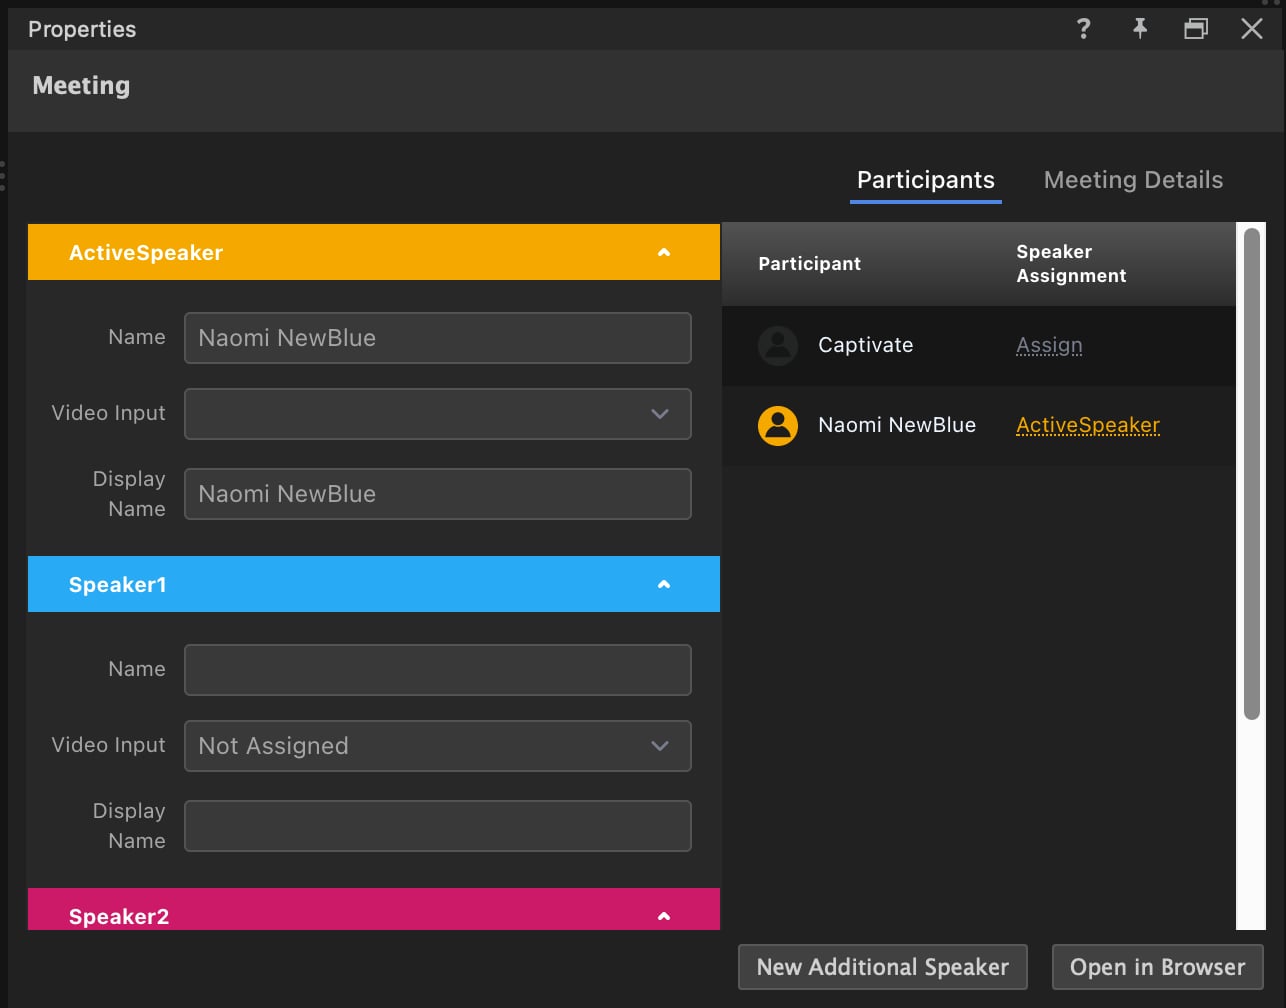
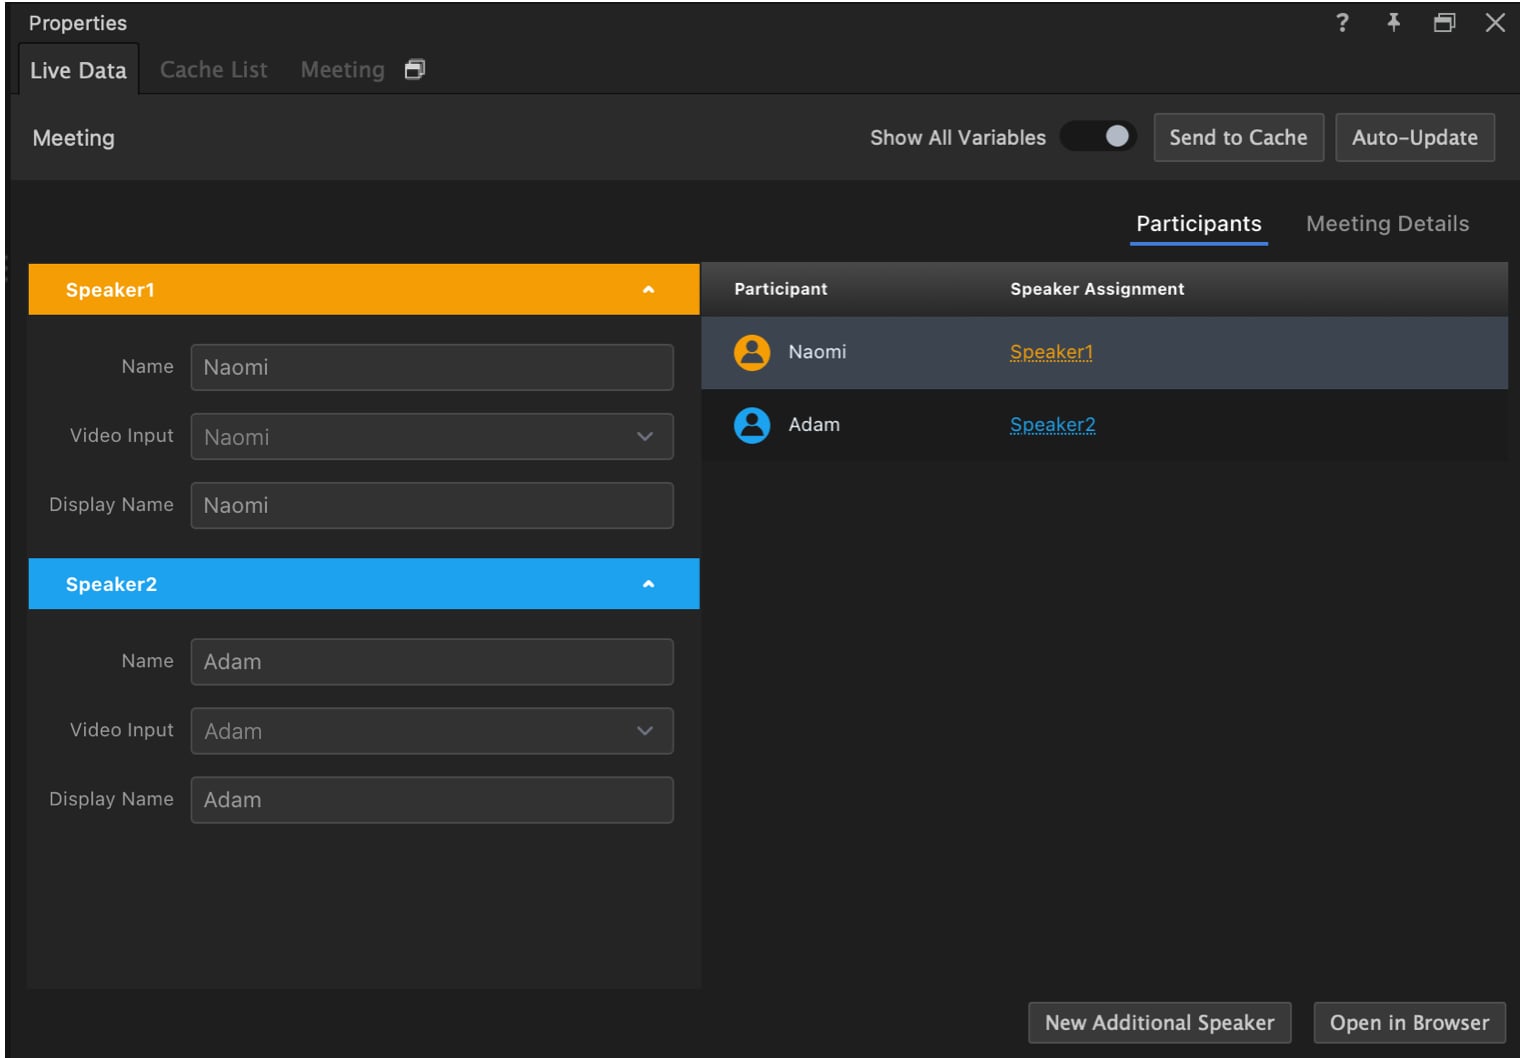
The Participants view is an interface for filling in details about participants in your production. Along the left side of the view, you have a list of Speaker objects (Speaker1, Speaker2, etc.). Additional Speakers can be added via the **New Additional Speaker** button at the bottom of the panel.
A Speaker is an instance of something that we call a *LiveObject*. A LiveObject is like a box for our variables. It groups them together, so we can manipulate them collectively rather than individually.
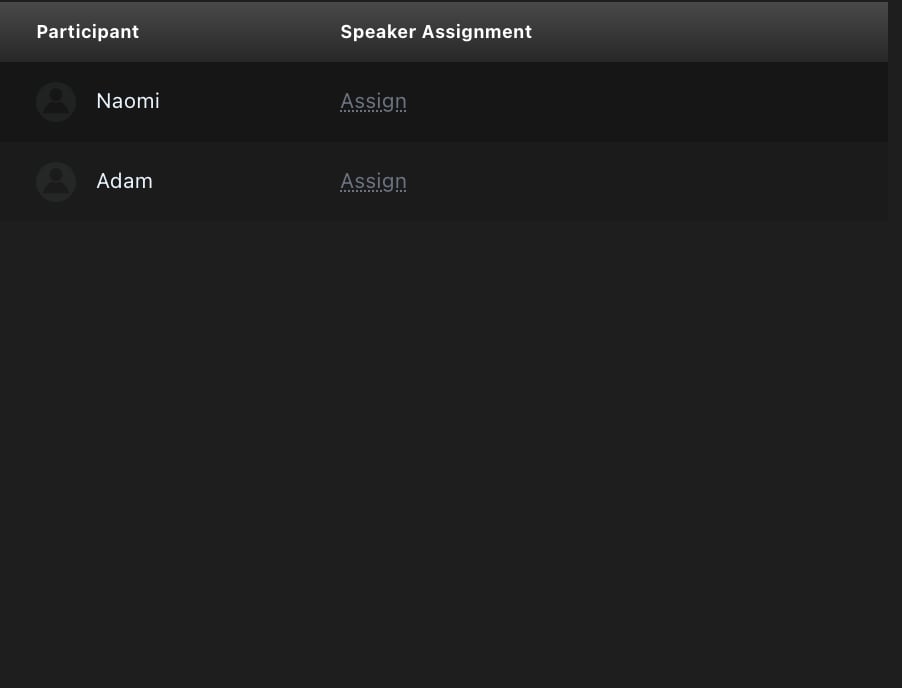
The Speaker object groups properties that relate to a meeting participant. You can manually type in values to assign them to various speakers, or you can assign them using the Participants table. The participants table will populate itself with values from your active Zoom meeting.
**💡 TIP**\
If your values do not populate automatically, try interacting with any of the text input boxes by clicking into one.
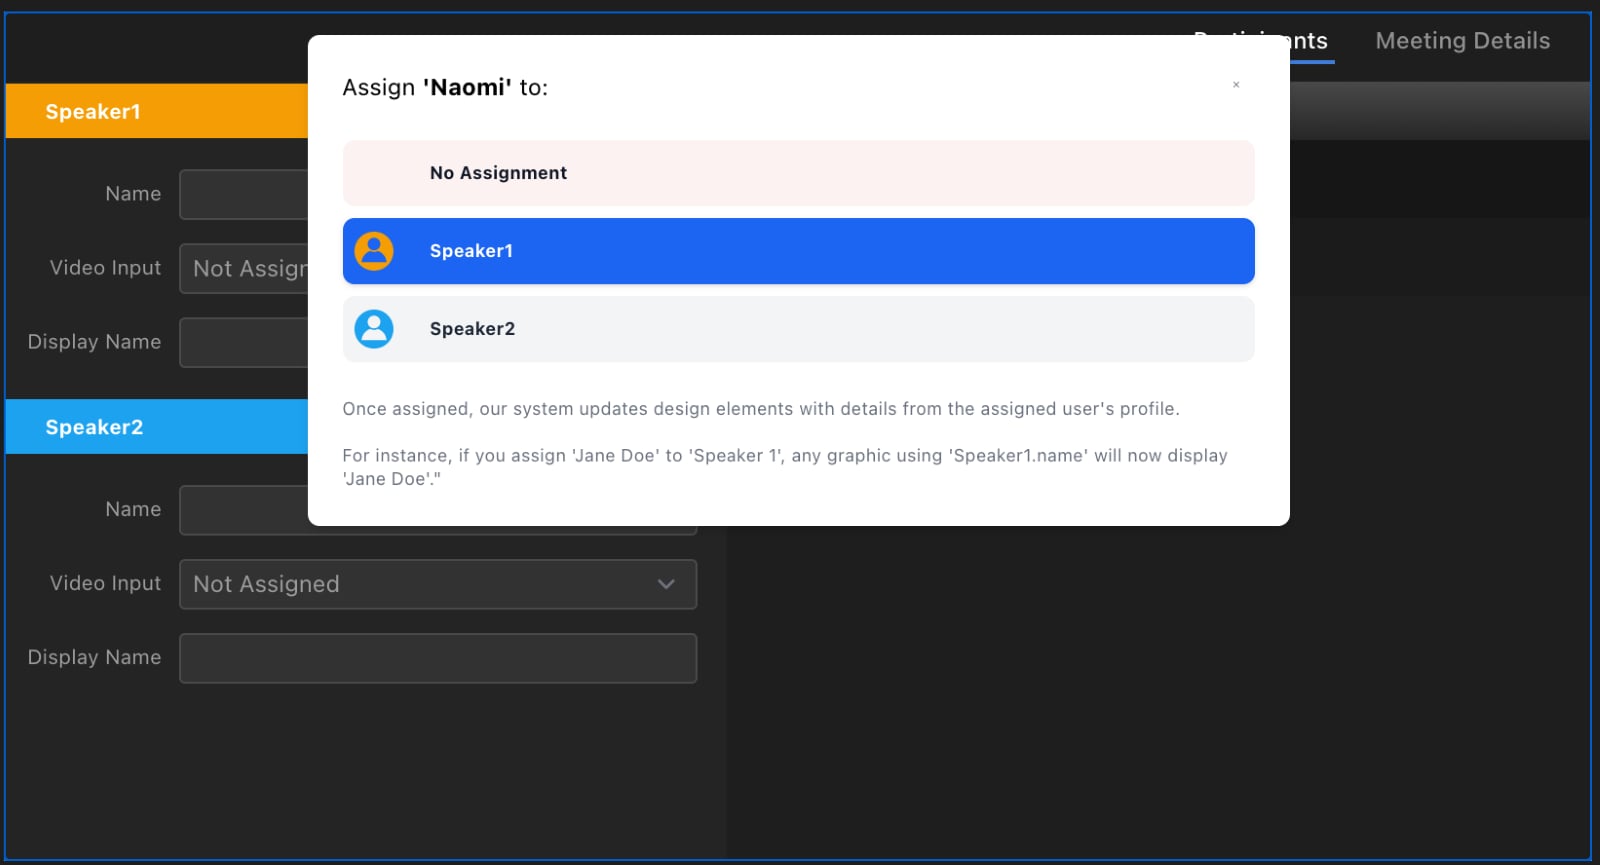
1. Select the participant of interest and click **Assign**.
2. Select a Speaker object to assign to (e.g., Speaker 1).
Captivate will query the active meeting for details about the selected participant and use those values (e.g., name, display name, video feed) to automatically configure the target Speaker object. Speaker objects in this view are color coded to help with identification.
**💡 TIP**\
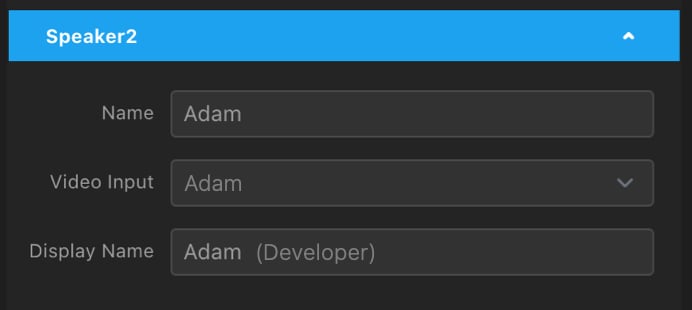
You can manually override the values in a Speaker object if you need to customize some values. For example, if we want to append "(Developer)" to "Adam", we can type in the field to add this.
## Integrating Participants into Graphics
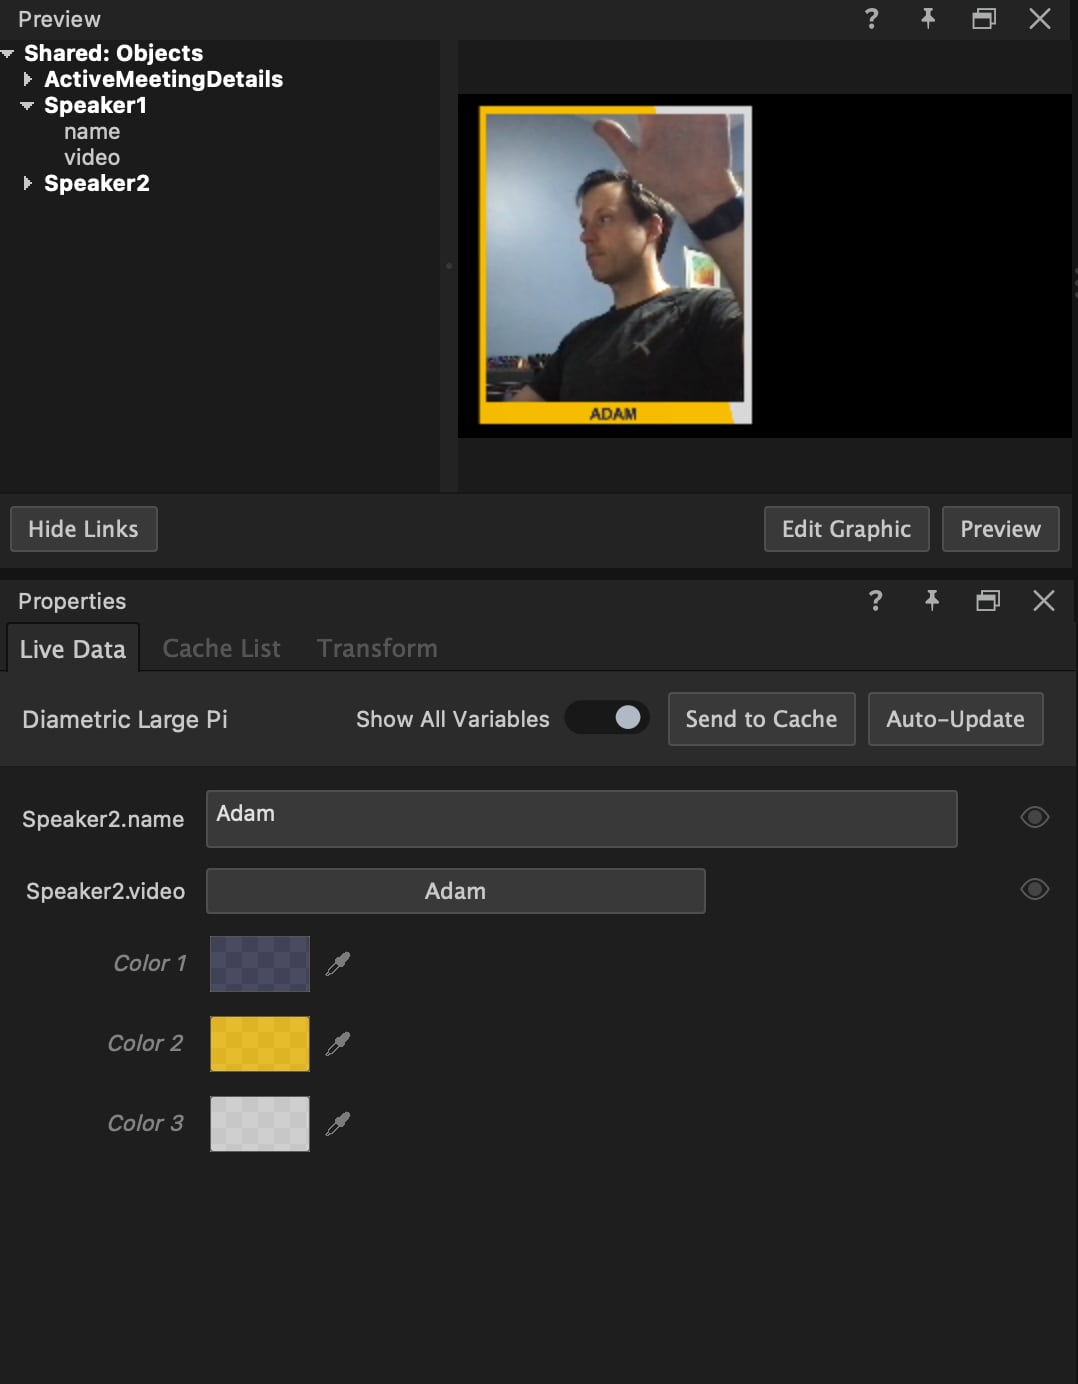
As mentioned earlier, the Meeting Workflow works with Speaker objects. Values are created inside of the Speaker objects available as variables for linking with your graphics design elements.
1. In the Link Data panel, select **Show Links** to make published objects visible below **Shared: Objects**.
2. The objects can then be expanded, and individual fields can be accessed for linking.
If you were to reassign Naomi to Speaker2, all the linked values would automatically update. This is the power of the LiveObject system; it simplifies handling groups of related values.
## Define Meeting Details
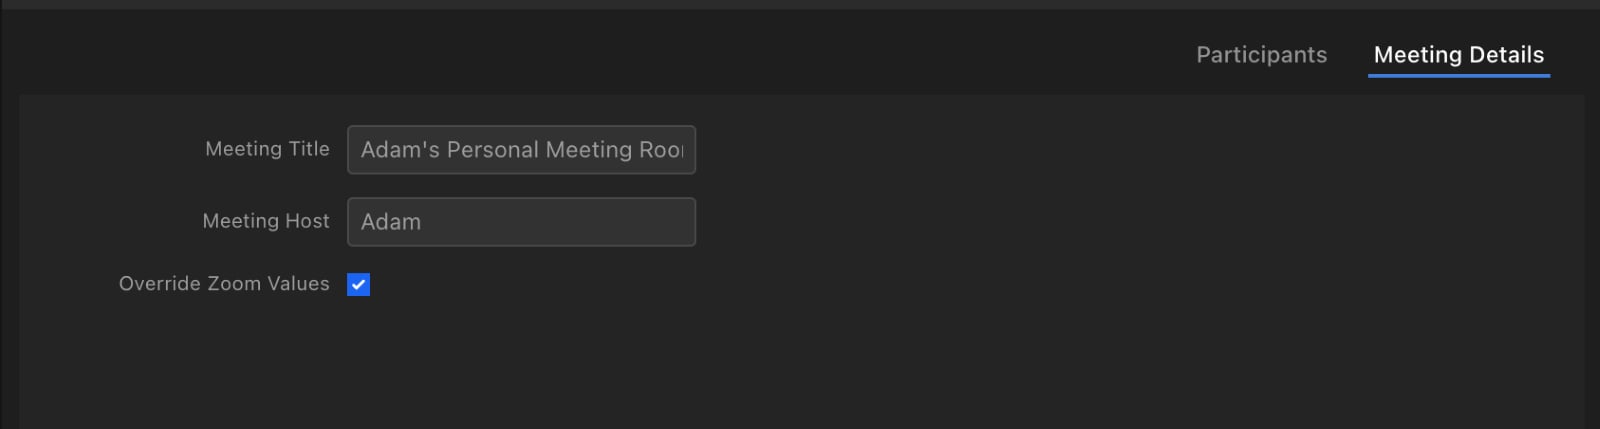
The Meeting Details view is used for setting values in the **Active Meeting Details** object. This object will be automatically updated by the active Zoom meeting unless you choose to override the values.
1. In the Meeting Details tab, click in the text box for **Meeting Title**. Captivate will auto-populate the Meeting Title and Meeting Host of the connected meeting.
2. To edit those values within Captivate, select **Override Zoom Values** and replace the text.
The ActiveMeetingDetails object can be connected to graphics similar to the Speaker objects.
---
# Agent Instructions
This documentation is published with GitBook. GitBook is the documentation platform designed so that both humans and AI agents can read, navigate, and reason over technical content effectively. Learn more at gitbook.com.
## Querying This Documentation
If you need additional information that is not directly available in this page, you can query the documentation dynamically by asking a question.
Perform an HTTP GET request on the current page URL with the `ask` query parameter, and the optional `goal` query parameter:
```
GET https://captivatehelp.newbluelive.com/play-and-update-graphics/chapter-index-3/connect-zoom-manager.md?ask=&goal=
```
`ask` is the immediate question: it should be specific, self-contained, and written in natural language.
`goal` is optional and describes the broader end goal you are ultimately trying to accomplish on behalf of the user. GitBook uses it to tailor the answer towards what is most useful for that goal.
The response will contain a direct answer to the question and relevant excerpts and sources from the documentation.
Use this mechanism when the answer is not explicitly present in the current page, you need clarification or additional context, or you want to retrieve related documentation sections.