> For the complete documentation index, see [llms.txt](https://captivatehelp.newbluelive.com/llms.txt). Markdown versions of documentation pages are available by appending `.md` to page URLs; this page is available as [Markdown](https://captivatehelp.newbluelive.com/play-and-update-graphics/chapter-index-3/connect-microsoft-teams.md).
# Connect Microsoft Teams
Captivate can add live video sources from your Microsoft Teams meetings via NDI. In addition, the Virtual Webcam output feature can be delivered directly into your Teams meeting as well.
**⚠️ WARNING**\
You must have the business version of the Teams App installed on your system for the NDI feature to be available. The personal Microsoft Teams App does not include the settings necessary for this workflow. Please make sure you are operating within the business version when starting your meeting.
* [Setting up Teams Meeting Participants as a Live Video Source](#setting-up-teams-meeting-participants-as-a-live-video-source)
* [Output via Virtual Webcam to your Teams Meeting](#output-via-virtual-webcam-to-your-teams-meeting)
## Setting up Teams Meeting Participants as a Live Video Source
Captivate will be able to source the Teams Meeting live video via NDI which will need to be enabled in your Teams settings.
**❗ IMPORTANT**\
The NDI feature in Teams requires a paid Microsoft account (consumer Office365 does not seem to count). You may need to contact a Microsoft admin to allow access to the Production Capabilities feature if not permitted.
1. Open Microsoft Teams and navigate to your Settings menu.
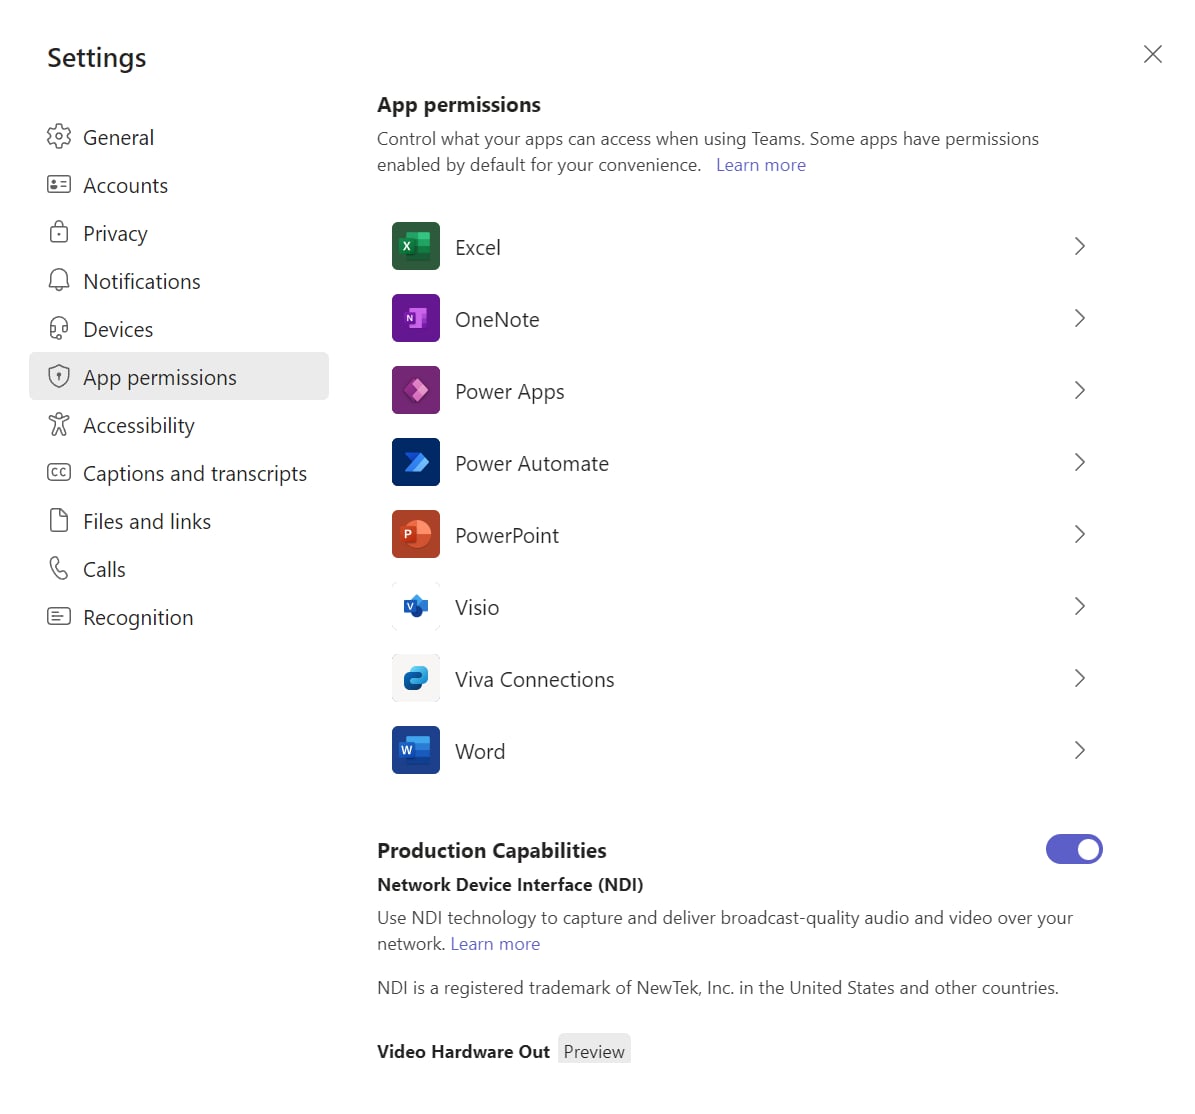
2. Select **App Permissions** on the sidebar and toggle on **Production Capabilities**.
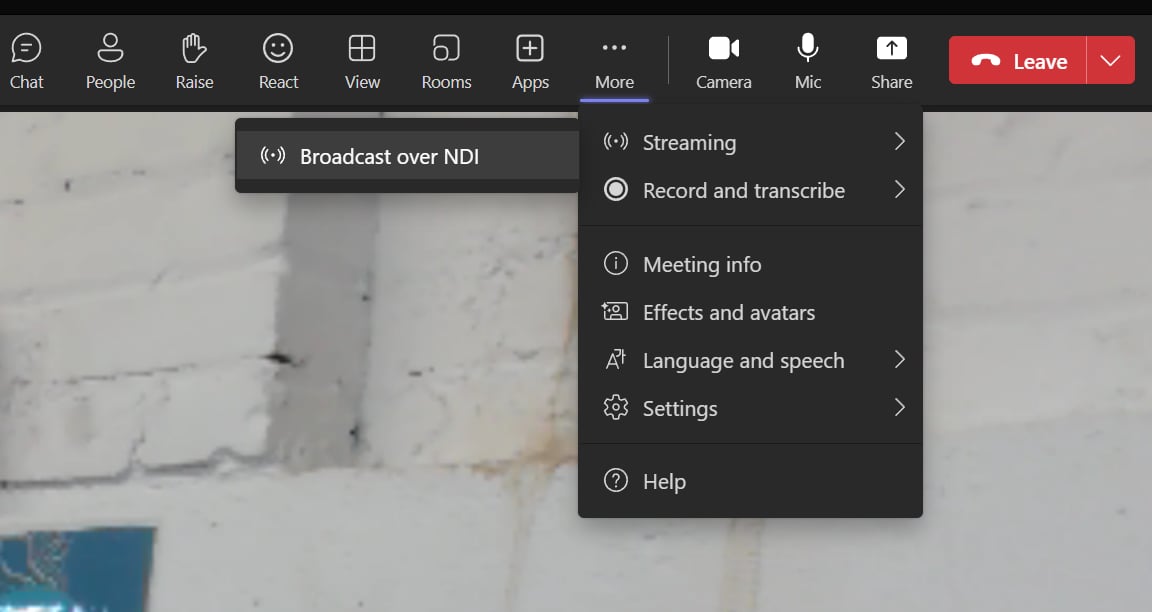
3. Start your Teams meeting and go to your settings or **More** menu > **Streaming** > **Broadcast over NDI**.
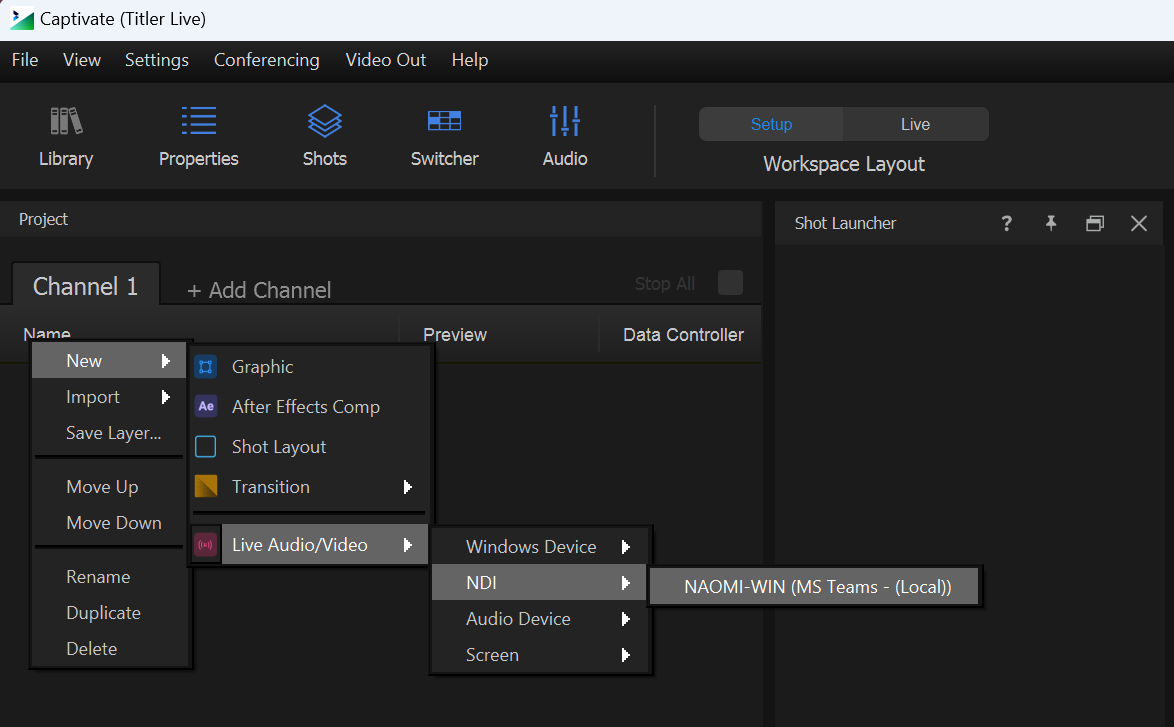
4. Open your Captivate project and either choose **Add new item** or right-click in your Project List to select **New** > **Live Audio/Video** > **NDI** > name of the meeting participant.
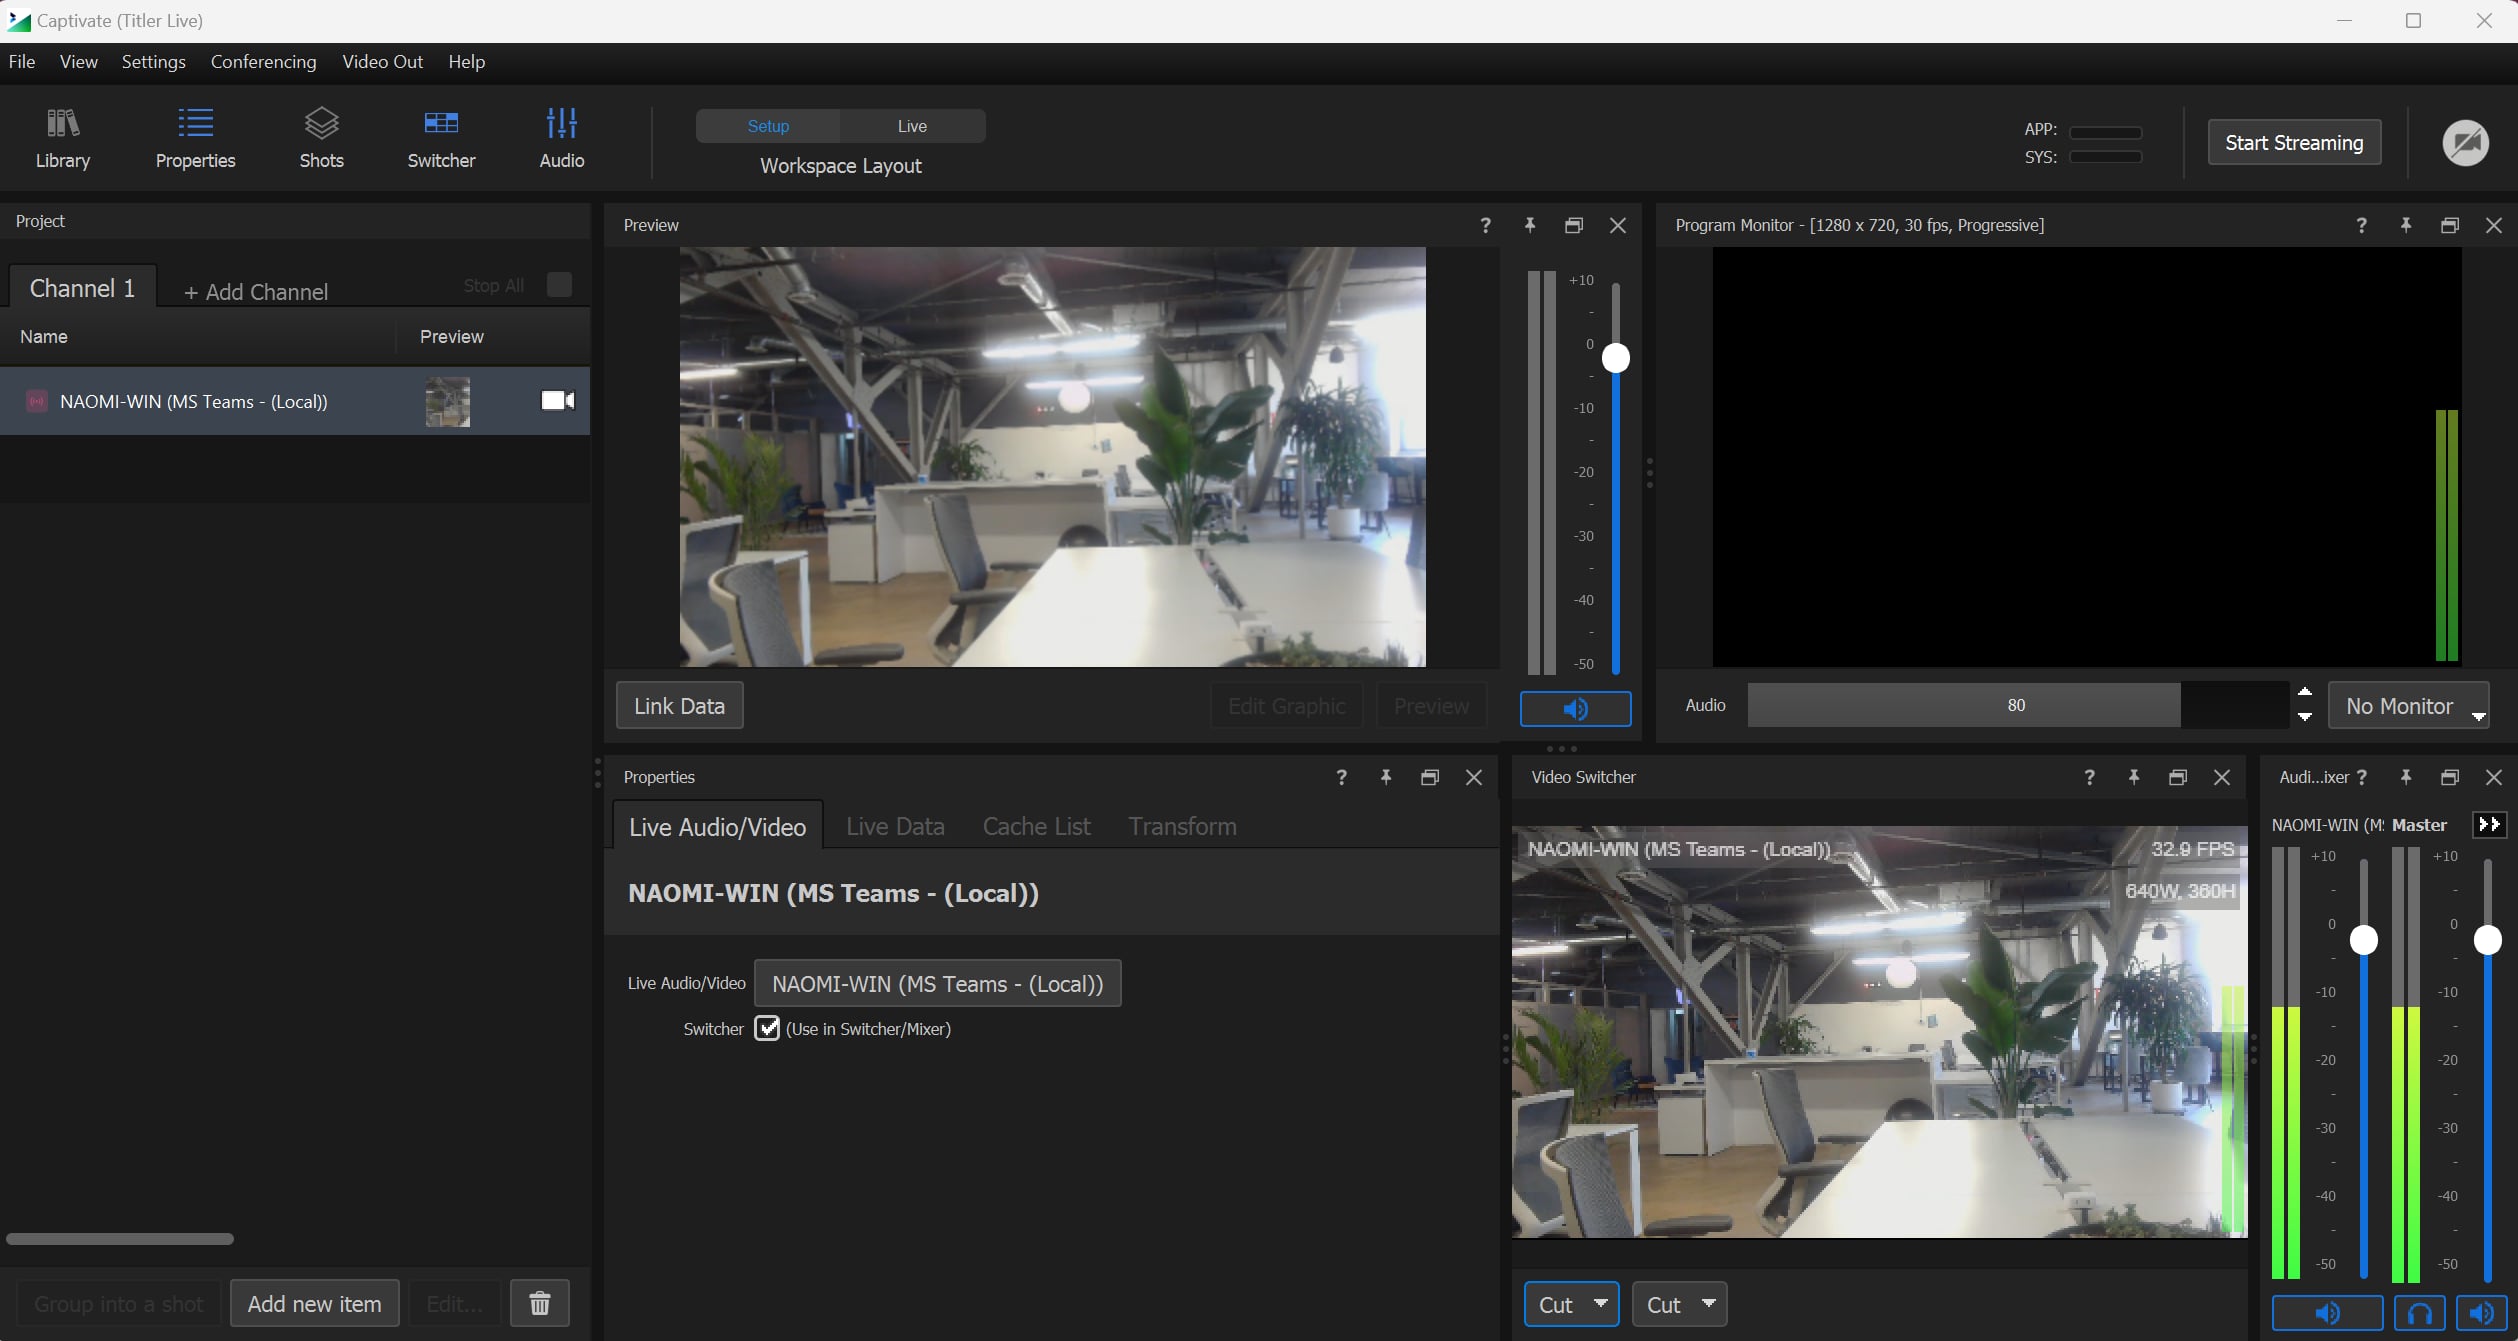
Your Teams meeting participant should now be showing as a live video source in your Project List, Video Switcher, and Preview panel.
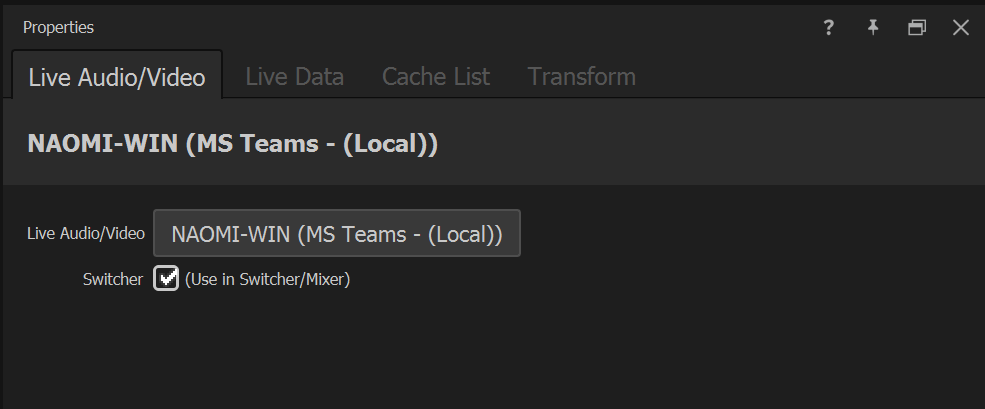
5. In the Properties panel, a Live Video tab will propagate with your source name and a checkbox option to **Use in Switcher/Mixer**.
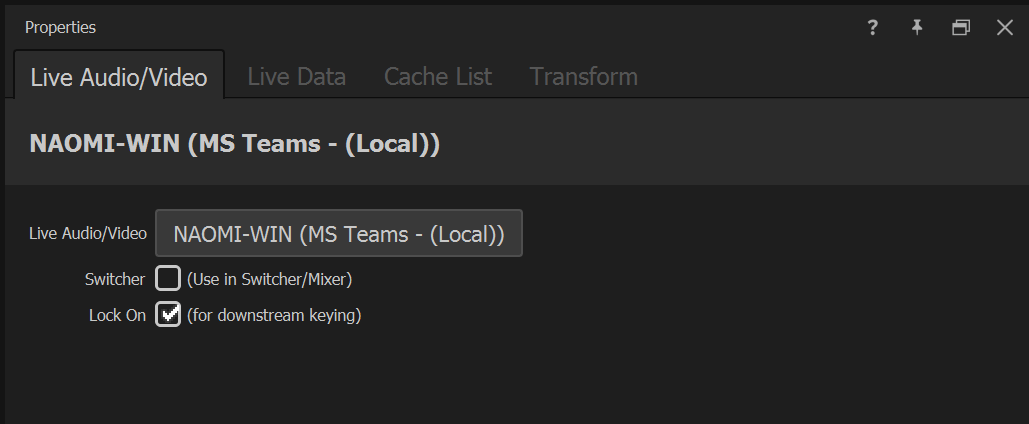
**💡 TIP**\
To lock on for downstream keying, toggle off the video switcher for the **Lock on for downstream keying** checkbox to appear in the **Layer Properties** panel, then enable it.
You should now see your live video source with a lock symbol in your Project List and playing live in your Program Monitor.
## Output via Virtual Webcam to your Teams Meeting
To integrate your Captivate graphics into Teams, use the Virtual Webcam output.
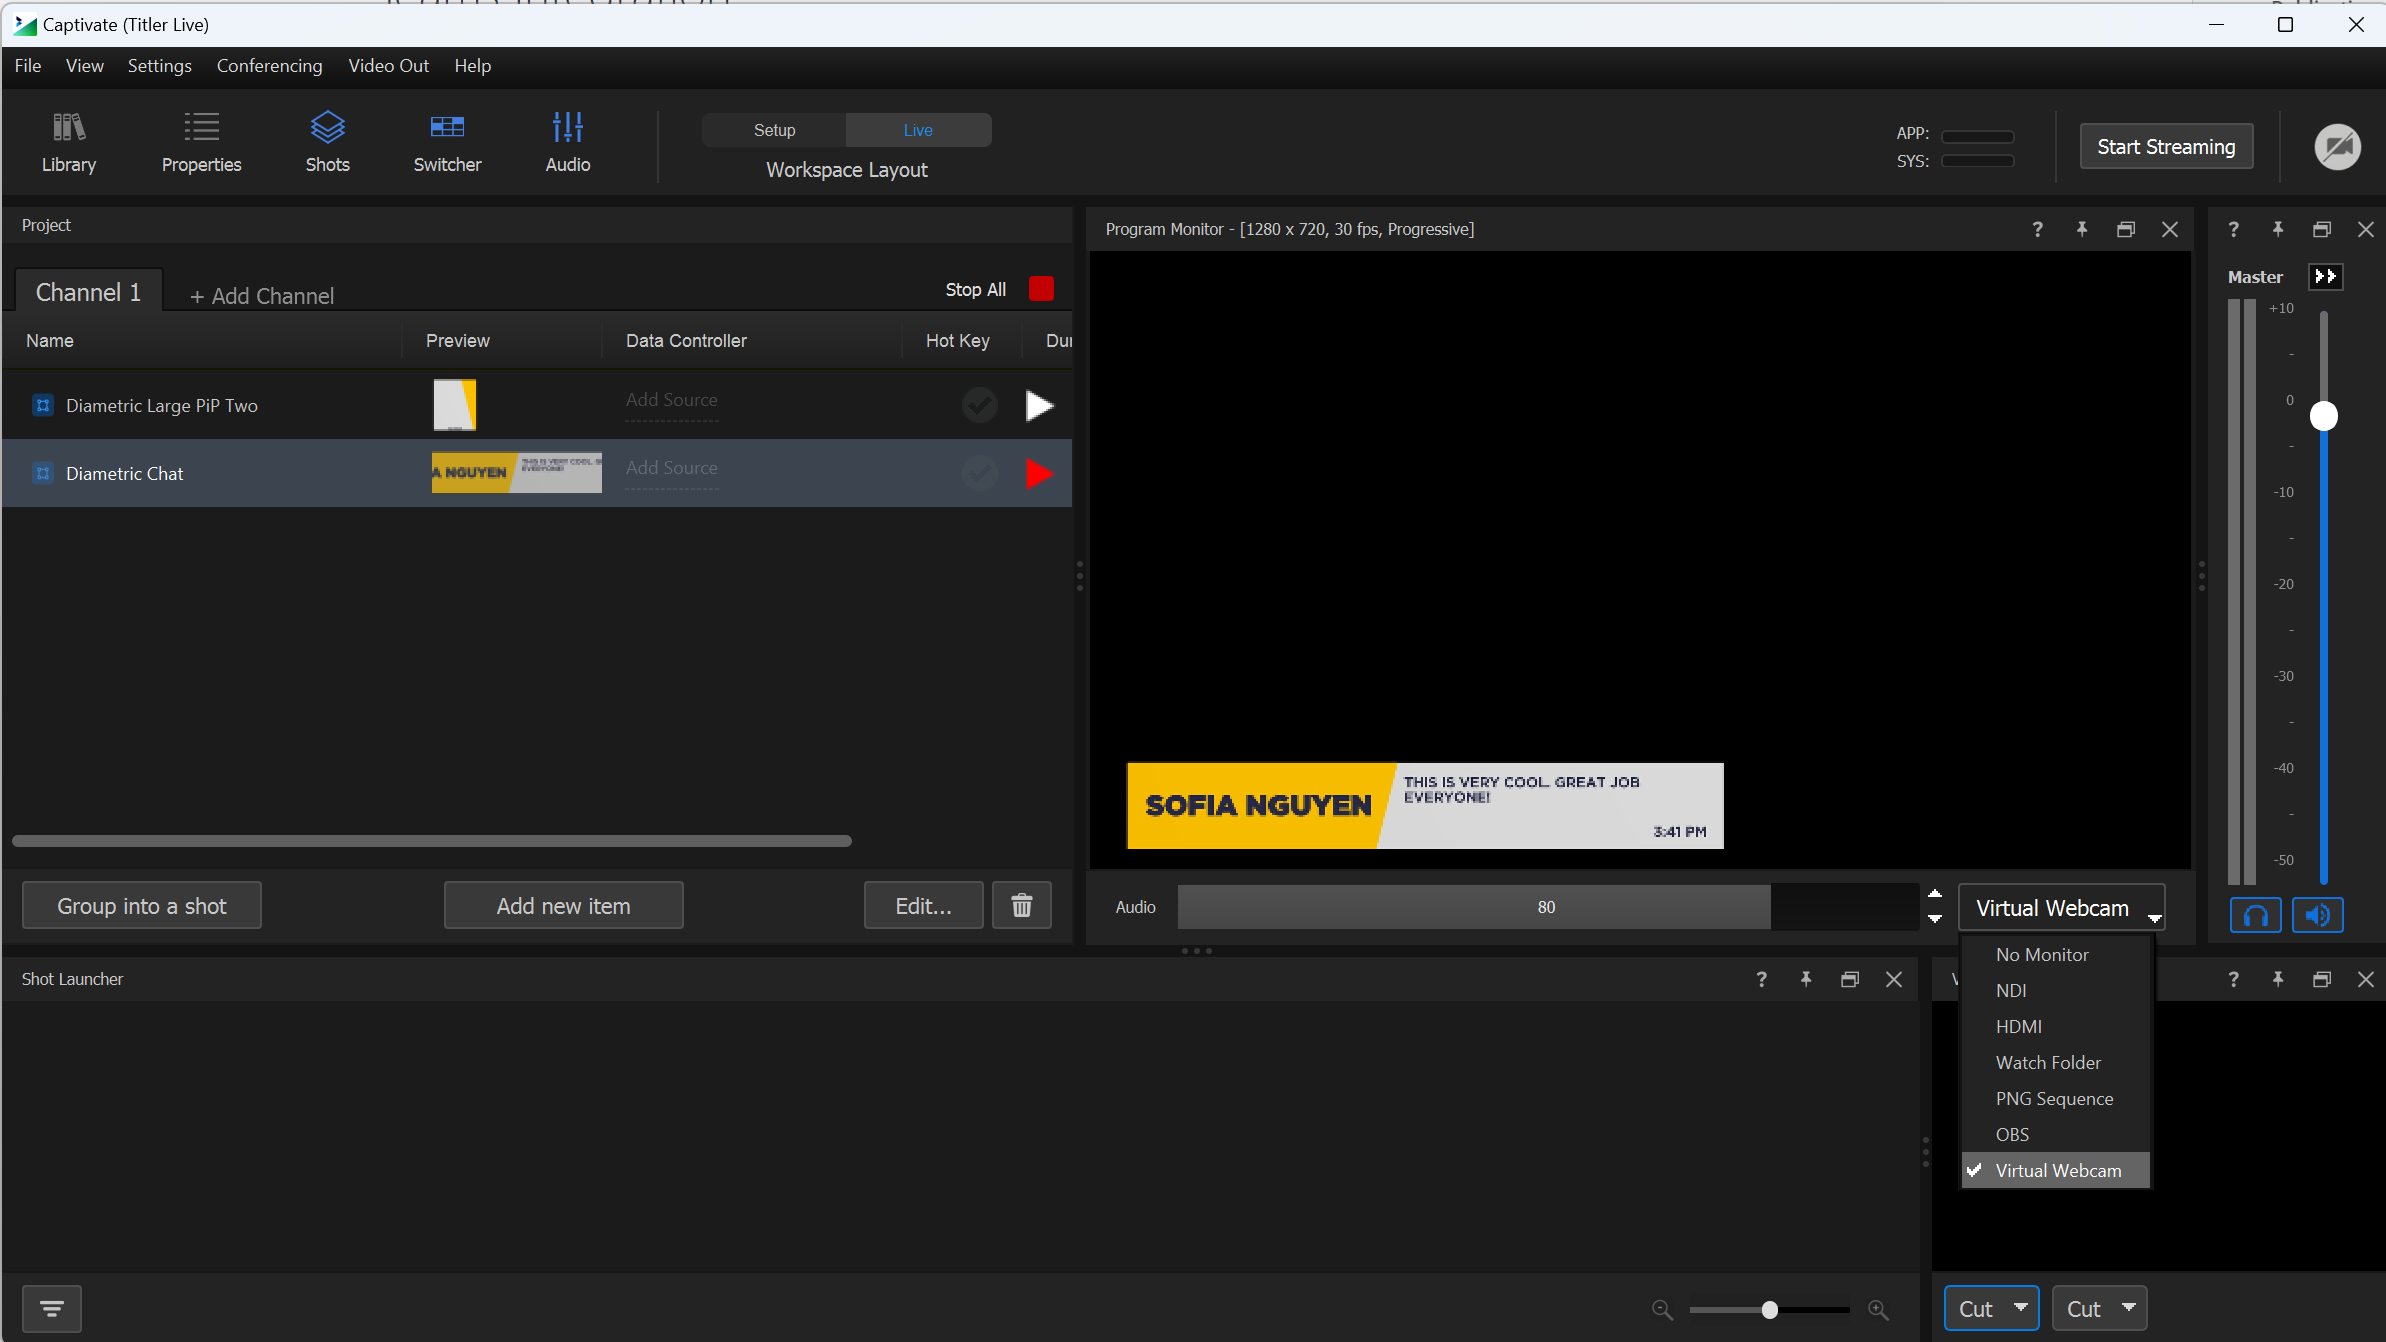
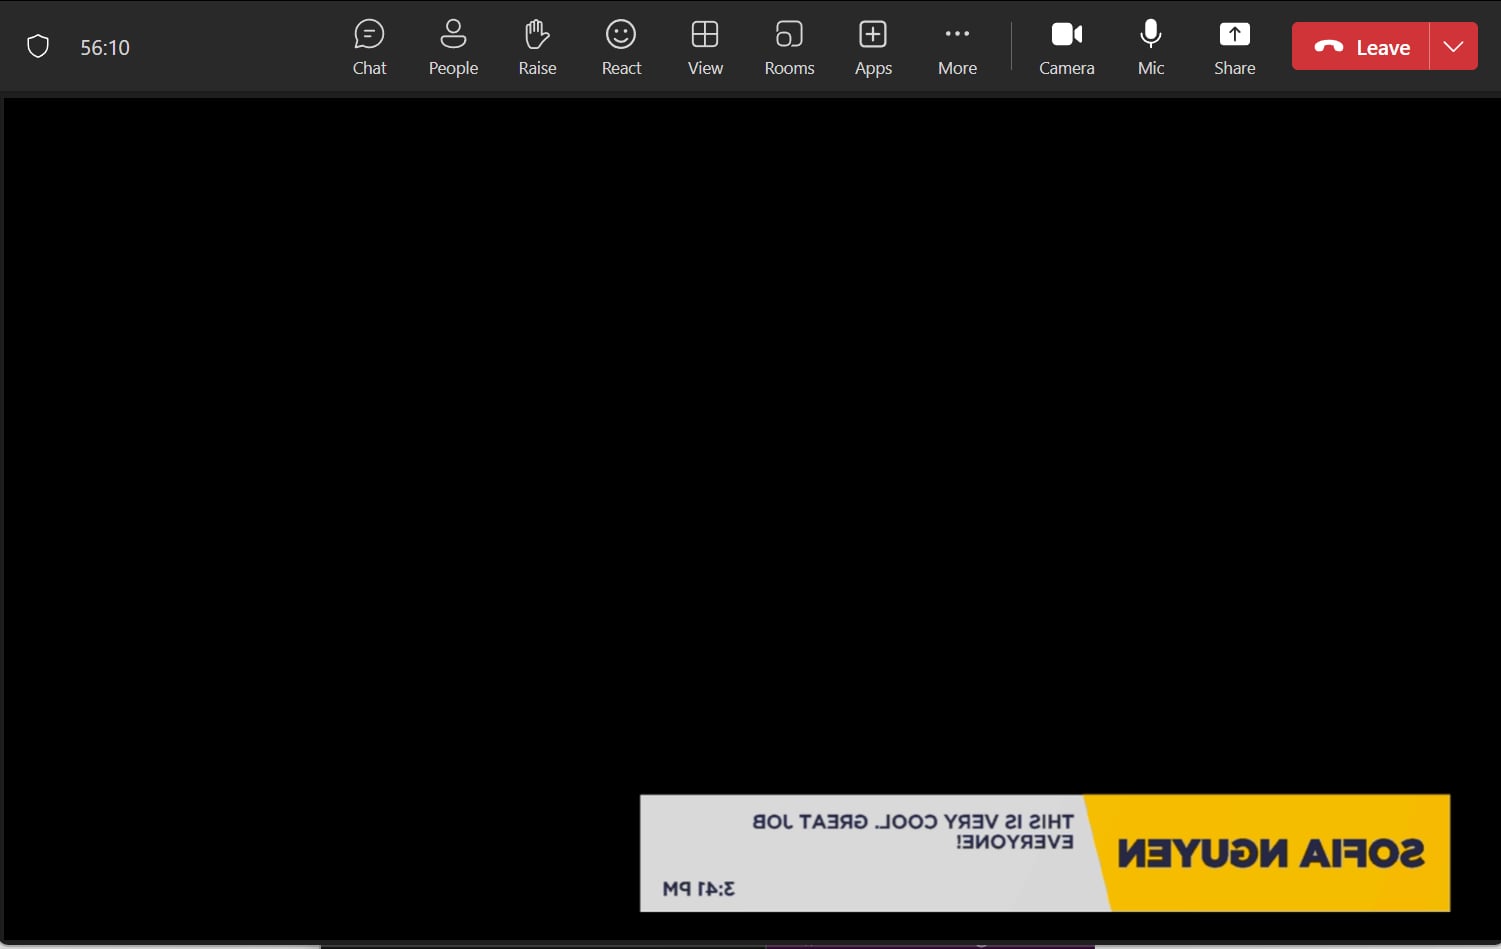
1. In your Program Monitor, select the dropdown menu with the default setting of **No Monitor** > choose **Virtual Webcam**.
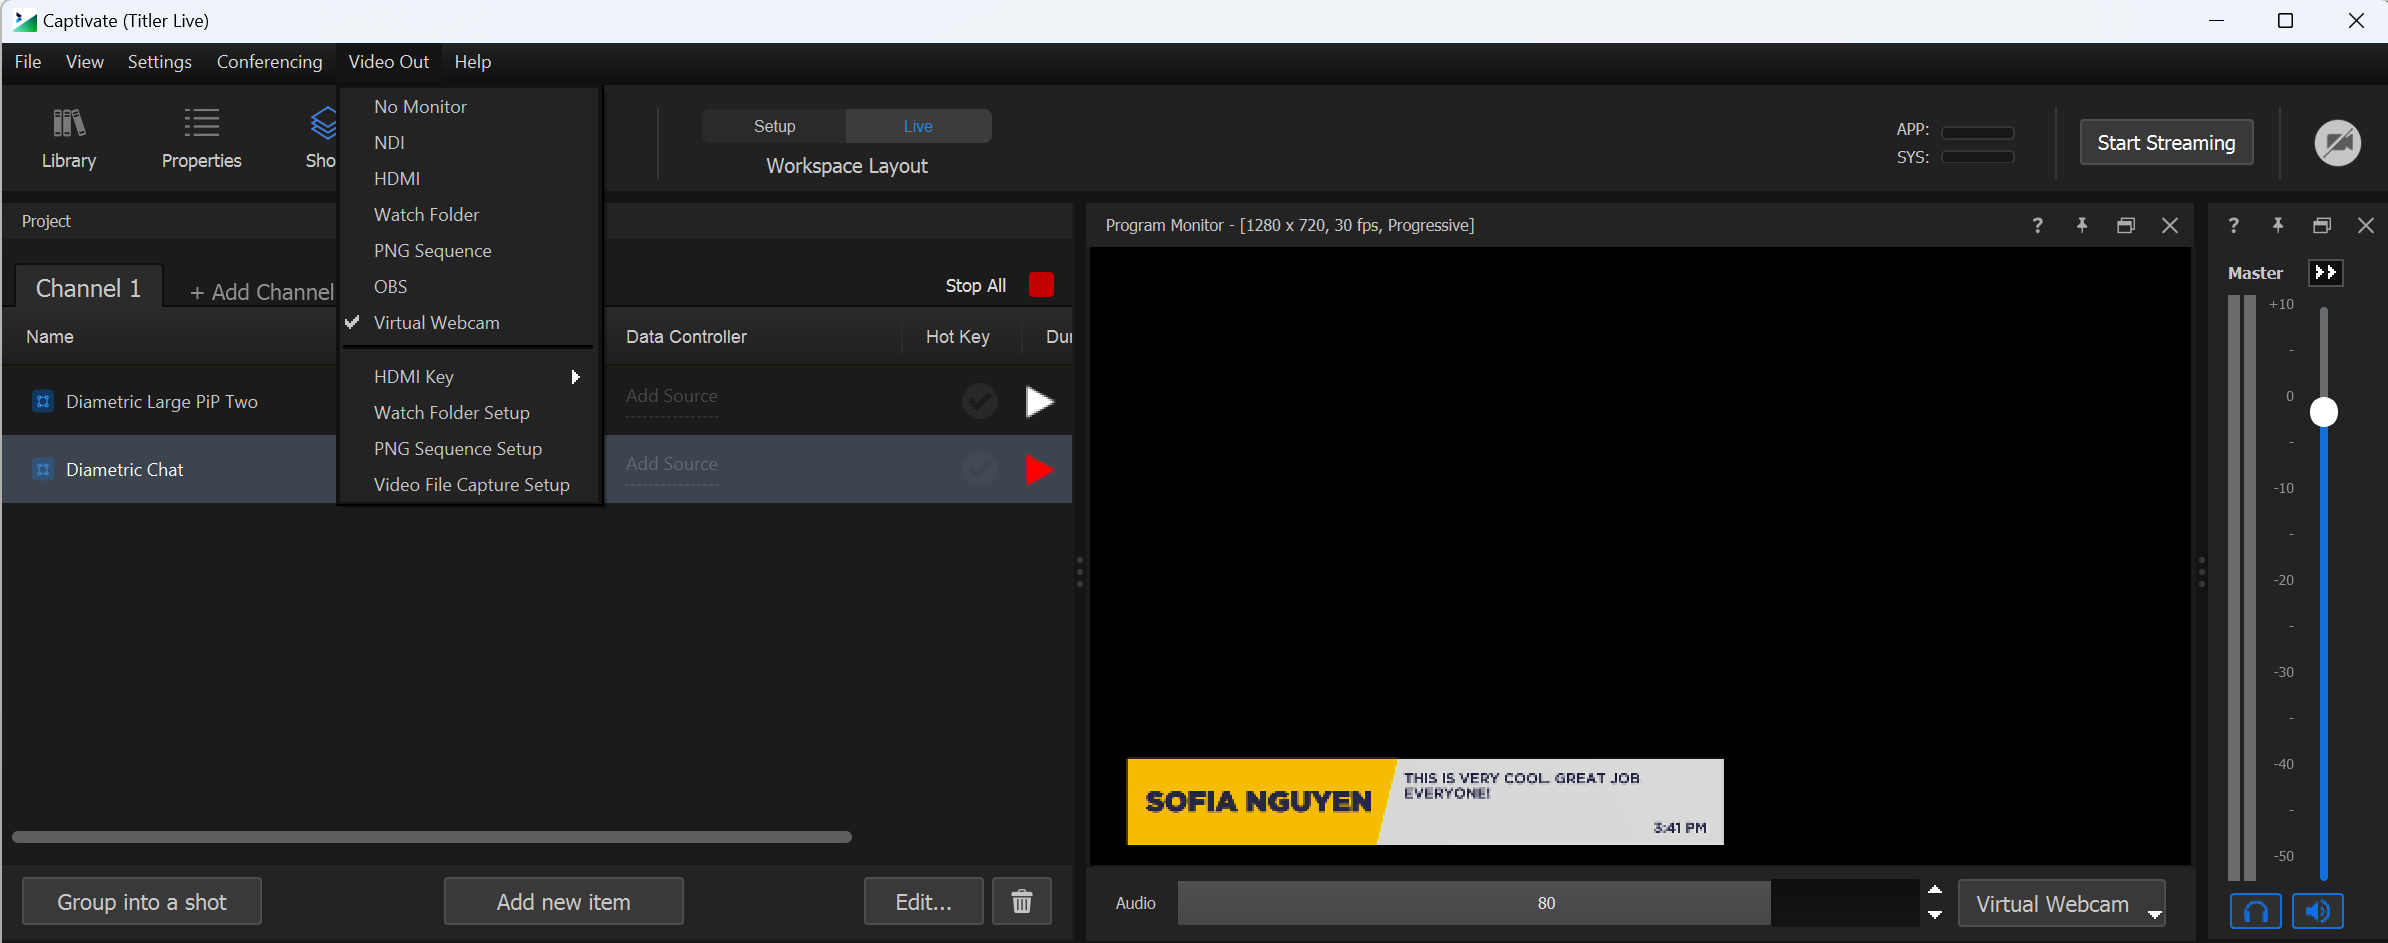
Or you can go to **Program Out** > **Virtual Webcam**.
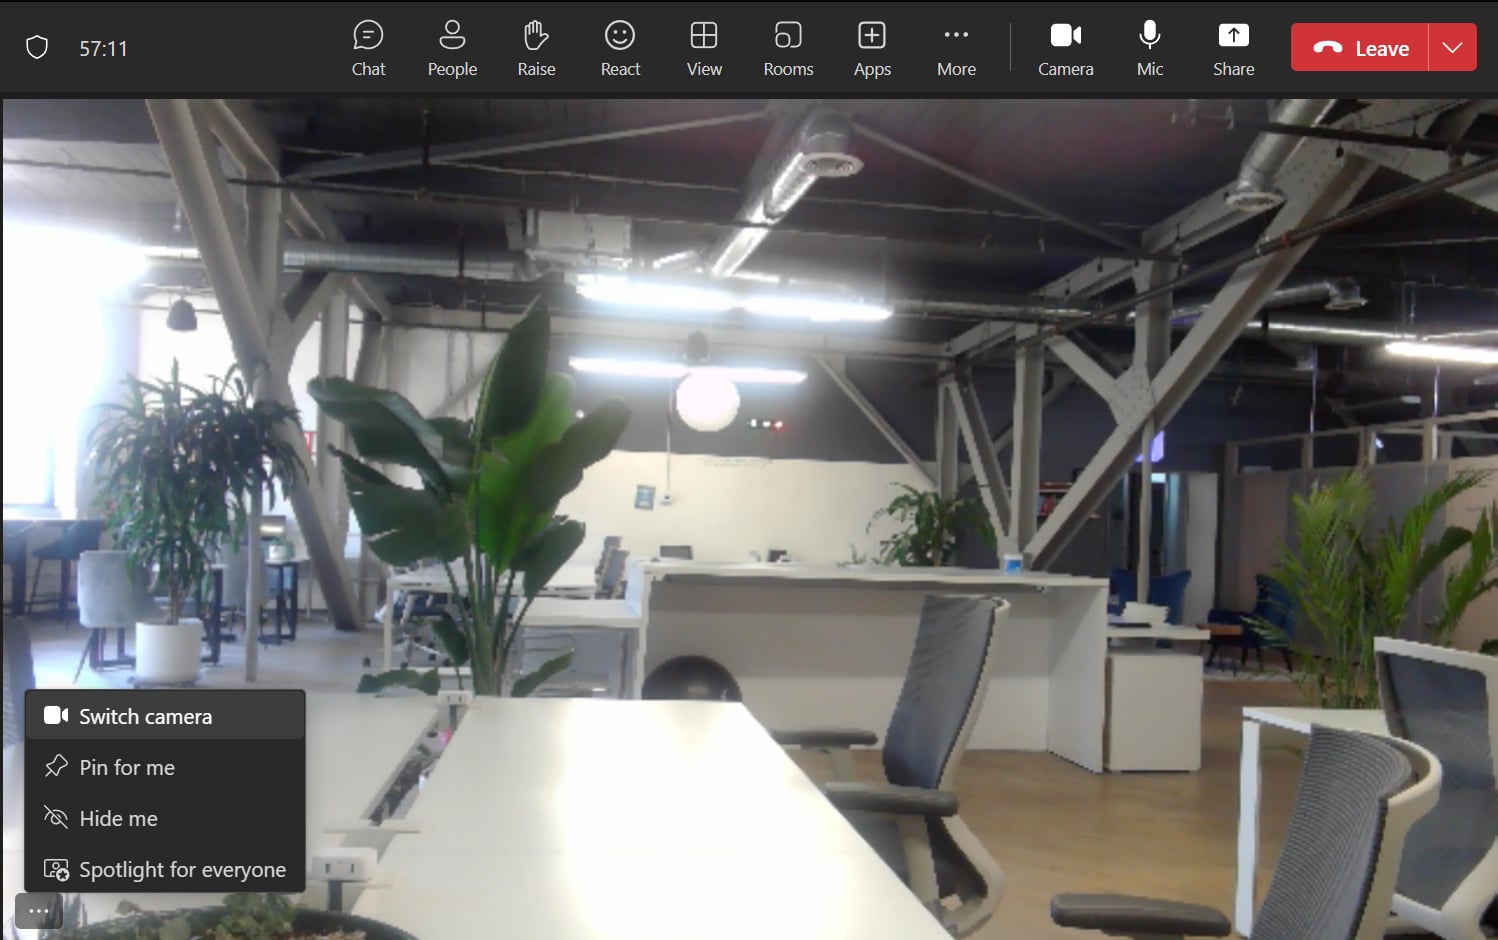
2. In your Teams meeting, open the three-dot **More** menu in the top toolbar or right-click anywhere on the screen > select **Switch Camera**.
Your Captivate graphics will now reflect in your Teams meeting when played on-air.
## See also
* [Setting up Teams Meeting Participants as a Live Video Source](/play-and-update-graphics/chapter-index-3/connect-microsoft-teams.md)
* [Set Up Live Video Switching](/set-up-your-production/chapter-index-4/the-switcher-panel.md)
* [Set up transitions](/set-up-your-production/chapter-index-3/setting-up-transitions.md)
* [Create Shot Layouts](/control-your-show/chapter-index-1/creating-shot-layouts.md)
---
# Agent Instructions
This documentation is published with GitBook. GitBook is the documentation platform designed so that both humans and AI agents can read, navigate, and reason over technical content effectively. Learn more at gitbook.com.
## Querying This Documentation
If you need additional information that is not directly available in this page, you can query the documentation dynamically by asking a question.
Perform an HTTP GET request on the current page URL with the `ask` query parameter, and the optional `goal` query parameter:
```
GET https://captivatehelp.newbluelive.com/play-and-update-graphics/chapter-index-3/connect-microsoft-teams.md?ask=&goal=
```
`ask` is the immediate question: it should be specific, self-contained, and written in natural language.
`goal` is optional and describes the broader end goal you are ultimately trying to accomplish on behalf of the user. GitBook uses it to tailor the answer towards what is most useful for that goal.
The response will contain a direct answer to the question and relevant excerpts and sources from the documentation.
Use this mechanism when the answer is not explicitly present in the current page, you need clarification or additional context, or you want to retrieve related documentation sections.