> For the complete documentation index, see [llms.txt](https://captivatehelp.newbluelive.com/llms.txt). Markdown versions of documentation pages are available by appending `.md` to page URLs; this page is available as [Markdown](https://captivatehelp.newbluelive.com/play-and-update-graphics/chapter-index-3/connect-easyworship.md).
# Connect EasyWorship to Captivate
Captivate integrates with EasyWorship to broadcast your EasyWorship schedule as live graphics to a supported video switcher for live stream. You can control playout from either Captivate or EasyWorship on the same network. A full broadcast can run at the same time as EasyWorship is broadcasting to your congregation in-house.
* [Prepare your Graphics in Captivate](#prepare-your-graphics-in-captivate)
* [Set up Remote Connection between EasyWorship and Captivate](#set-up-remote-connection-in-easyworship)
* [Configure your EasyWorship Playlist](#configure-your-easyworship-playlist)
**💡 TIP**\
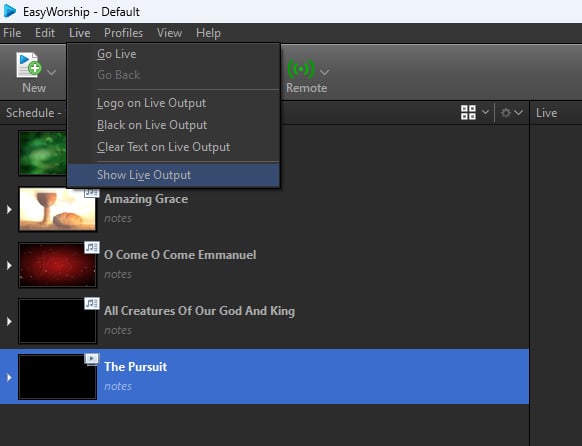
**Troubleshooting:** EasyWorship has a default setting displaying Live Output, which can block controls on your system.
If the Live Output screen is blocking access to Captivate, disable it by going to **Live > Uncheck Show Live Output**.
## Prepare your Graphics in Captivate
1. Open a new project in Captivate.
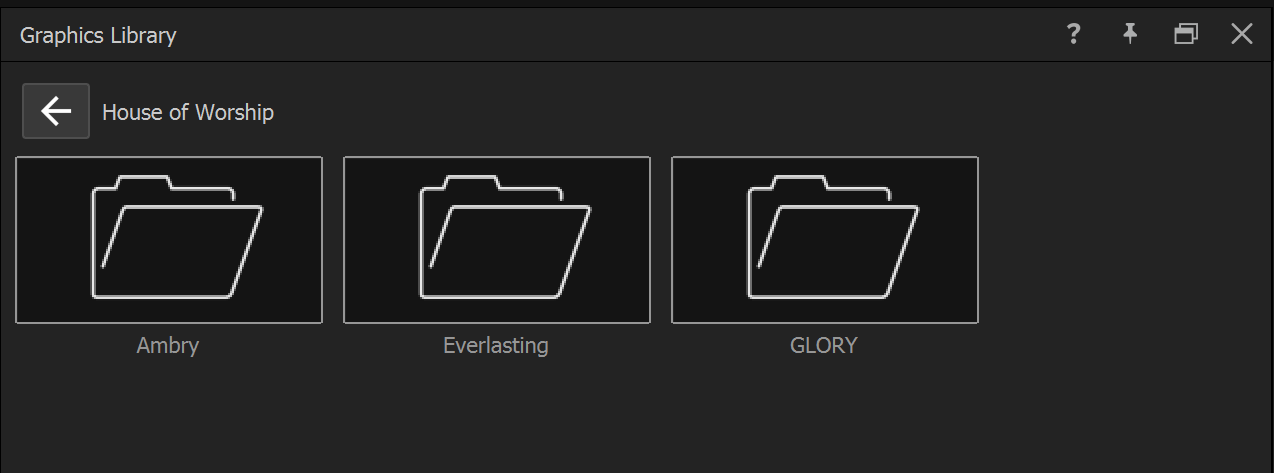
2. Navigate to the House of Worship folder in the Library.
3. Drag and drop your desired graphics into the Project List.
**📌 NOTE**\
If you have any graphic that needs to overlay another full-screen graphic (such as a lower third or bug), place the overlaying graphic above the full-screen graphic in the Project List.
## Set up Remote Connection in EasyWorship
Enable the Remote Connection in EasyWorship to your local network used by Captivate.
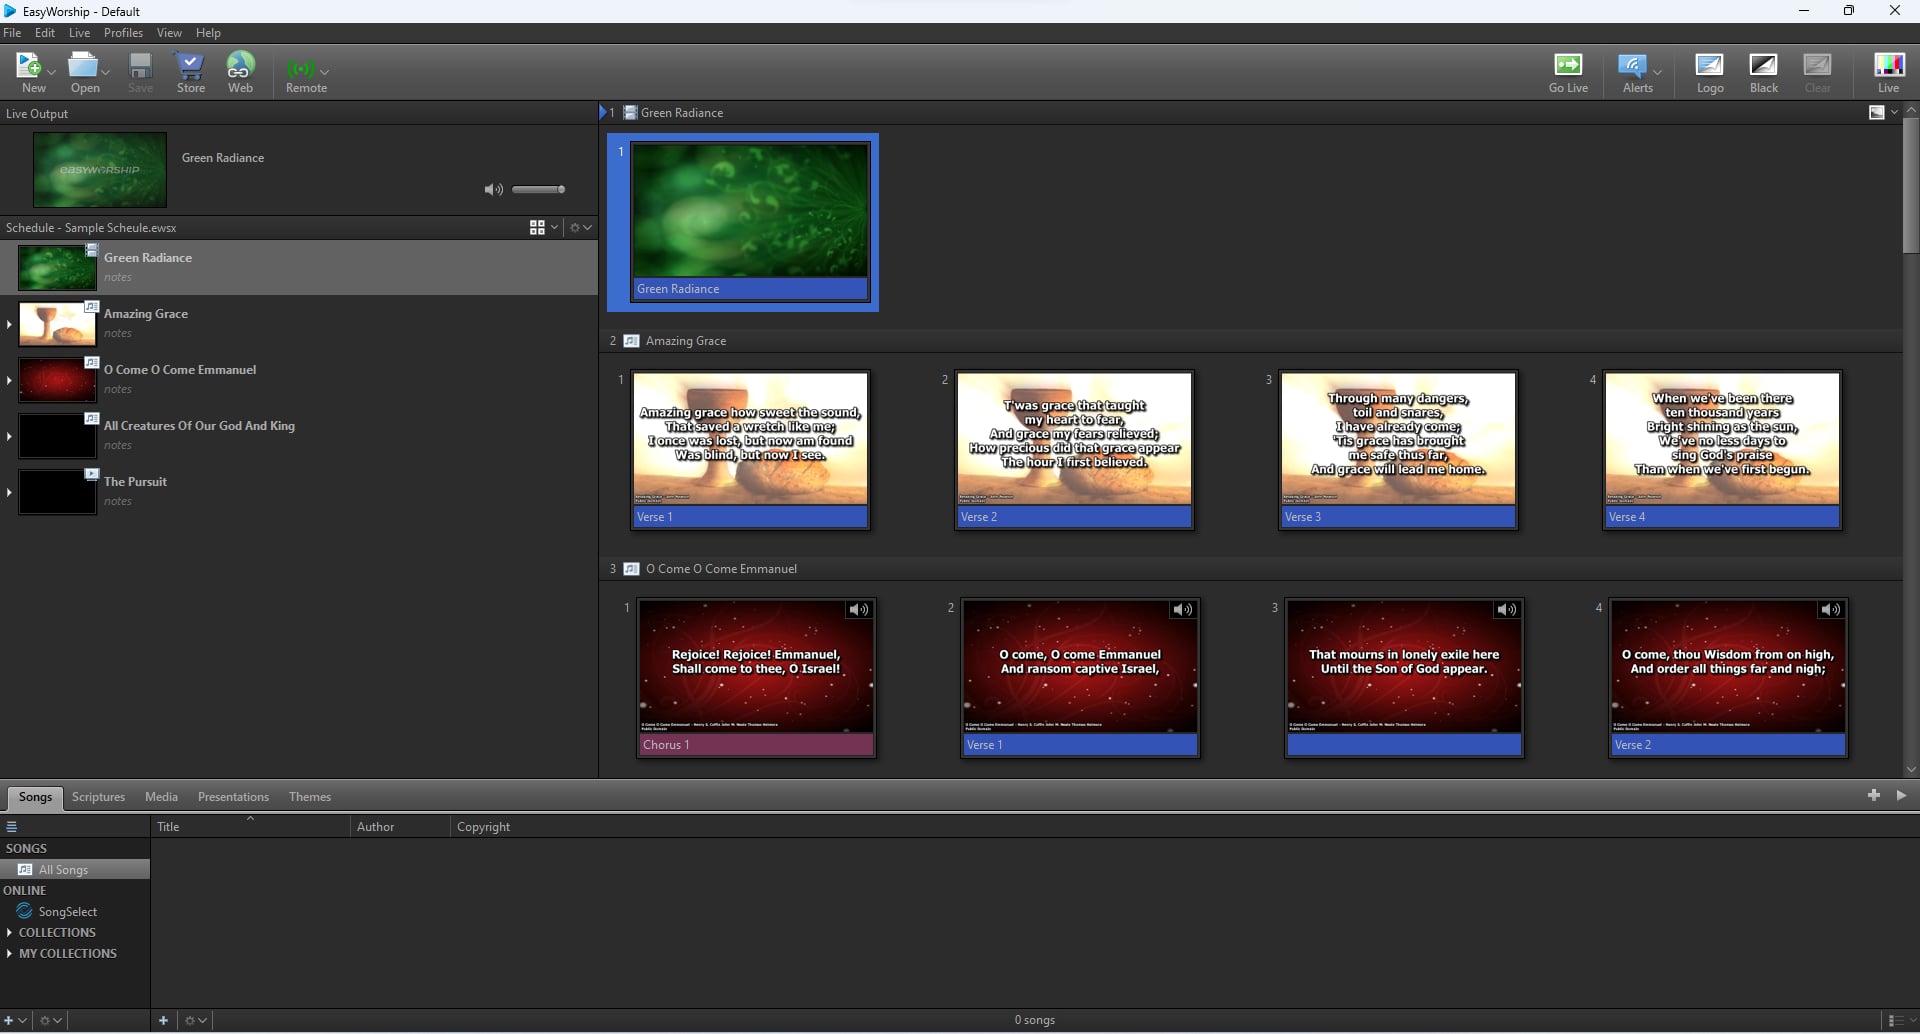
1. Open your EasyWorship schedule.
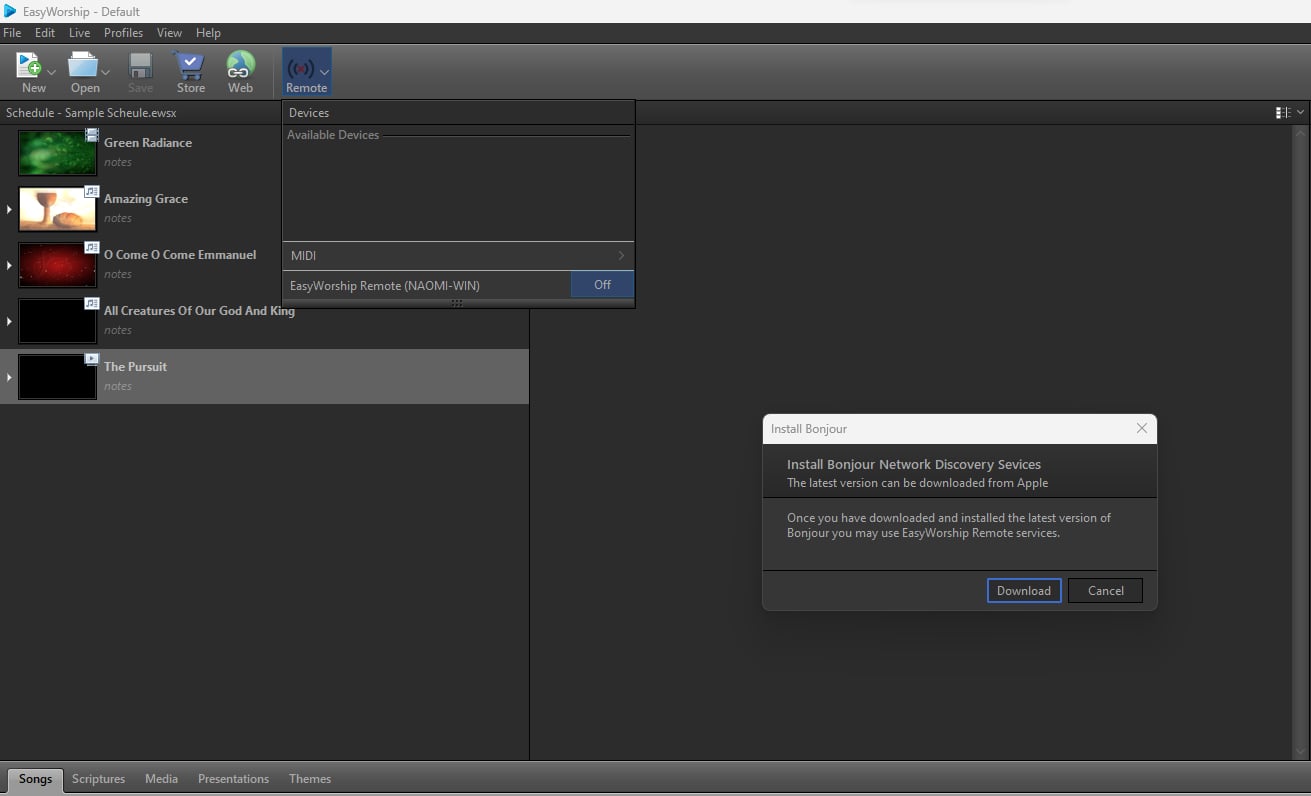
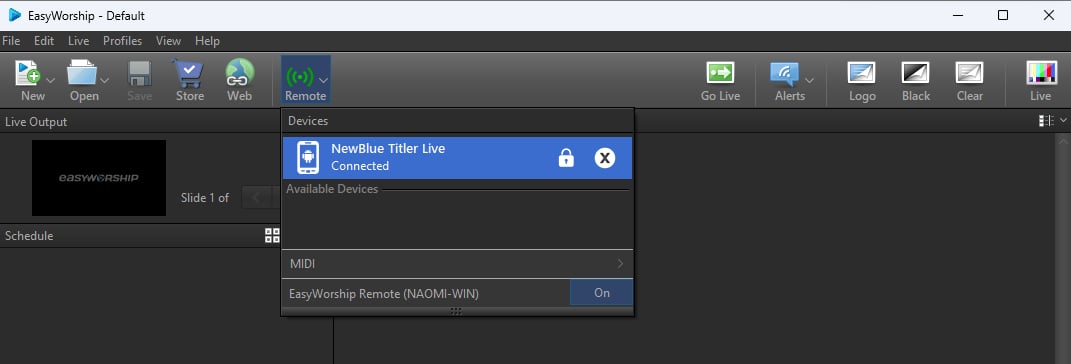
2. Go to **Remote** > **EasyWorship Remote** > click **Off** to turn it **On**.
**📌 NOTE**\
You may be prompted to download Bonjour Services. If not, and you don’t see Captivate in your devices menu, download [Bonjour Print Services](https://download.info.apple.com/Mac_OS_X/061-8098.20100603.gthyu/BonjourPSSetup.exe).
3. Within EasyWorship, the Captivate device will appear under **Remote** > **Devices**.
4. Choose **Pair** to allow a connection from EasyWorship to Captivate.
**📌 NOTE**\
When pairing, EasyWorship exposes a **View Only** vs. **Full Control** permissions choice. Choose Full Control to allow Captivate to drive playlist playback; choose View Only to monitor without control.
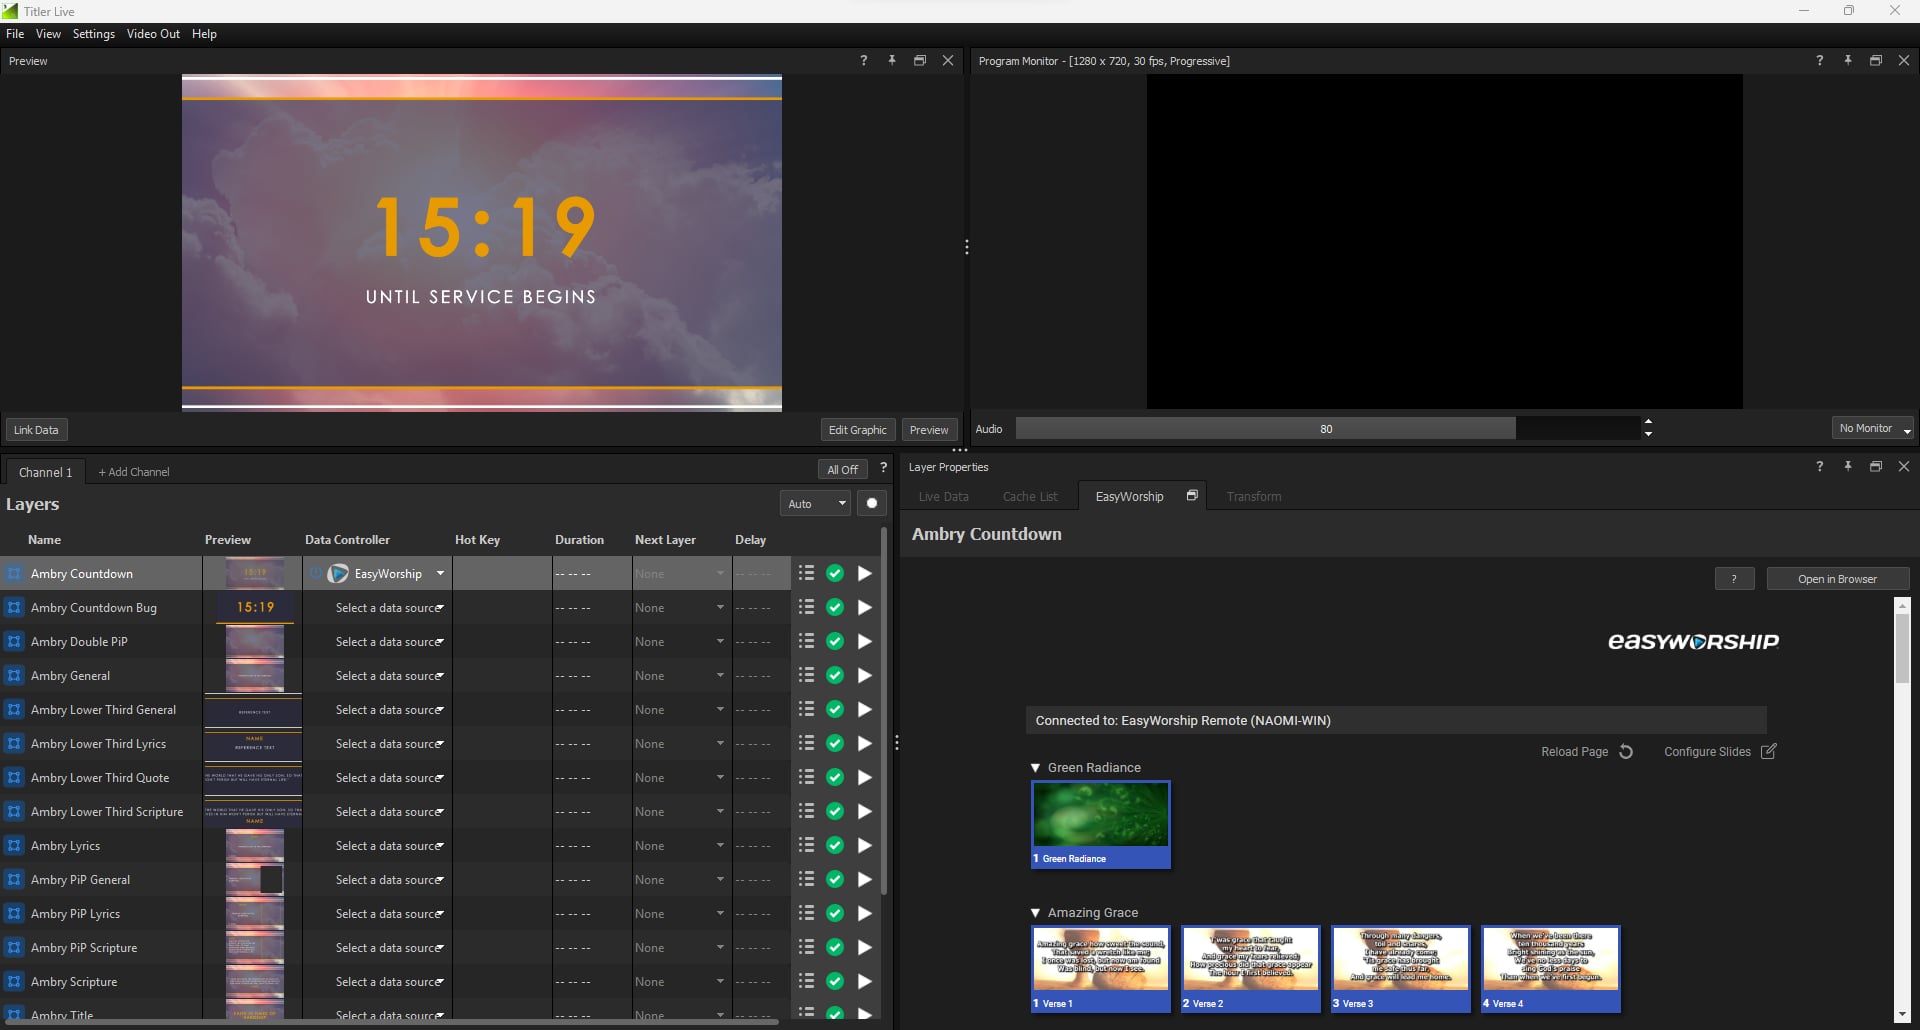
5. In Captivate, go to the Data Controller column of the Graphic layer you want to connect, and select **Select a Datasource** > **Worship** > **EasyWorship** > **EasyWorship**.
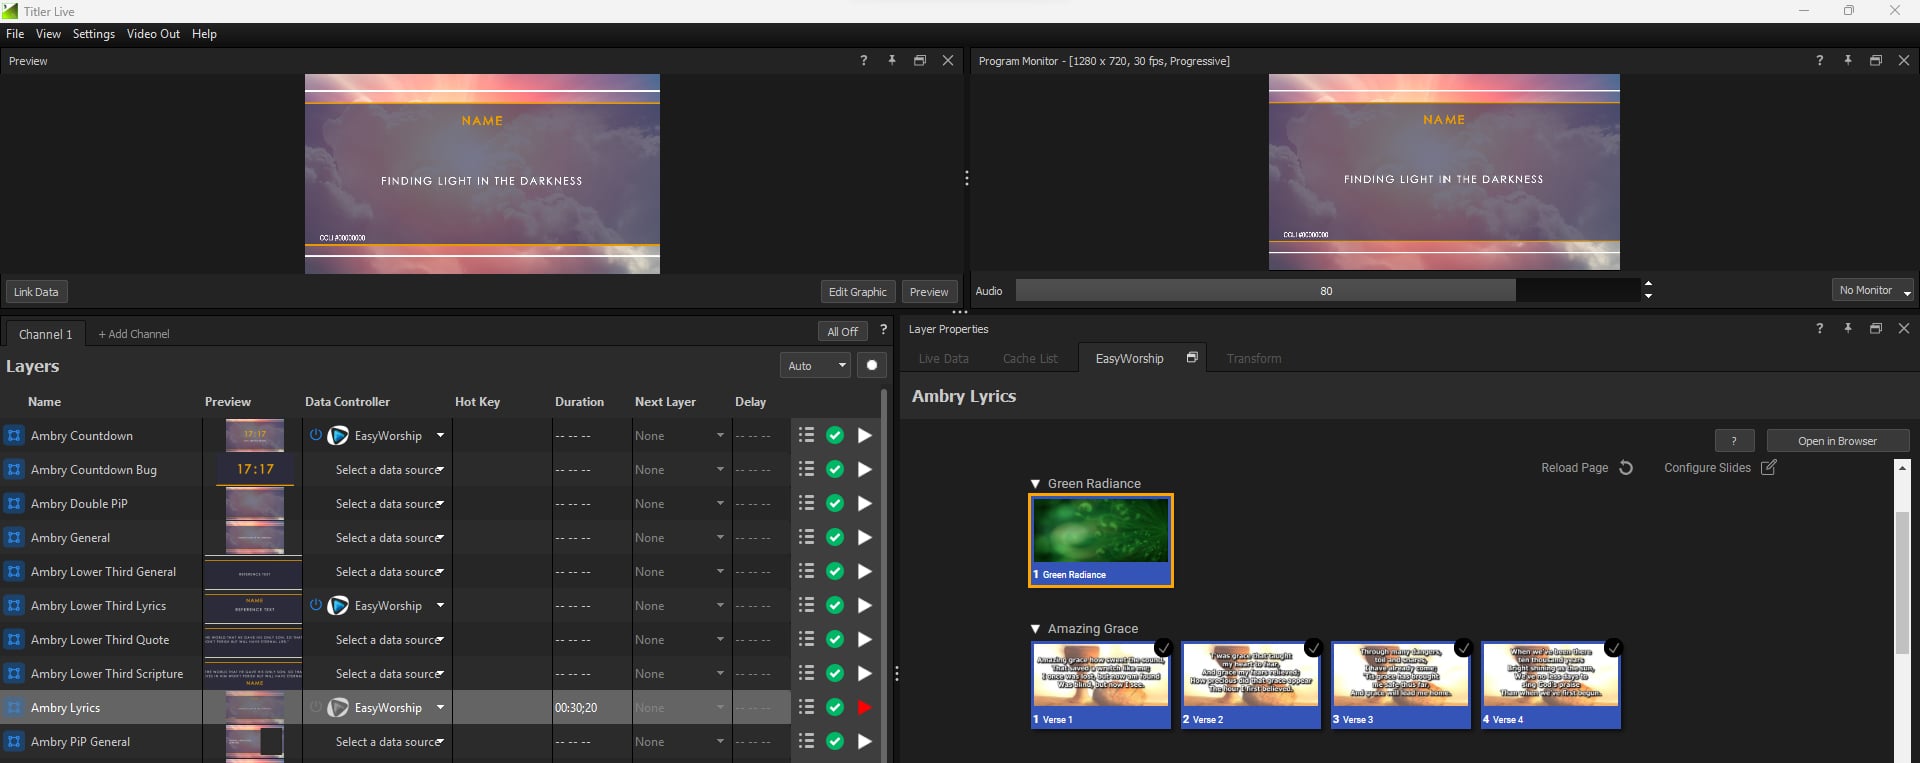
EasyWorship is now connected as a data source. Your EasyWorship schedule appears in the EasyWorship Controller tab in the Layer Properties Panel.
**💡 TIP**\
Close your Graphics Library panel for more workspace. Reopen it via **View > Graphics Library**.
### If Captivate doesn’t appear in EasyWorship’s device list
The two applications find each other by announcing themselves on the local network, so anything that blocks or garbles that announcement stops the pairing before it starts. Work through these in order:
1. **Check both machines are on the same network** — the same subnet, not a guest network or a separate wireless SSID.
2. **Install Bonjour on the EasyWorship machine** if you were prompted to and skipped it (see the note above). EasyWorship is the one announcing itself on the network, so that’s where the discovery service is needed.
3. **Allow both applications through the firewall.** Discovery uses local network broadcasts, which firewalls often block by default.
4. **Run the current release of Captivate.** Network discovery improves release to release; if everything above is set up correctly and the device still doesn’t appear, update before investigating further.
## Configure your EasyWorship Playlist
Now that you have enabled your EasyWorship Controller, configure your slides using the Master Control.
1. Select the graphic in the Layers list that is connected to EasyWorship and navigate to the EasyWorship tab in the Layer Properties panel.
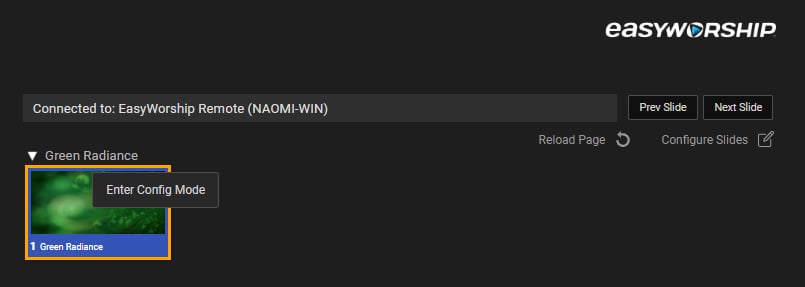
2. Your presentations with slides populate below the controls. Choose **Configure Slides** or right-click > **Enter Config Mode** to open the Slide Configuration panel at the bottom.
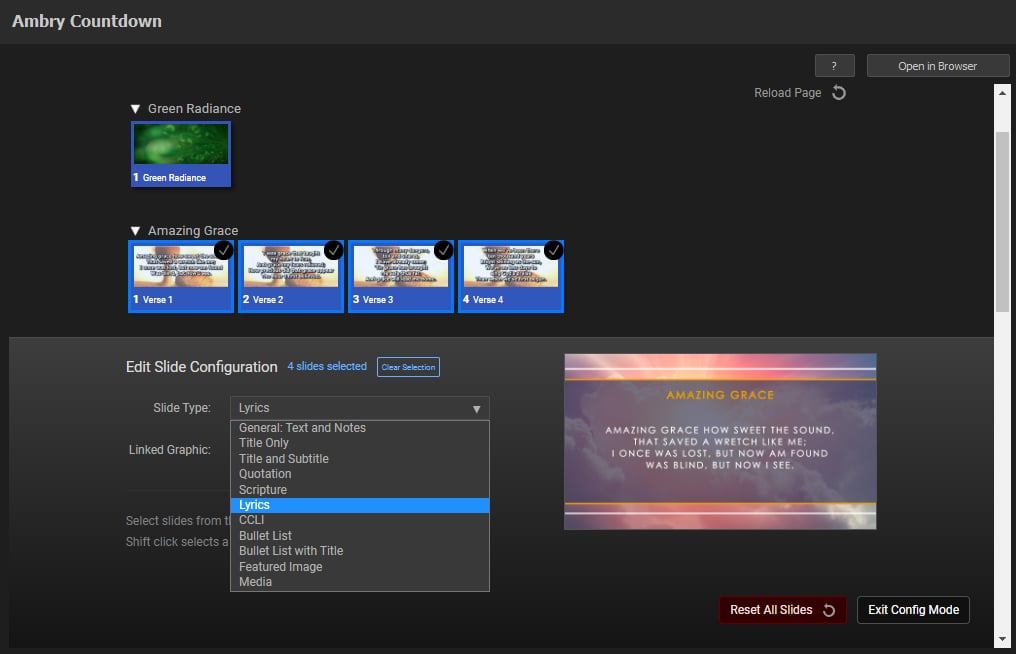
3. Select a slide, or multiple slides of the same type, that will be connected to the same graphic layout in Captivate.
4. Select your Slide Type from the dropdown for the type of information the graphic should portray.
5. Select the Linked Graphic from the dropdown list. If you don’t see your graphic, add it to your Layers list from the Graphic Library, then reload the EasyWorship Controller tab (right-click > **Reload**).
6. Press Escape or **Exit Config Mode** to save the Configuration. You can **Reset All Slides** at any time in the Configure Slides Panel.
A checkmark appears in the upper-right corner of each configured slide. You can now click any configured slide to play it in the Program Monitor from your EasyWorship interface.
---
# Agent Instructions
This documentation is published with GitBook. GitBook is the documentation platform designed so that both humans and AI agents can read, navigate, and reason over technical content effectively. Learn more at gitbook.com.
## Querying This Documentation
If you need additional information that is not directly available in this page, you can query the documentation dynamically by asking a question.
Perform an HTTP GET request on the current page URL with the `ask` query parameter, and the optional `goal` query parameter:
```
GET https://captivatehelp.newbluelive.com/play-and-update-graphics/chapter-index-3/connect-easyworship.md?ask=&goal=
```
`ask` is the immediate question: it should be specific, self-contained, and written in natural language.
`goal` is optional and describes the broader end goal you are ultimately trying to accomplish on behalf of the user. GitBook uses it to tailor the answer towards what is most useful for that goal.
The response will contain a direct answer to the question and relevant excerpts and sources from the documentation.
Use this mechanism when the answer is not explicitly present in the current page, you need clarification or additional context, or you want to retrieve related documentation sections.