> For the complete documentation index, see [llms.txt](https://captivatehelp.newbluelive.com/llms.txt). Markdown versions of documentation pages are available by appending `.md` to page URLs; this page is available as [Markdown](https://captivatehelp.newbluelive.com/get-started/chapter-index-2/program-monitor-panel.md).
# Program Monitor panel
The Program Monitor panel shows what Captivate is sending to Program. Use it to monitor one or more channels, check live output, and listen to local monitor audio. Press **F5** to show or hide the panel, or click **Program** on the top bar.
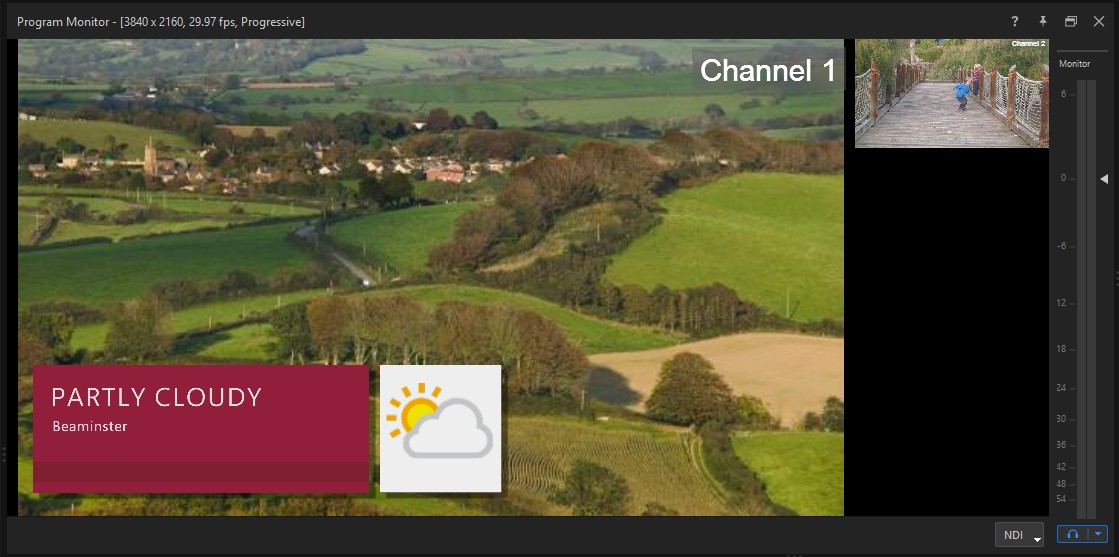
If your project has more than one channel, the Program Monitor can show multiple channels at the same time. Click a channel to make it the primary view. The selected channel fills as much of the monitor area as possible, and the remaining channels appear along the side.
**❗ IMPORTANT**
The Program Monitor does not create the output. Closing the panel does not stop Program or disconnect any configured output. Captivate continues sending output even when the Program Monitor is hidden.
## Video monitor
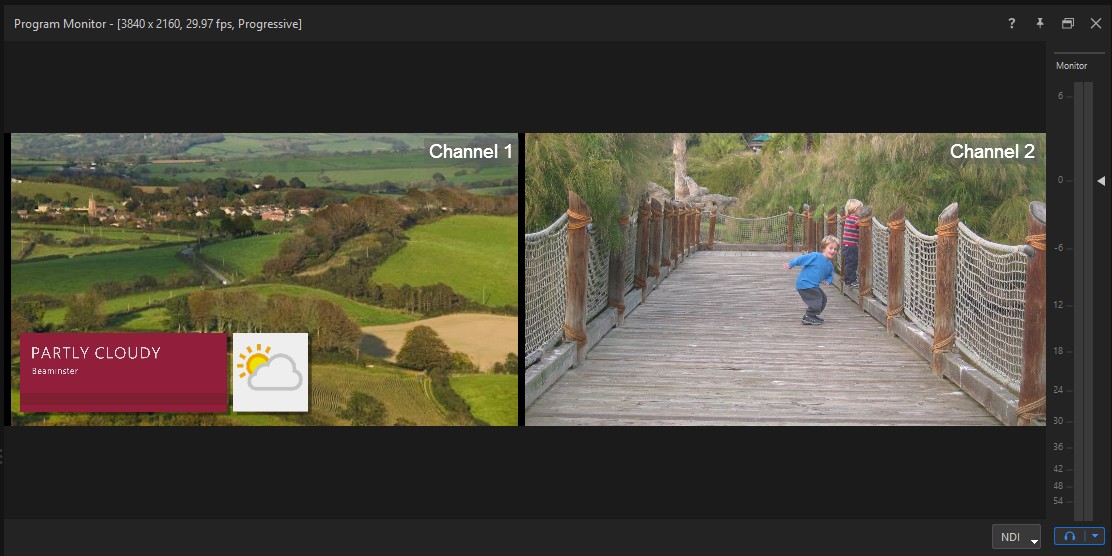
The video monitor shows the current Program output for the visible channel or channels. It updates at the project frame rate, and the panel’s title bar shows the project’s format — for example, **\[3840 x 2160, 29.97 fps, Progressive]**.
### Monitor multiple channels
When a project has more than one channel, the Program Monitor shows the channel outputs at the same time, each labeled with its channel name.
Click a channel to focus on it. The selected channel fills as much of the monitor area as possible, and the other channels move to the side. Click one of the side channels to make it the primary view.
## Output destination button
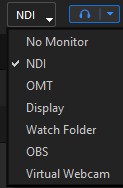
The button at the bottom right of the panel shows the current Program Out destination — **NDI**, for example. Click it to choose a different destination from the menu.
This button changes the live output, not just the monitor view — it is the same selection as the **Program Out** menu. See [Set up graphics output](/set-up-your-production/chapter-index.md).
## Monitor strip
A horizontal monitor strip sits in the control row under the program video. It controls what you hear through your speakers or headphones without changing the audio sent to Program:
* **Speaker button** — click to mute local monitoring; click the arrow beside it to open the output menu — **Mute Audio**, **Show Output Meter**, and the list of audio output devices to monitor through. Captivate remembers the selected device between sessions.
* **Volume slider** — the handle sets monitor volume, and the slider’s track doubles as a live output-level meter.
If the project includes a Zoom Mix audio source, a separate control appears for the Zoom Mix with its own fader and mute.
For the meter scale, fader increments, and reset controls, see [Program Monitor audio controls](/reference/program-monitor-audio-controls.md).
## When the panel is hidden
The Program Monitor panel is present in both the Setup and Live workspace presets by default. Press **F5** to show or hide it. The Program Monitor is included in every Captivate license.
## Related
* [Tour the Captivate interface](/get-started/chapter-index-2/the-playout-interface.md)
* [Channels](/get-started/chapter-index-2/channels.md)
* [The Audio Mixer](/set-up-your-production/chapter-index-5/the-audio-mixer.md)
* [Preview panel](/get-started/chapter-index-2/preview-panel.md)
---
# Agent Instructions
This documentation is published with GitBook. GitBook is the documentation platform designed so that both humans and AI agents can read, navigate, and reason over technical content effectively. Learn more at gitbook.com.
## Querying This Documentation
If you need additional information that is not directly available in this page, you can query the documentation dynamically by asking a question.
Perform an HTTP GET request on the current page URL with the `ask` query parameter, and the optional `goal` query parameter:
```
GET https://captivatehelp.newbluelive.com/get-started/chapter-index-2/program-monitor-panel.md?ask=&goal=
```
`ask` is the immediate question: it should be specific, self-contained, and written in natural language.
`goal` is optional and describes the broader end goal you are ultimately trying to accomplish on behalf of the user. GitBook uses it to tailor the answer towards what is most useful for that goal.
The response will contain a direct answer to the question and relevant excerpts and sources from the documentation.
Use this mechanism when the answer is not explicitly present in the current page, you need clarification or additional context, or you want to retrieve related documentation sections.