> For the complete documentation index, see [llms.txt](https://captivatehelp.newbluelive.com/llms.txt). Markdown versions of documentation pages are available by appending `.md` to page URLs; this page is available as [Markdown](https://captivatehelp.newbluelive.com/get-started/chapter-index-2/preview-panel.md).
# Preview panel
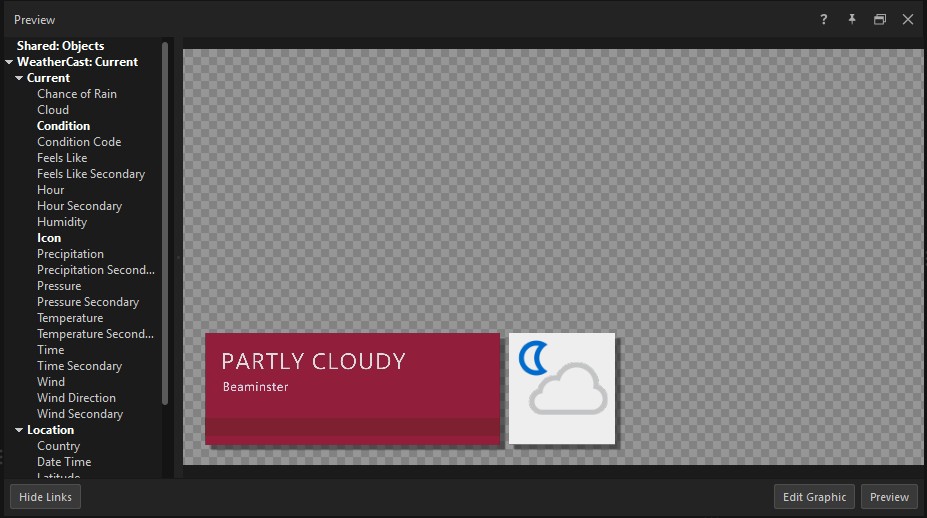
The Preview panel shows the selected Project List item before it goes to Program. Use it to check a graphic, edit visible values, replace images, link data, and preview animation without putting anything on air. Press **F6** to show or hide the panel, or click **Preview** on the top bar.
The **Link Data** sidebar appears on the left, and the preview canvas appears on the right. Buttons along the bottom show or hide links, open the Designer, and preview animation.
## Edit the title right in the preview
The preview canvas is also an editor. You can change text, colors, images, size, and placement all from this one place — before you ever touch the Properties panel or the Live Values tab.
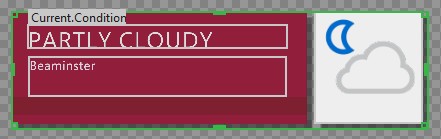
The canvas shows the selected item at the project’s frame size, scaled to fit the panel. Move the pointer over the canvas to show editable elements.
* Click a text element to edit it in place.
* Click an image element to replace it.
* Click and drag the green border handles to reposition or scale an element. Dragging here updates the **Position** and **Scale** values in the [Transform tab](/set-up-your-production/position-and-fit-items-in-program.md).
* Double-click an element to reset its position and scale.
Preview is not Program. Changes and animations in this panel do not go on air until you use the **Play** button on the item’s row in the Project List.
### Background
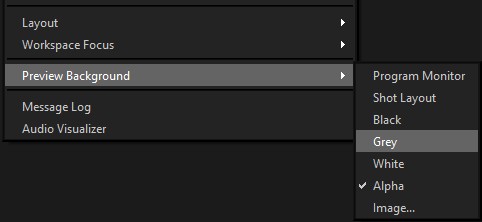
The preview background is **Alpha** — a transparent checkerboard — by default. To change it, choose **View** > **Preview Background**, then pick **Program Monitor**, **Shot Layout**, **Black**, **Grey**, **White**, **Alpha**, or **Image…**.
## Link Data sidebar
The **Link Data** sidebar lists data fields from Data Controllers connected to the selected item. Click **Link Data** at the bottom of the panel to show or hide the sidebar.
When the sidebar is hidden, the button reads **Link Data**. When the sidebar is visible, the button reads **Hide Links**.
### Connecting data fields
There are two ways to connect a Data Controller field to a design variable:
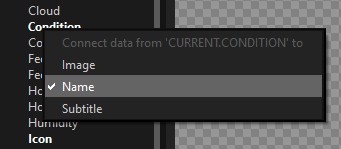
* **Drag and drop** — drag the field from the list onto a design element in the canvas. If the element has more than one variable, a menu appears so you can choose which variable to connect.
* **Right-click** — right-click the field and choose the design variable to connect it to.
### When the sidebar is empty
The sidebar lists only fields from Data Controllers connected to the selected item. If the item has no connected Data Controllers, the sidebar is empty.
## Edit Graphic button
The **Edit Graphic** button opens the selected title graphic in the [Designer](/design-and-customize-graphics/chapter-index-1.md). Only title graphics have this button — other Project List item types cannot be edited in the Designer.
You can also open the Designer by double-clicking the **Preview** column in the [Project List](/get-started/chapter-index-2/project-list-panel-and-channel-management.md).
## Preview button
The **Preview** button plays the selected item’s build-in and build-out animation in the canvas. This is a local preview only; nothing goes to Program. The button appears only for playable items that have a timeline, such as graphics and media clips.
**❗ IMPORTANT**
The **Preview** button is not a Take. Pressing it plays the animation only inside the Preview panel. To put the item on air, use the **Play** button on its row in the Project List.
Captivate uses **Preview** in two places. The top-bar **Preview** button shows or hides the Preview panel. The **Preview** button inside the panel plays the selected item’s animation locally.
## Render progress
When Captivate is preparing the selected graphic, a small progress bar appears at the bottom of the panel between **Edit Graphic** and **Preview**. The bar fills while Captivate prepares the preview and disappears when rendering is complete. This applies only to graphics — other item types do not need to render.
## When the panel is hidden
The Preview panel is hidden by default in **Live** workspace presets and shown by default in **Setup**. Press **F6** to show or hide it, or click **Preview** on the top bar.
## Related
* [Properties panel](/get-started/chapter-index-2/properties-panel.md)
* [Project List panel](/get-started/chapter-index-2/project-list-panel-and-channel-management.md)
* [Move and resize items for Program](/set-up-your-production/position-and-fit-items-in-program.md)
* [Live Values tab](/control-your-show/chapter-index/live-data-tab.md)
---
# Agent Instructions
This documentation is published with GitBook. GitBook is the documentation platform designed so that both humans and AI agents can read, navigate, and reason over technical content effectively. Learn more at gitbook.com.
## Querying This Documentation
If you need additional information that is not directly available in this page, you can query the documentation dynamically by asking a question.
Perform an HTTP GET request on the current page URL with the `ask` query parameter, and the optional `goal` query parameter:
```
GET https://captivatehelp.newbluelive.com/get-started/chapter-index-2/preview-panel.md?ask=&goal=
```
`ask` is the immediate question: it should be specific, self-contained, and written in natural language.
`goal` is optional and describes the broader end goal you are ultimately trying to accomplish on behalf of the user. GitBook uses it to tailor the answer towards what is most useful for that goal.
The response will contain a direct answer to the question and relevant excerpts and sources from the documentation.
Use this mechanism when the answer is not explicitly present in the current page, you need clarification or additional context, or you want to retrieve related documentation sections.