> For the complete documentation index, see [llms.txt](https://captivatehelp.newbluelive.com/llms.txt). Markdown versions of documentation pages are available by appending `.md` to page URLs; this page is available as [Markdown](https://captivatehelp.newbluelive.com/get-started/chapter-index-2/customize-your-layout.md).
# Customize Captivate's layout
The Captivate workspace is built from panels you can rearrange to suit your show. Every panel lives in a **tab group** — drag panels to split the workspace, stack them as tabs, float them on their own, or pin them to the window edge. Whatever you arrange is saved automatically: there is no Save step, and the next time you open Captivate your layout is exactly as you left it.
Captivate includes two workspace layouts: **Setup** for building and configuring a project, and **Live** for running a show. Your saved Setup and Live arrangements belong to you on this computer and apply in every project.
The Designer has its own panel layout that you arrange the same way, separately. See [Designer Workspace panel](/design-and-customize-graphics/chapter-index-1/designer-workspace-overview.md).
* [Move panels](#move-panels)
* [Show or hide panels](#show-or-hide-panels)
* [Pin panels to the edge](#pin-panels-to-the-edge)
* [Switch between Setup and Live](#switch-between-setup-and-live)
* [Save the current Setup or Live layout](#save-the-current-setup-or-live-layout)
* [Open a predefined layout, or reset](#open-a-predefined-layout-or-reset)
* [Layouts and projects](#layouts-and-projects)
## Move panels
Drag a panel by its **title bar** to move its whole group, or by its **tab** to move just that panel. As you drag, Captivate draws where the panel will land — there are no drop buttons to aim for; the position of your cursor decides:
* **Center of another group** — the group highlights: dropping **stacks the panel as a tab** in that group.
* **Toward an edge of a group** — an insertion line appears on that side: dropping **splits the group** there.
* **At the outer edge of the window** — the line jumps to the window edge: dropping splits the **whole window** on that side.
* **A red highlight** means that target doesn’t accept the panel — releasing does nothing.
* **Outside the window** — the panel **floats** as its own window. Drag it back in, or use its panel menu, to re-dock it.
Drag a splitter between groups to resize them. Drag tabs within a tab strip to reorder them. A panel’s title-bar controls — pin, float, close — appear when you hover over the panel.
{% hint style="info" %}
The **Workflow** panel is driven by the project — when the active workflow needs to stay on screen, it re-shows itself if hidden.
{% endhint %}
## Show or hide panels
* Click the panel icons on the top bar — **Library**, **Project**, **Shots**, **Properties**, **Switcher**, **Audio**, **Program**, **Preview**, and **Data**. The icon is blue when its panel is visible and grey when it’s hidden.
* Or open the **View** menu and toggle the panel there. The function keys mirror the most-used panels: **F3** Properties, **F4** Graphics Library, **F5** Program, **F6** Preview, **F7** Video Switcher, **F8** Audio Mixer, **F9** Shot Launcher, **F10** Project List. See [Shortcuts](/reference/shortcuts.md).
A closed panel reopens where it was.
Some occasional-use panels — the [Message Log](/troubleshooting/read-the-message-log.md) and the [Audio Visualizer](/troubleshooting/use-the-audio-visualizer.md) among them — open as **floating windows** the first time you show them, so they don’t disturb the layout you’re working in. Dock one where you want it and Captivate remembers that place from then on.
## Pin panels to the edge
Pinning collapses a panel to a thin rail on the left or right window edge, giving its space back to the rest of the layout — handy for panels you need occasionally but not on screen all the time.
* **Pin** — click the pin button in the panel’s title bar. The panel collapses to the nearest side rail.
* **Reveal** — click the panel’s icon on the rail. The panel flies out **over** the workspace; click the pin again to dock it back into the layout.
* **Resize the flyout** — drag its inner edge (the edge facing the workspace). The width is remembered.
* **Right-click the rail icon** for **Dock Back**, **Reveal**, and **Close** — always available, even if the flyout won’t open.
## Switch between Setup and Live
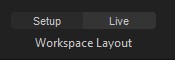
Click **Setup** or **Live** in the Workspace Layout control on the top bar. The current arrangement is replaced with the one you chose, and the active layout is highlighted on the control.
If you haven’t saved your own arrangement to Setup or Live, clicking the button applies the standard Captivate layout of that name.
**💡 TIP**\
**Ctrl+1** switches to the **Setup** layout and **Ctrl+2** switches to the **Live** layout, without using the mouse.
## Save the current Setup or Live layout
Your day-to-day arrangement is always saved automatically. Saving to a **preset** is different: it snapshots the current arrangement into the Setup or Live layout, so the corresponding button restores it on demand.
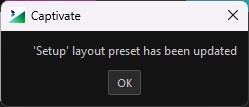
* **Hold-to-save (gesture)** — press and hold the **Setup** or **Live** button for **one second** without moving the cursor. The arrangement is saved to that layout the moment the hold completes, and a message confirms: *"'Setup' layout preset has been updated"*. A brief click on the same button applies the layout instead of saving it.
* **Right-click to save (menu)** — right-click **Setup** or **Live** and choose **Save Layout as Preset**.
Both gestures overwrite the layout you aimed at — there is no undo; if you overwrote a layout by accident, rearrange the panels and save again. You can’t add layouts beyond Setup and Live, and you can’t rename them.
Saved Setup and Live layouts belong to you on this computer and apply in **every** project — arrange them once and every show you open uses them.
## Layouts and projects
A project carries the panel arrangement it was saved with, so a project built on one computer opens looking the same on another — useful when you hand a show to a colleague, or move between an edit suite and a control room.
That means opening a project can change your panel arrangement. If you’d rather keep your own, choose **View** > **Layout** > **Keep My Layout When Opening Projects**. With it ticked, opening a project leaves your current arrangement alone instead of restoring the one saved in the project. The setting is off by default and applies to every project you open from then on.
{% hint style="info" %}
Panels that float in their own windows are restored by position, which assumes a comparable screen. Moving a project between machines with different screen resolutions or scaling can leave a floating panel somewhere awkward — drag it back, or dock it, and the new position is remembered.
{% endhint %}
## Open a predefined layout, or reset
Choose **View** > **Layout** and select one of Captivate’s predefined layouts — such as **Compact**, **Default**, **Express**, **Live**, **Scoretable**, or **Setup**. These are starting points — apply one, then rearrange panels from there. The same menu lists **Custom layout**, a single slot for an arrangement of your own: set up the panels, choose **View** > **Layout** > **Save current to Custom**, and apply it any time from the same menu.
To put everything back the way Captivate shipped, choose **View** > **Layout** > **Reset all**. If a layout ever gets into a state you can’t fix by dragging, **Reset all** is the recovery step.
---
# Agent Instructions
This documentation is published with GitBook. GitBook is the documentation platform designed so that both humans and AI agents can read, navigate, and reason over technical content effectively. Learn more at gitbook.com.
## Querying This Documentation
If you need additional information that is not directly available in this page, you can query the documentation dynamically by asking a question.
Perform an HTTP GET request on the current page URL with the `ask` query parameter, and the optional `goal` query parameter:
```
GET https://captivatehelp.newbluelive.com/get-started/chapter-index-2/customize-your-layout.md?ask=&goal=
```
`ask` is the immediate question: it should be specific, self-contained, and written in natural language.
`goal` is optional and describes the broader end goal you are ultimately trying to accomplish on behalf of the user. GitBook uses it to tailor the answer towards what is most useful for that goal.
The response will contain a direct answer to the question and relevant excerpts and sources from the documentation.
Use this mechanism when the answer is not explicitly present in the current page, you need clarification or additional context, or you want to retrieve related documentation sections.