> For the complete documentation index, see [llms.txt](https://captivatehelp.newbluelive.com/llms.txt). Markdown versions of documentation pages are available by appending `.md` to page URLs; this page is available as [Markdown](https://captivatehelp.newbluelive.com/get-started/chapter-index-2/channels.md).
# Channels
A channel in Captivate is an independent show list with its own Project List items and playback state. Every project starts with one channel.
Channels can feed primary Program Out destinations — NDI, SDI, Display, Virtual Webcam, and the other outputs you pick from the **Program Out** menu. Secondary outputs, such as RTMP/SRT streaming, Zoom, and ISO recording, receive a copy of the program output rather than defining a channel’s destination themselves.
## When to use multiple channels
One channel handles multiple simultaneous graphics — a scoreboard, a lower third, and a bug can all be live on the same channel at once. Most shows need only one.
Multiple channels usually come into play when Captivate feeds a switcher with more than one graphics overlay input and the operator wants to control what is seen at the switcher level. For example, one channel might hold the scoreboard and other game-time graphics while a second holds media playout sequences for game highlights — the switcher operator brings each overlay in and out independently.
Secondary outputs don’t necessarily require additional channels: a stream, a Zoom send, or an ISO recording can receive a copy of the program output from the channels you already have.
## Channels per edition
Captivate Sport includes one channel; Captivate Broadcast supports up to 16. You can purchase additional channels for your license — see [channel add-ons](https://newbluefx.com/channel-graphic-add-ons/#channels) on newbluefx.com.
## Add a channel
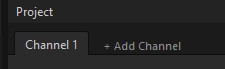
1. Look at the tab bar above the Project List. Each existing channel has its own tab.
2. Click the **+ Add Channel** button at the right end of the tab bar. A new channel tab appears, selected, with an empty Project List.
At your license’s channel limit, the **+ Add Channel** button remains available, and clicking it explains the situation: *"You’ve reached the maximum number of channels available with your license."* Choose **Upgrade** to open the upgrade page, or **Close**. No channel is added.
## Rename a channel
1. Right-click the channel’s tab and choose **Rename**, or double-click the tab name.
2. Type the new name.
3. Press **Enter** to save.
**❗ IMPORTANT**
Renaming a channel may rename any output destination that uses the channel name. For example, an NDI source named after the channel disappears from the network and reappears under the new name — downstream receivers must re-select it — and a multi-channel Watch Folder filename changes the same way.
## Delete a channel
1. Right-click the channel’s tab and choose **Delete**.
2. Confirm if prompted.
The channel and every item in its Project List are removed immediately. The project always keeps at least one channel; you cannot delete the last remaining channel.
## Reorder channels
Click and drag a channel tab left or right along the tab bar to change its order. The new order is saved with the project.
## Switch between channels
Click a channel’s tab to make it active. The Project List shows that channel’s items, and the Properties panel, Preview, and Program Monitor follow the active channel’s selection.
Every channel keeps playing whether or not its tab is the active one. Switching tabs is a view change, not a playout change — graphics already live on the channel you switch away from stay on air.
## How channels map to outputs
Channels feed the primary destinations you select from the **Program Out** menu. How they map depends on the output type:
* Some outputs expose **one destination per channel** — each channel becomes its own NDI source (named after the channel), its own Watch Folder file, its own virtual camera.
* Others require you to **assign channels to ports** — SDI cards (DeckLink, AJA) and TriCaster have discrete outputs, and you choose which channel feeds each one in the output setup.
Secondary outputs — RTMP/SRT streaming, Zoom, ISO recording — receive a copy of the program output. They don’t appear as per-channel destinations.
The destination-specific articles in [Set up graphics output](/set-up-your-production/chapter-index.md) describe each output’s routing in detail.
## Stop playback by channel
### Stop the active channel
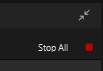
Click **Stop All** on the tab bar to stop every live item on the currently active channel.
### Clear all channels
To clear output across every channel, switch to each channel and click **Stop All**. There is no single control that stops every channel at once.
The video panic button on the top bar is not a clear-all: double-clicking it fades every live video input across all channels, but graphics stay on air. It’s an emergency control for video sources. See [The video panic button](https://github.com/NewBlueFX/help-docs/tree/gitbook-test/gitbook/get-started/the-interface/get-started/the-interface/top-bar-status-meaning.adoc#the-panic-button).
## Related
* [Project List panel](/get-started/chapter-index-2/project-list-panel-and-channel-management.md)
* [Set up graphics output](/set-up-your-production/chapter-index.md)
* [Feature availability by edition](/reference/entitlements-sku-matrix.md)
---
# Agent Instructions
This documentation is published with GitBook. GitBook is the documentation platform designed so that both humans and AI agents can read, navigate, and reason over technical content effectively. Learn more at gitbook.com.
## Querying This Documentation
If you need additional information that is not directly available in this page, you can query the documentation dynamically by asking a question.
Perform an HTTP GET request on the current page URL with the `ask` query parameter, and the optional `goal` query parameter:
```
GET https://captivatehelp.newbluelive.com/get-started/chapter-index-2/channels.md?ask=&goal=
```
`ask` is the immediate question: it should be specific, self-contained, and written in natural language.
`goal` is optional and describes the broader end goal you are ultimately trying to accomplish on behalf of the user. GitBook uses it to tailor the answer towards what is most useful for that goal.
The response will contain a direct answer to the question and relevant excerpts and sources from the documentation.
Use this mechanism when the answer is not explicitly present in the current page, you need clarification or additional context, or you want to retrieve related documentation sections.