> For the complete documentation index, see [llms.txt](https://captivatehelp.newbluelive.com/llms.txt). Markdown versions of documentation pages are available by appending `.md` to page URLs; this page is available as [Markdown](https://captivatehelp.newbluelive.com/design-and-customize-graphics/chapter-index-6/preparing-your-after-effects-designs-for-import.md).
# Prepare After Effects designs for import
Captivate can now directly import both AEP and MOGRT files with all animations, effects, and expressions intact. While the import functionality is engineered to ingest virtually any After Effects design, here are a few tips and recommendations to achieve the best integration and performance in Captivate.
This feature is only available in Captivate Broadcast.
**❗ IMPORTANT**\
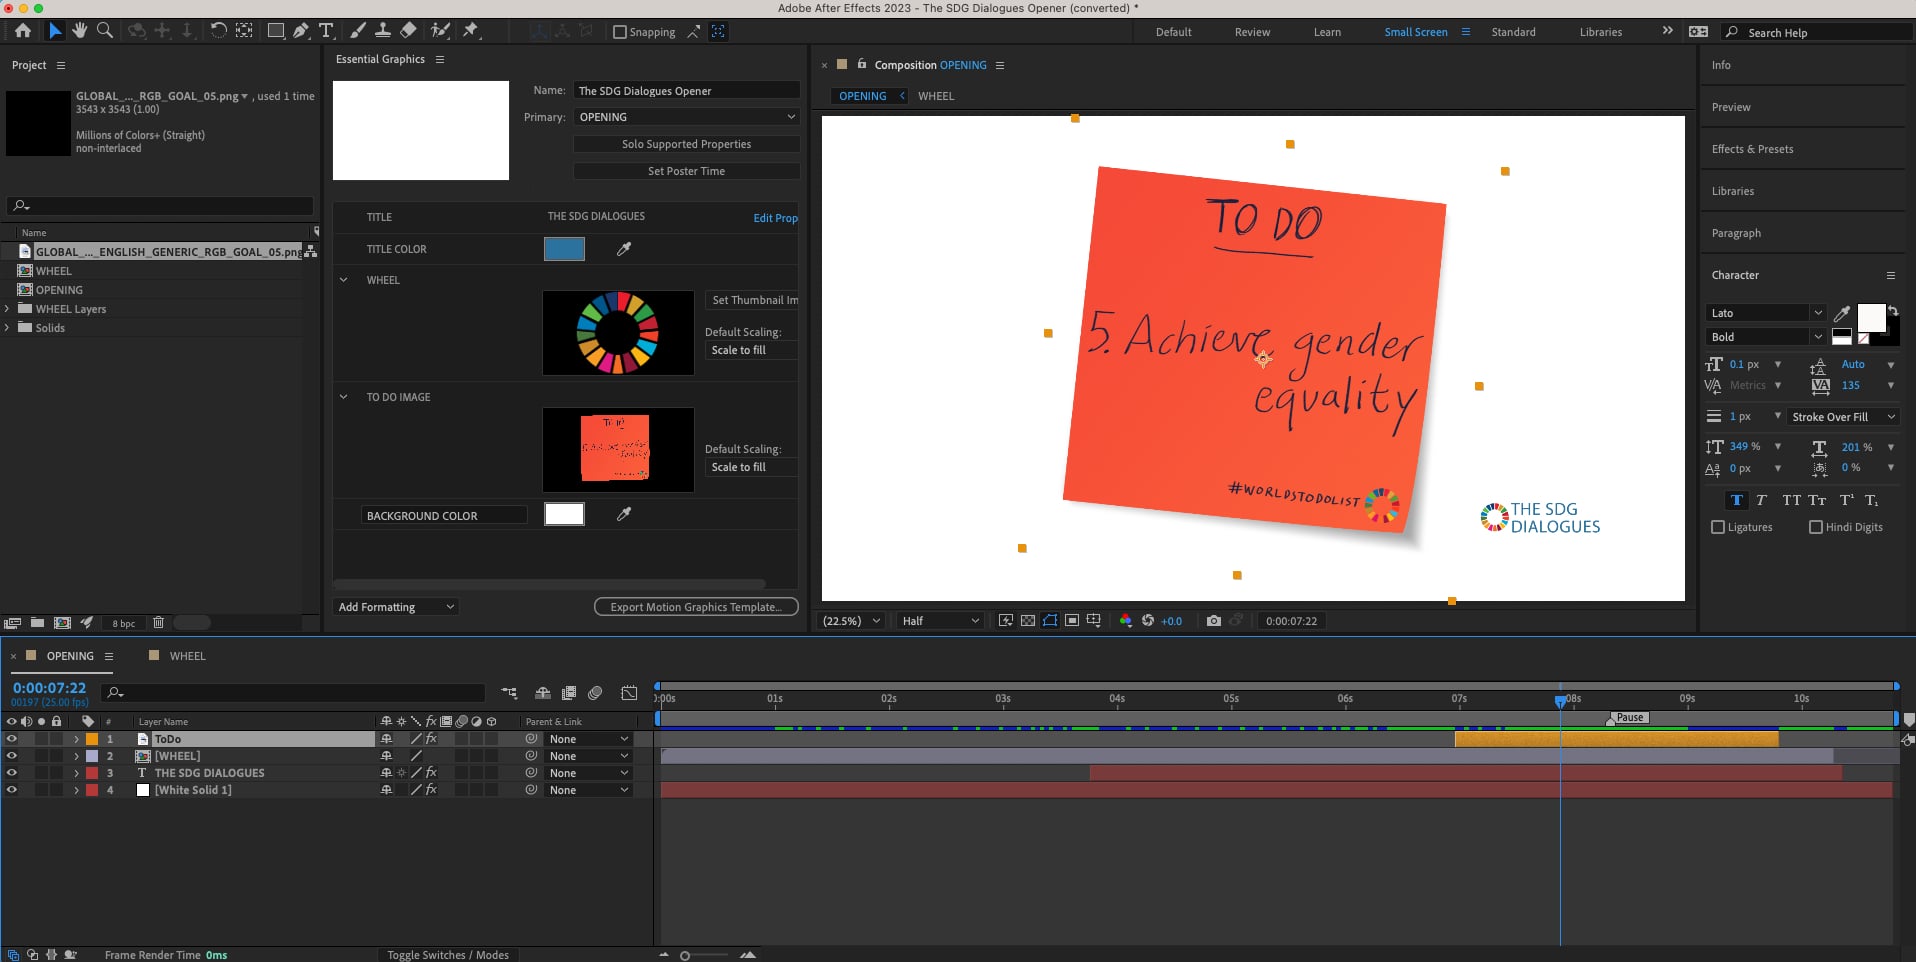
Making your After Effects compositions as short as possible, while preserving the timing of your intro/outro animations, will result in the most efficient rendering during import.
Therefore, it is recommended that you remove any sections of the composition where the graphic is static. For more information see [Setting a Pause Point](#setting-a-pause-point).
## Topics included
* [Choosing AEP or MOGRTs](#choosing-aep-or-mogrts)
* [After Effects projects (.aep)](#after-effects-projects-aep)
* [Motion Graphics templates (.mogrt)](#motion-graphics-templates-mogrt)
* [AEP Compositions](#aep-compositions)
* [MOGRT Compositions](#mogrt-compositions)
* [Setting a Pause Point](#setting-a-pause-point)
## Choosing AEP or MOGRTs
There are advantages to working with either file type. So, choosing which is preferable largely depends on your workflow and Data Controller needs. Following are some of the advantages and disadvantages of working with each.
### After Effects projects (.aep)
**Advantages**
* Many compositions can be imported from a single project.
* Text properties are imported as Captivate variables with no additional setup.
* No additional setup or export is required.
**Disadvantages**
* Types of variables supported in Captivate are limited to text and images.
* If the `.aep` contains external media, it will not automatically be transported with the file.
### Motion Graphics templates (.mogrt)
**Advantages**
* All properties that are set up in Essential Graphics can be edited directly in Captivate.
* Many types of Captivate variables are supported, such as colors and visibility.
* Any external media in the composition is packaged within the `.mogrt`, so migrating graphics is very simple.
**Disadvantages**
* Requires setup and export from AE.
In conclusion:
* AEP provides a quick, hassle-free workflow if you only need to update text from Captivate and especially when graphics only contain elements generated in After Effects.
* MOGRT offers greater versatility and is likely necessary for more complex graphics, such as sports scoreboards. Additionally, it has added convenience/reliability when migrating graphics that reference external media.
## AEP Compositions
**❗ IMPORTANT**\
Please make sure that your AEP compositions are saved with the current version of After Effects. Also, please save your AEP compositions in the same folder as your Captivate project if you would like to re-open the project without having to re-import the AEP files.
### Properties available to edit in Captivate
* Text
* Image
### Exposing Image/Video with a prefix
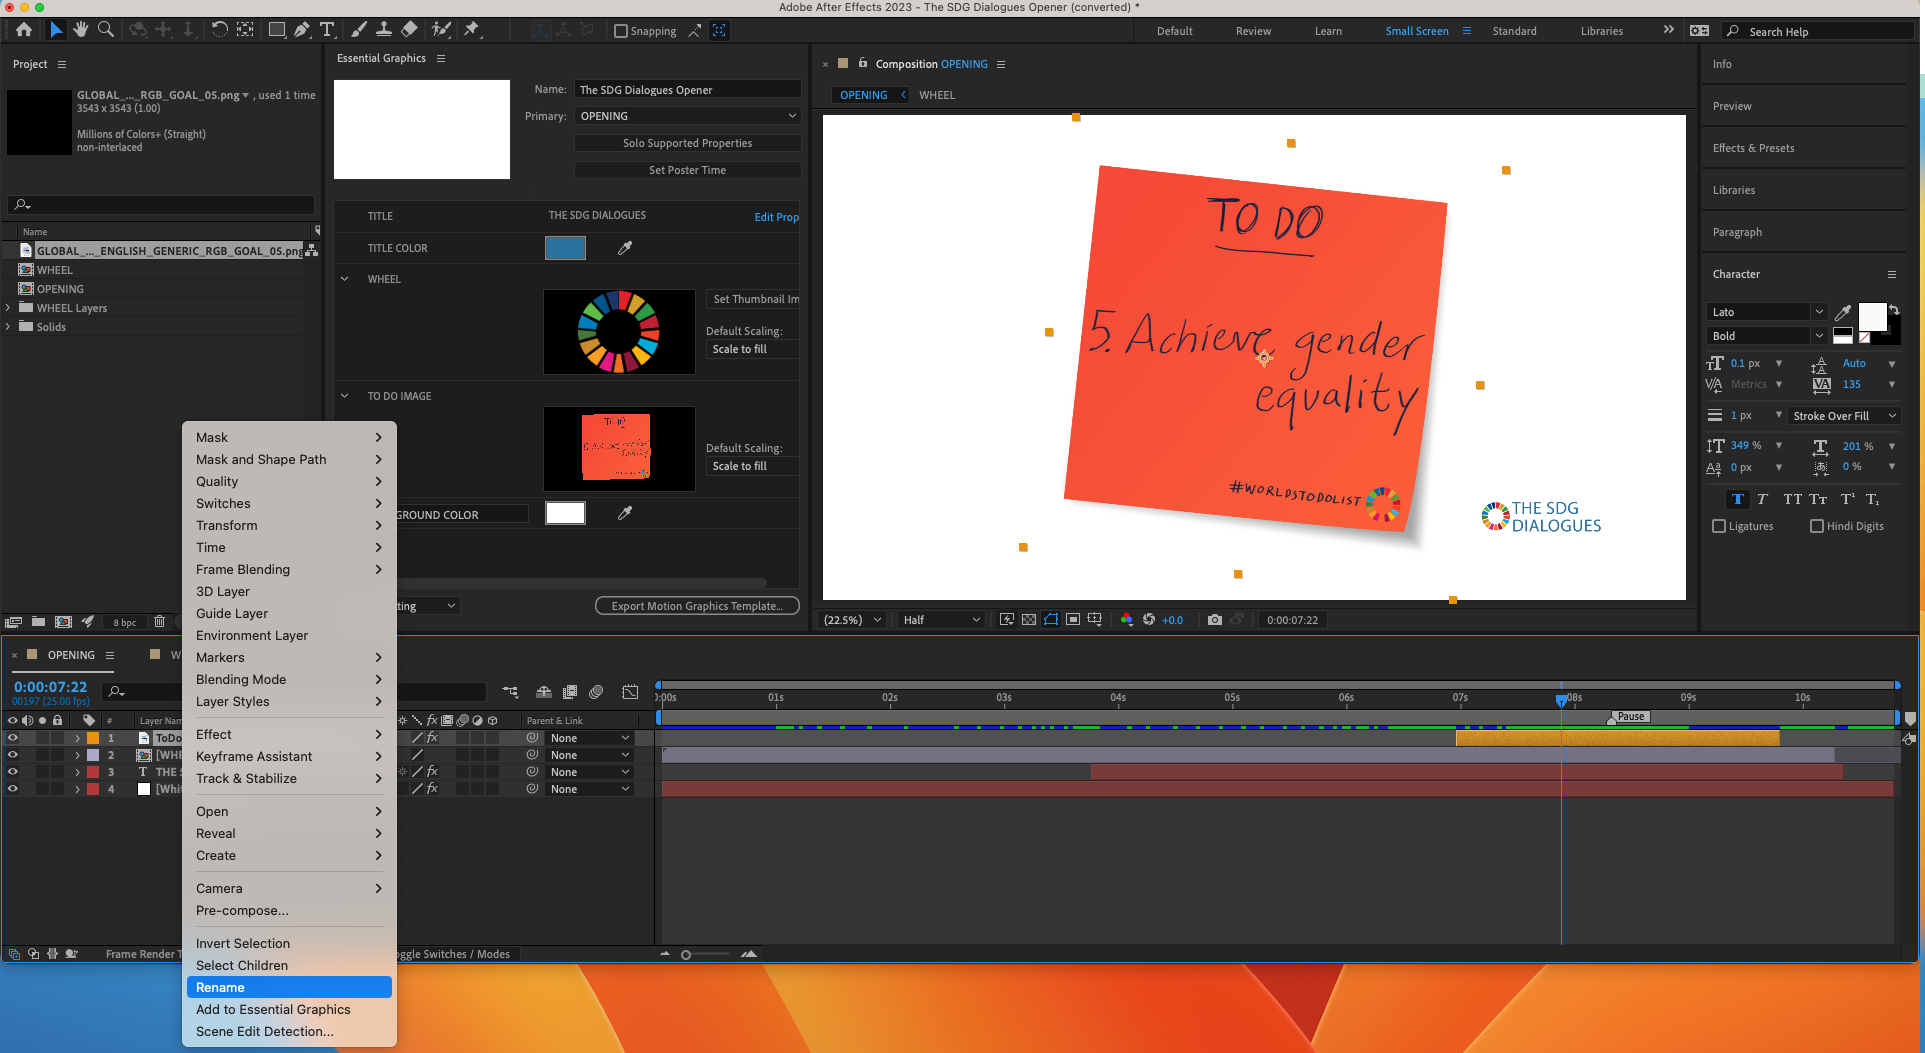
1. Select your image layer in your AE timeline.
2. Right-click on the current label of the layer > choose **Rename**.
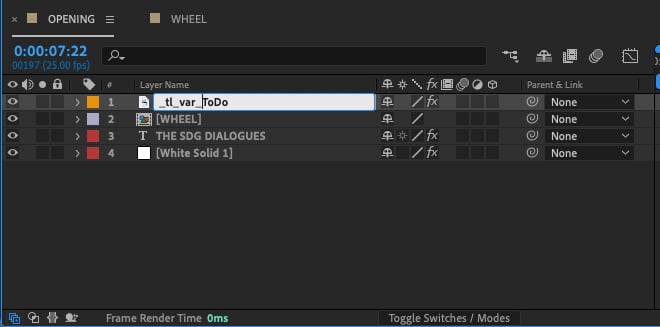
3. Type in the prefix `_tl_var_` to the beginning of the label.
4. Then proceed to the Captivate interface to import your design.
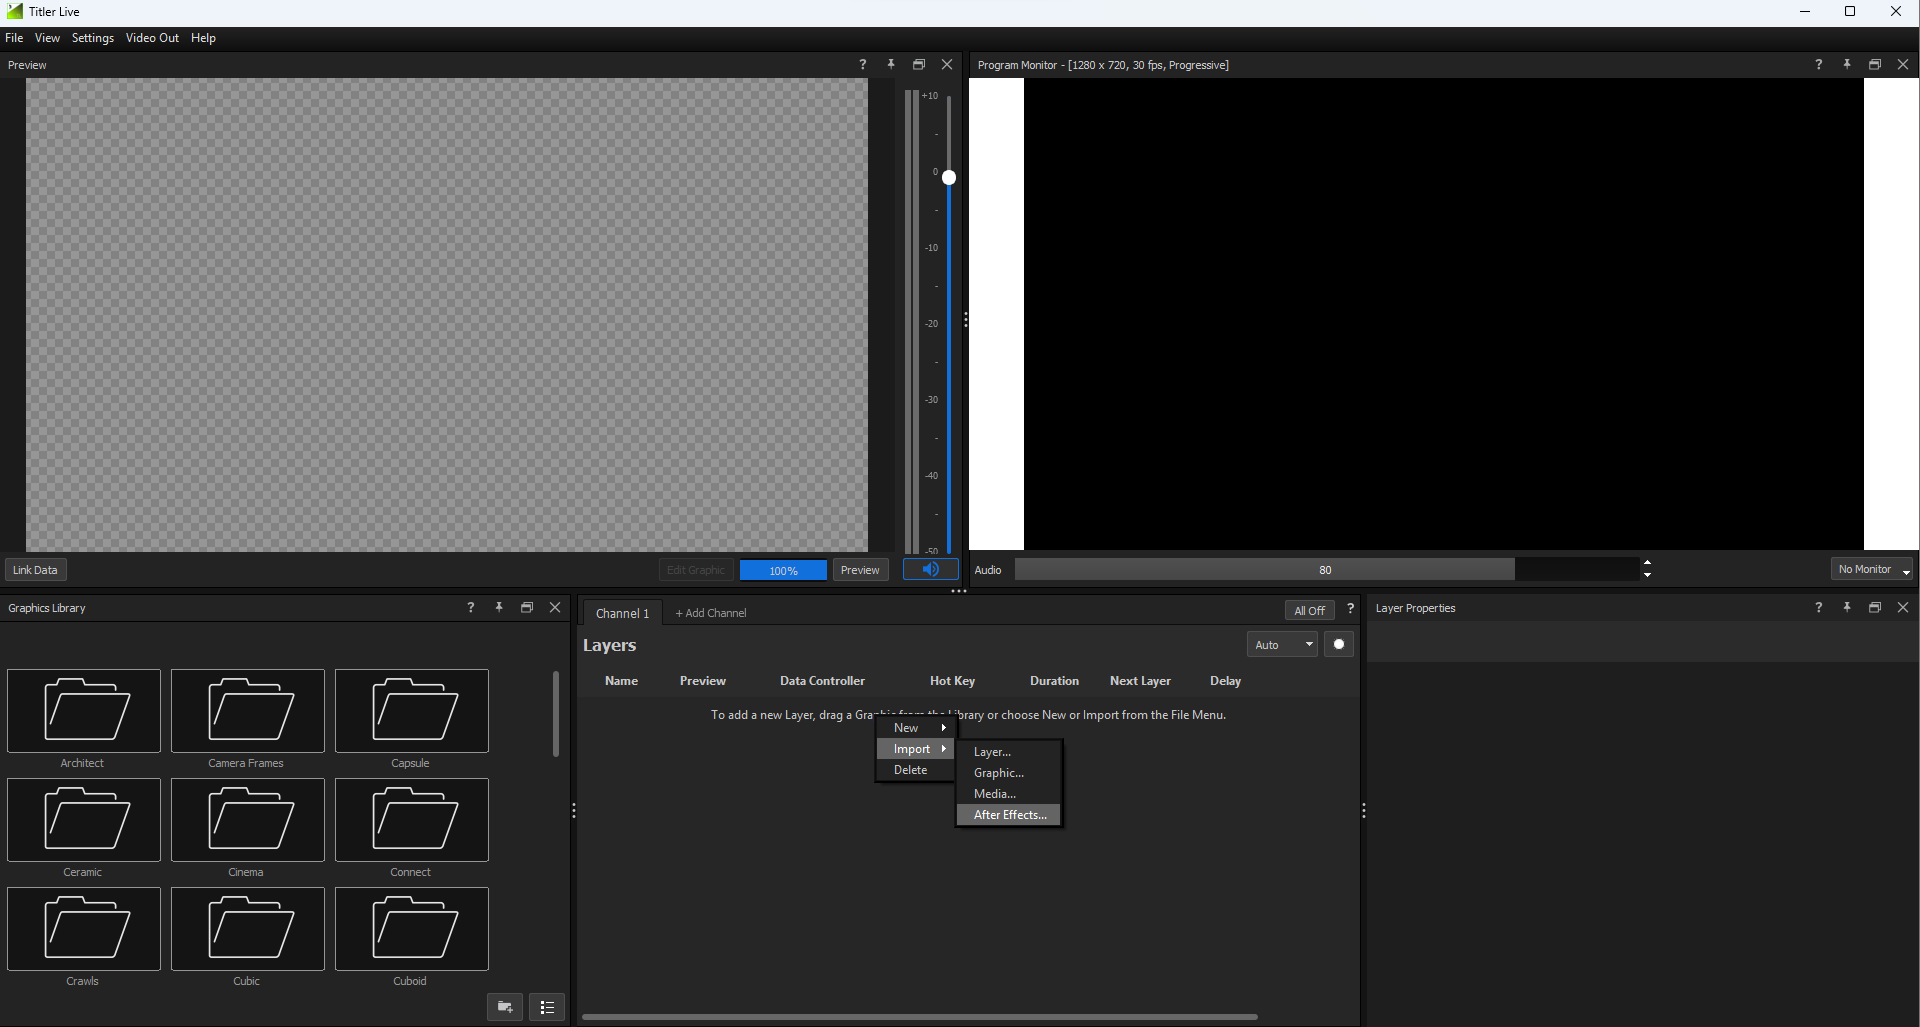
5. Right-click in the Graphic Layers Panel or go to the File menu > **Import** > **After Effects**.
6. Choose the `.aep` or `.mogrt` file containing the newly labeled graphic and double-click or select **Open**.
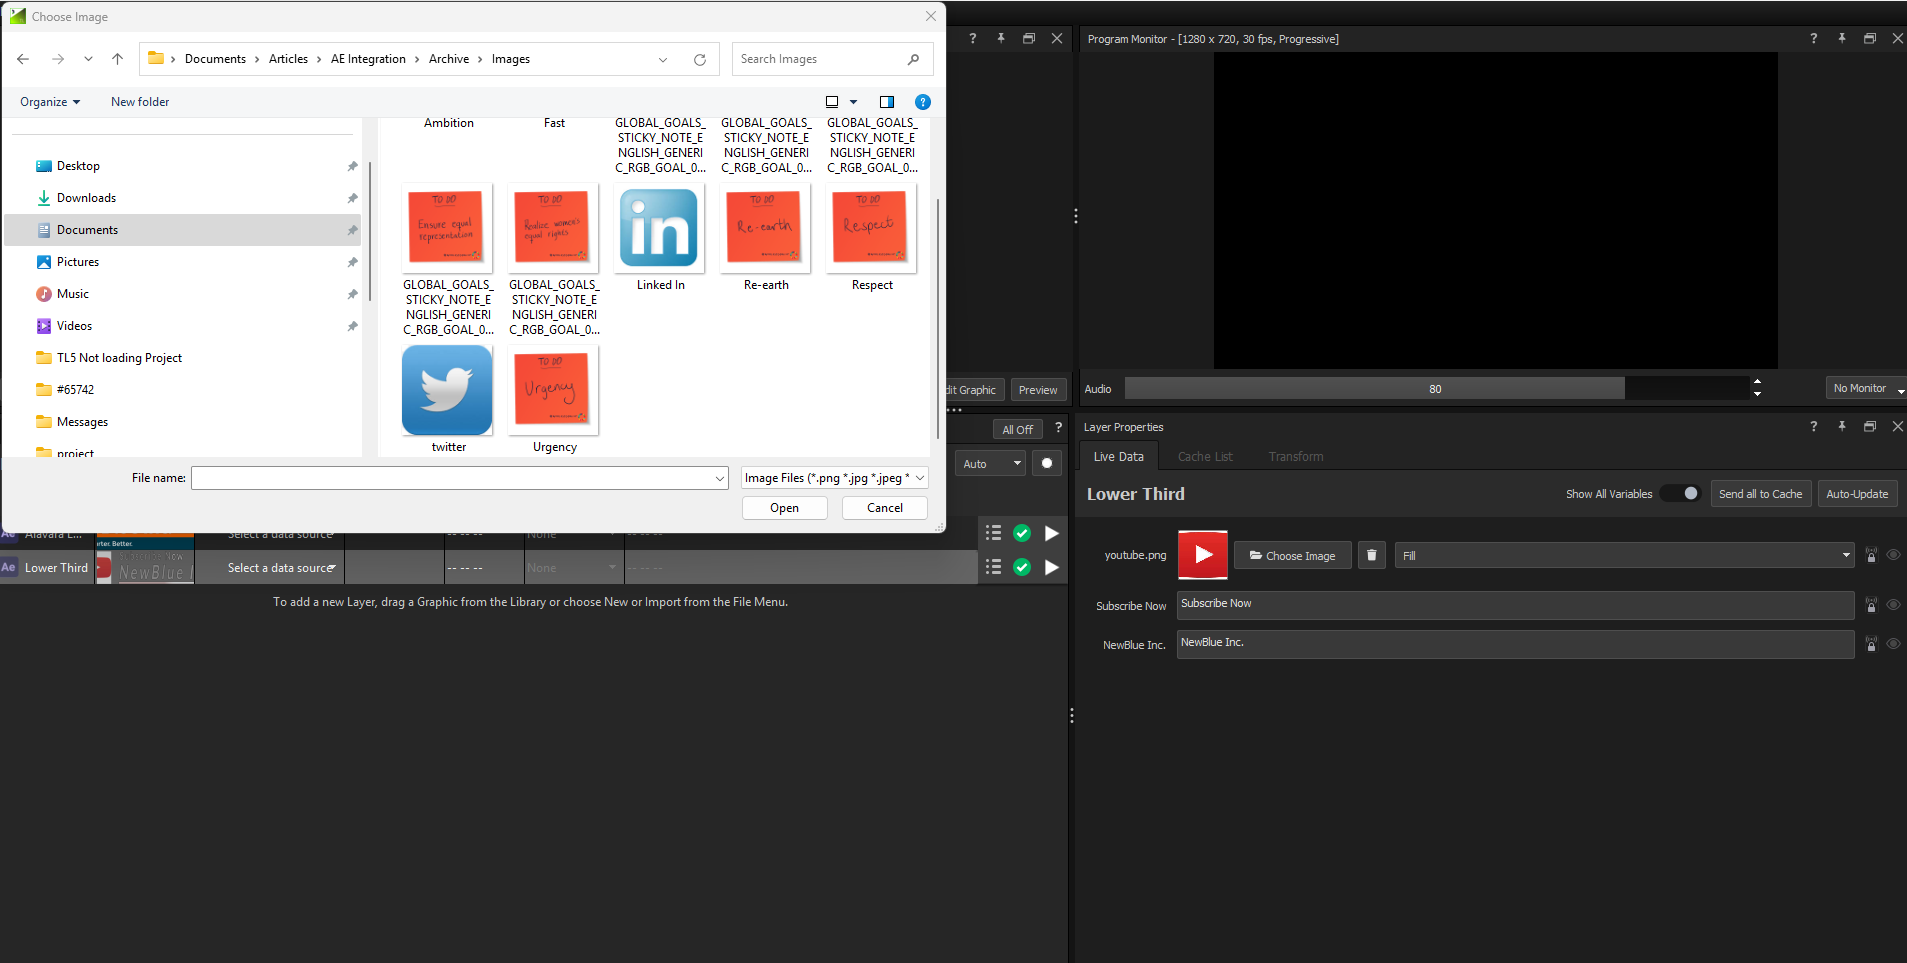
7. After the import and render has completed within Captivate, select **Choose image** in the Live Values tab of the Layer Properties panel to change.
Your new image will now replace the image imported with the After Effects design. You can also use the **Send to Cache** function to have several instances of the same graphic with different images that can be ready for broadcast. See [Pre-cache graphics before a show](/control-your-show/chapter-index/pre-cache-graphics-before-a-show.md).
**❗ IMPORTANT**\
When creating a clock in your graphic, the following is a workaround in case it shows differently in Captivate. Your text box containing a clock should be just enough to fit your font. If not properly sized, sub-optimal spacing or shifting can occur. Your custom clock should now be set to play with controls located in the Clocks tab in the Layer Properties panel.
## MOGRT Compositions
Motion Graphics templates (`.mogrt`) serve as After Effects' native method to encapsulate AE projects as templates that can be directly edited in Premiere Pro. These MOGRTs can also be imported to Captivate and directly manipulated in the same fashion. Learn more about Motion Graphics templates [here](https://helpx.adobe.com/after-effects/using/creating-motion-graphics-templates.html).
**❗ IMPORTANT**\
Please make sure that your AEP compositions are saved with the current version of After Effects. Also, please save your MOGRTs in the same folder as your Captivate project if you would like to re-open the project without having to re-import the MOGRTs.
### Properties available for edit in Captivate
* Source Text
* Image
* Color
* Media (Image, Video, PSD & Illustrator files)
* Check box Expression Control
* Anchor Point
* Position
* Opacity
* Scale
* Rotation
### Exposing various properties
Additionally, you can prepare/export MOGRTs in order to update a broader range of the graphic’s properties within Captivate.
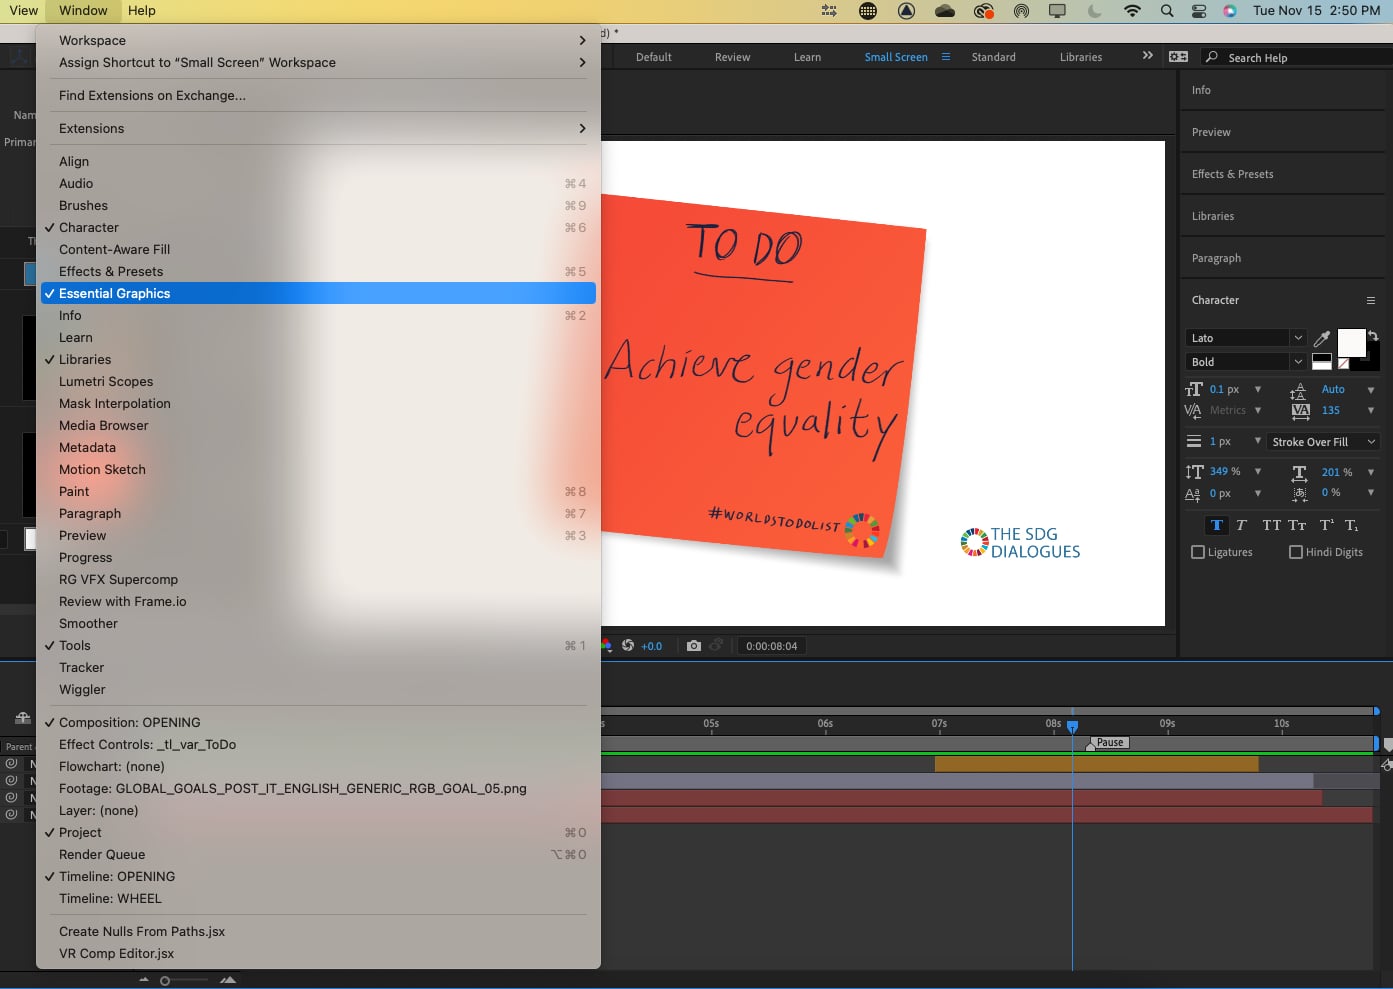
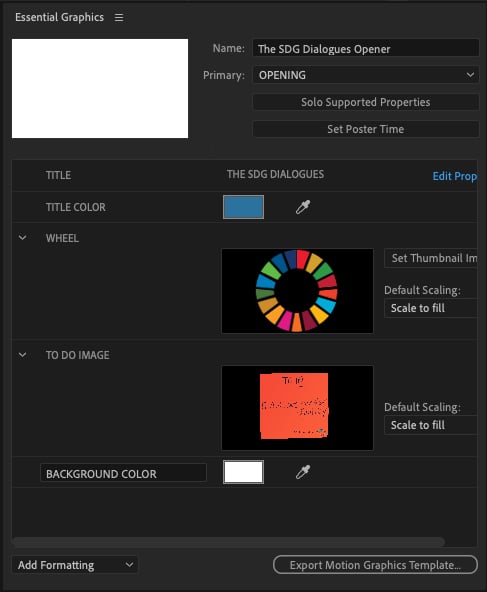
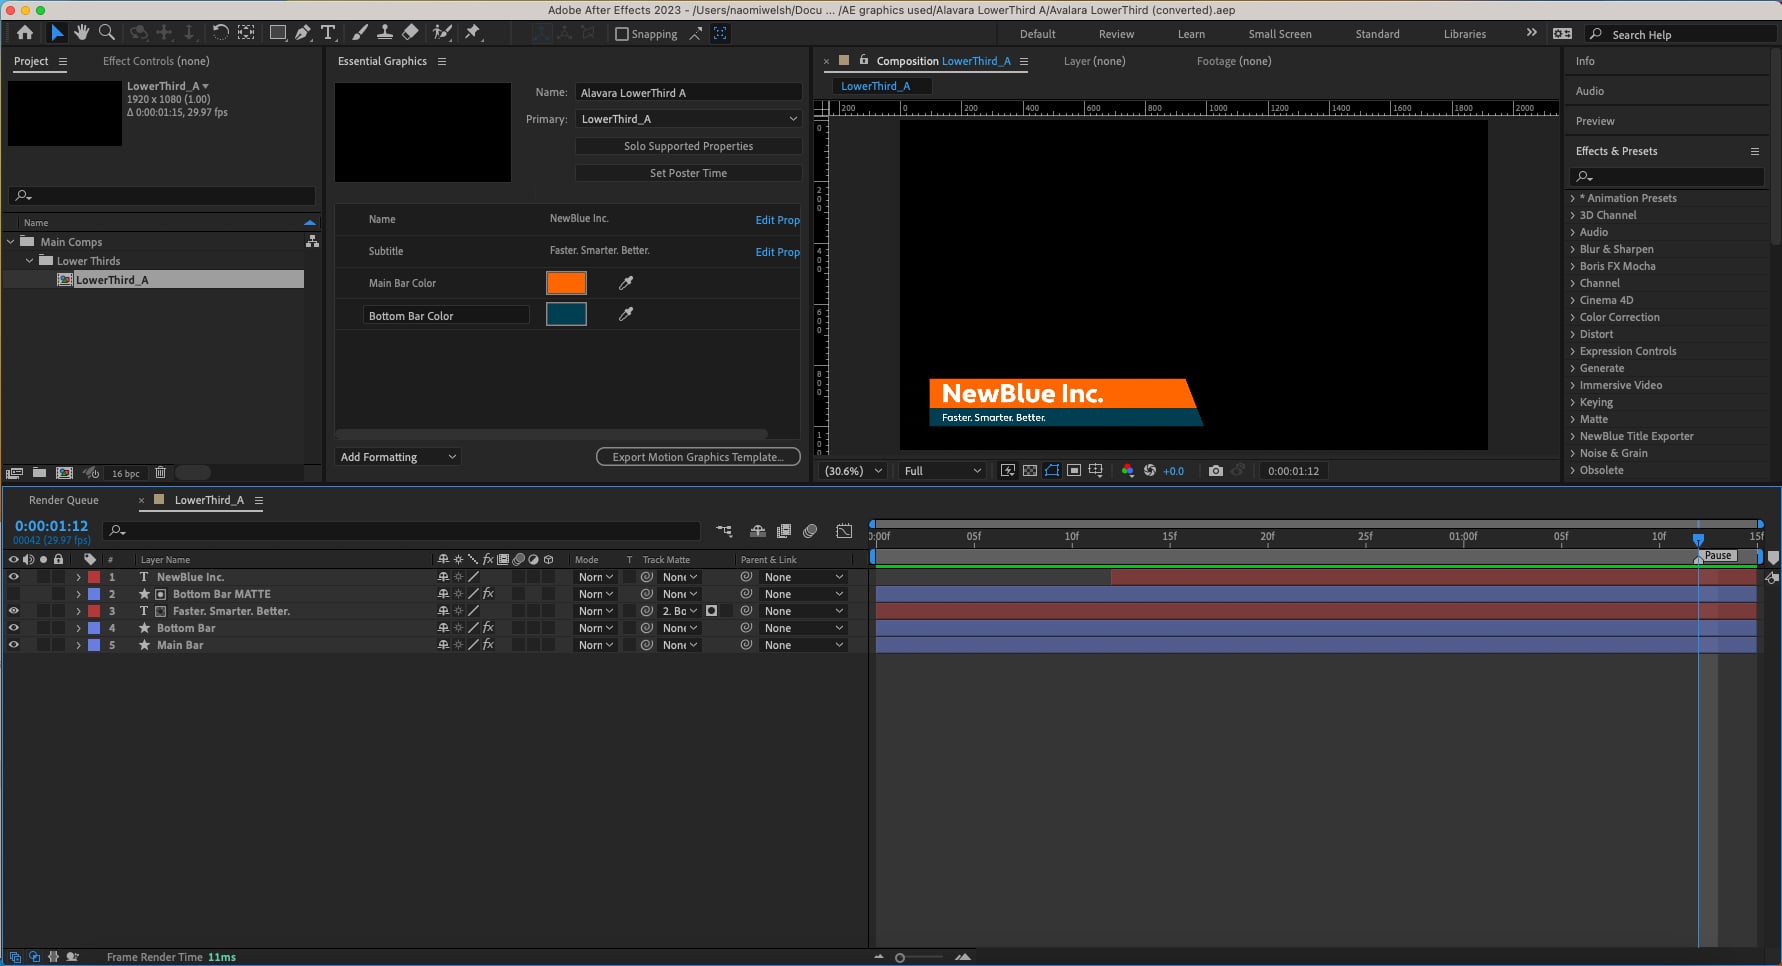
1. Open the Essential Graphics panel in After Effects by going to **Window** > **Essential Graphics**.
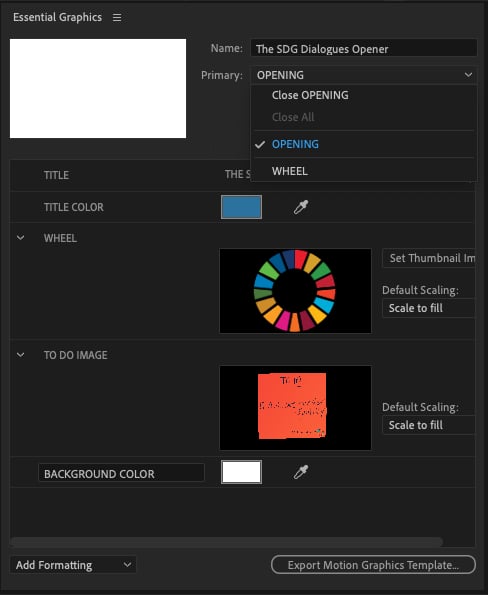
2. Choose the composition to export from the dropdown.
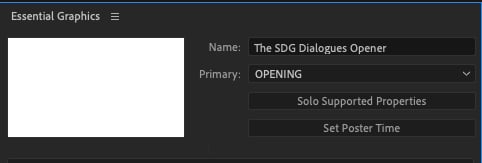
3. Click the **Solo Supported Properties** button.
4. Drag the supported properties into the Essential Graphics panel.
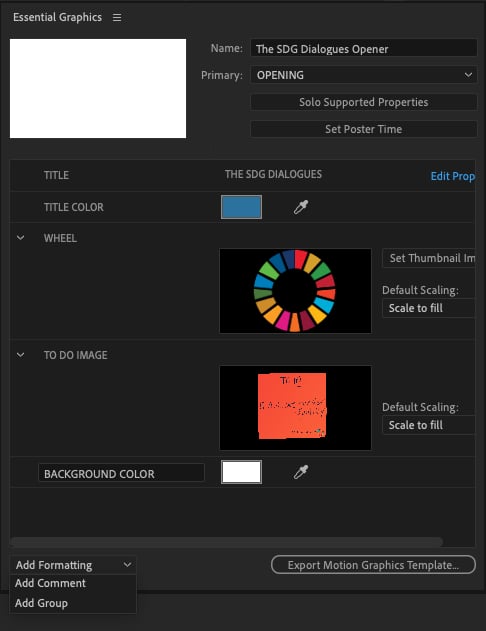
5. We recommend that you group your Layer Properties by going to the **Add Formatting** dropdown > **Add Group**.
6. Drag and drop all the properties for that layer into the group. Repeat as necessary.
7. After all supported properties have been added and grouped, click the **Export Motion Graphics Template** button.
## Setting a Pause Point
When you are sending a graphic on-air, it is essential that you set up a pause point so the graphic can stay live indefinitely, before you choose to animate it out. There are several methods to establish a custom Pause frame for your graphics. Additionally, Captivate can set an automatic pause point for you directly in the middle point of your duration.
### Setting a Composition Marker as a Pause Point
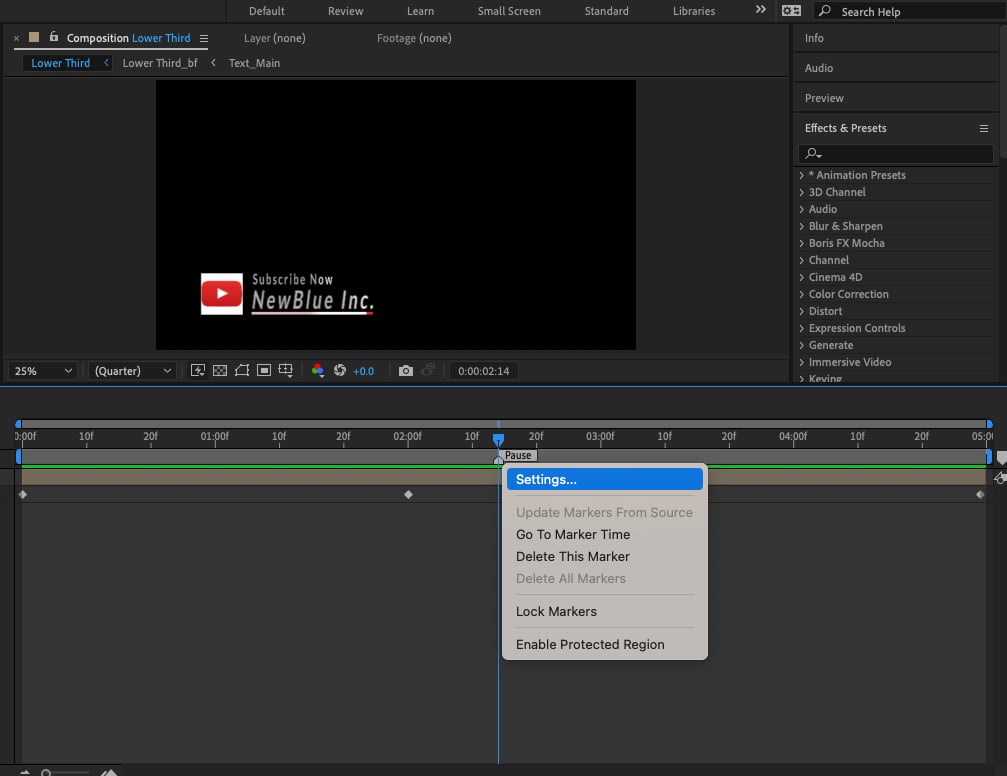
1. Drag in a Composition marker by clicking and dragging to the desired location from the top right of your timeline.
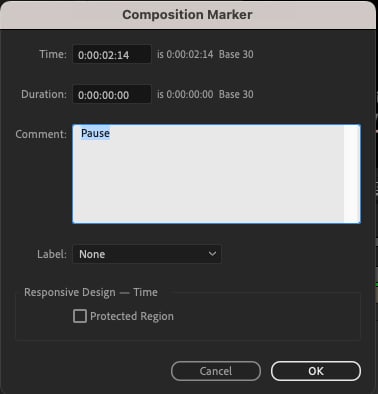
2. Label the marker "Pause" by double-clicking
or by right-clicking > **Settings**
and typing **Pause** in the Comment box.
### Captivate will also recognize Intro and Outro Protected Regions
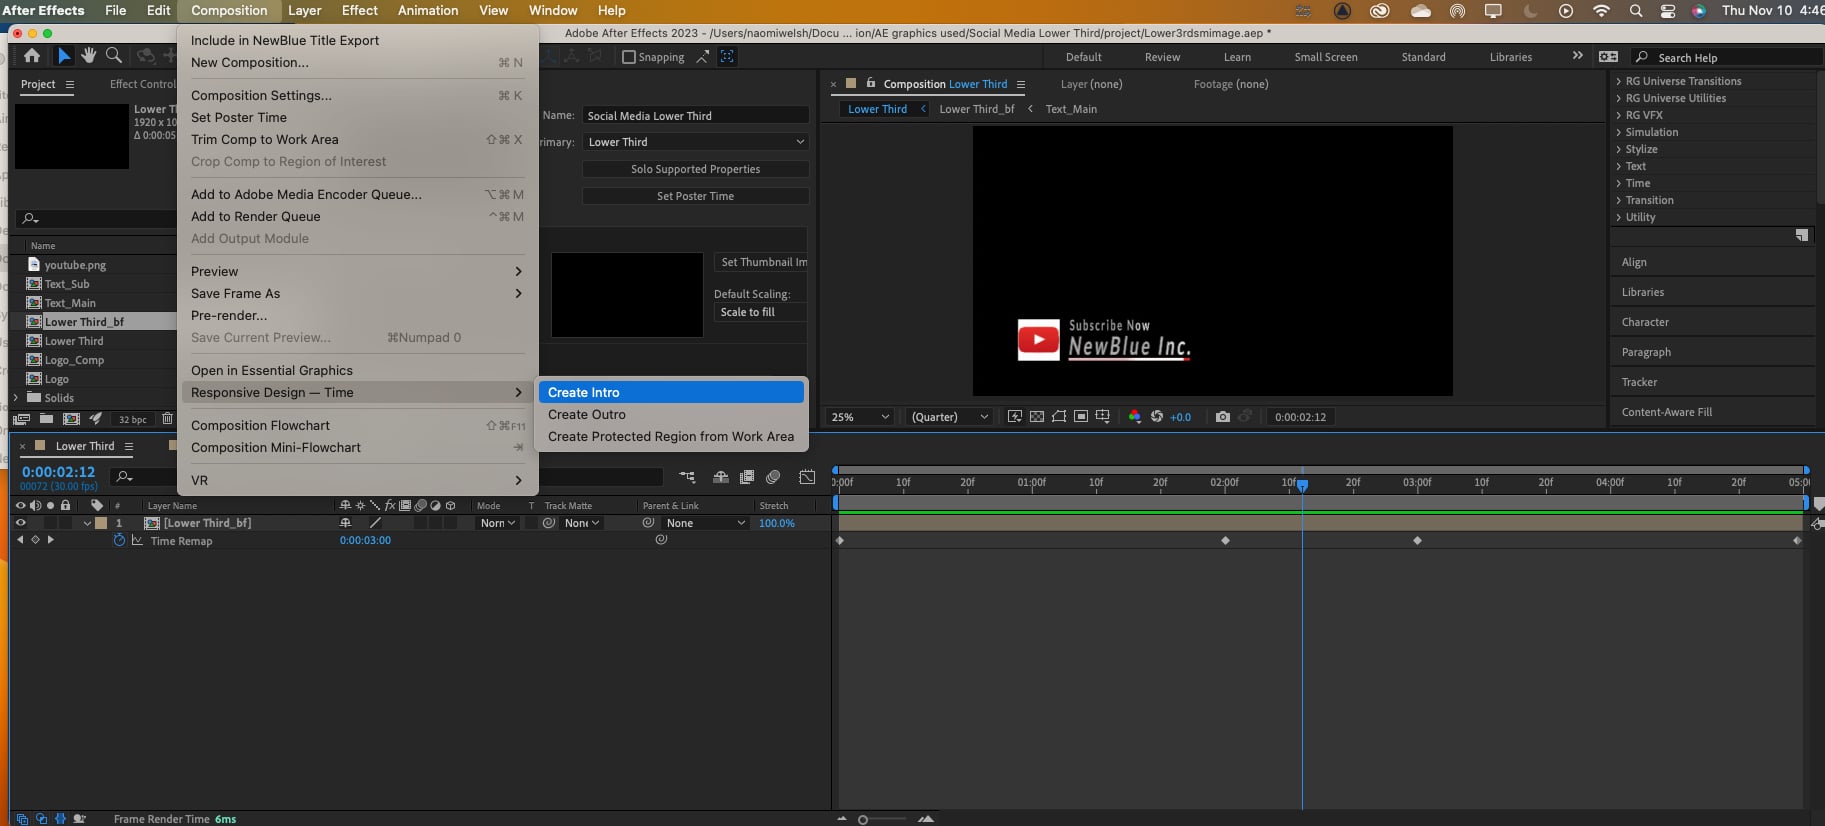
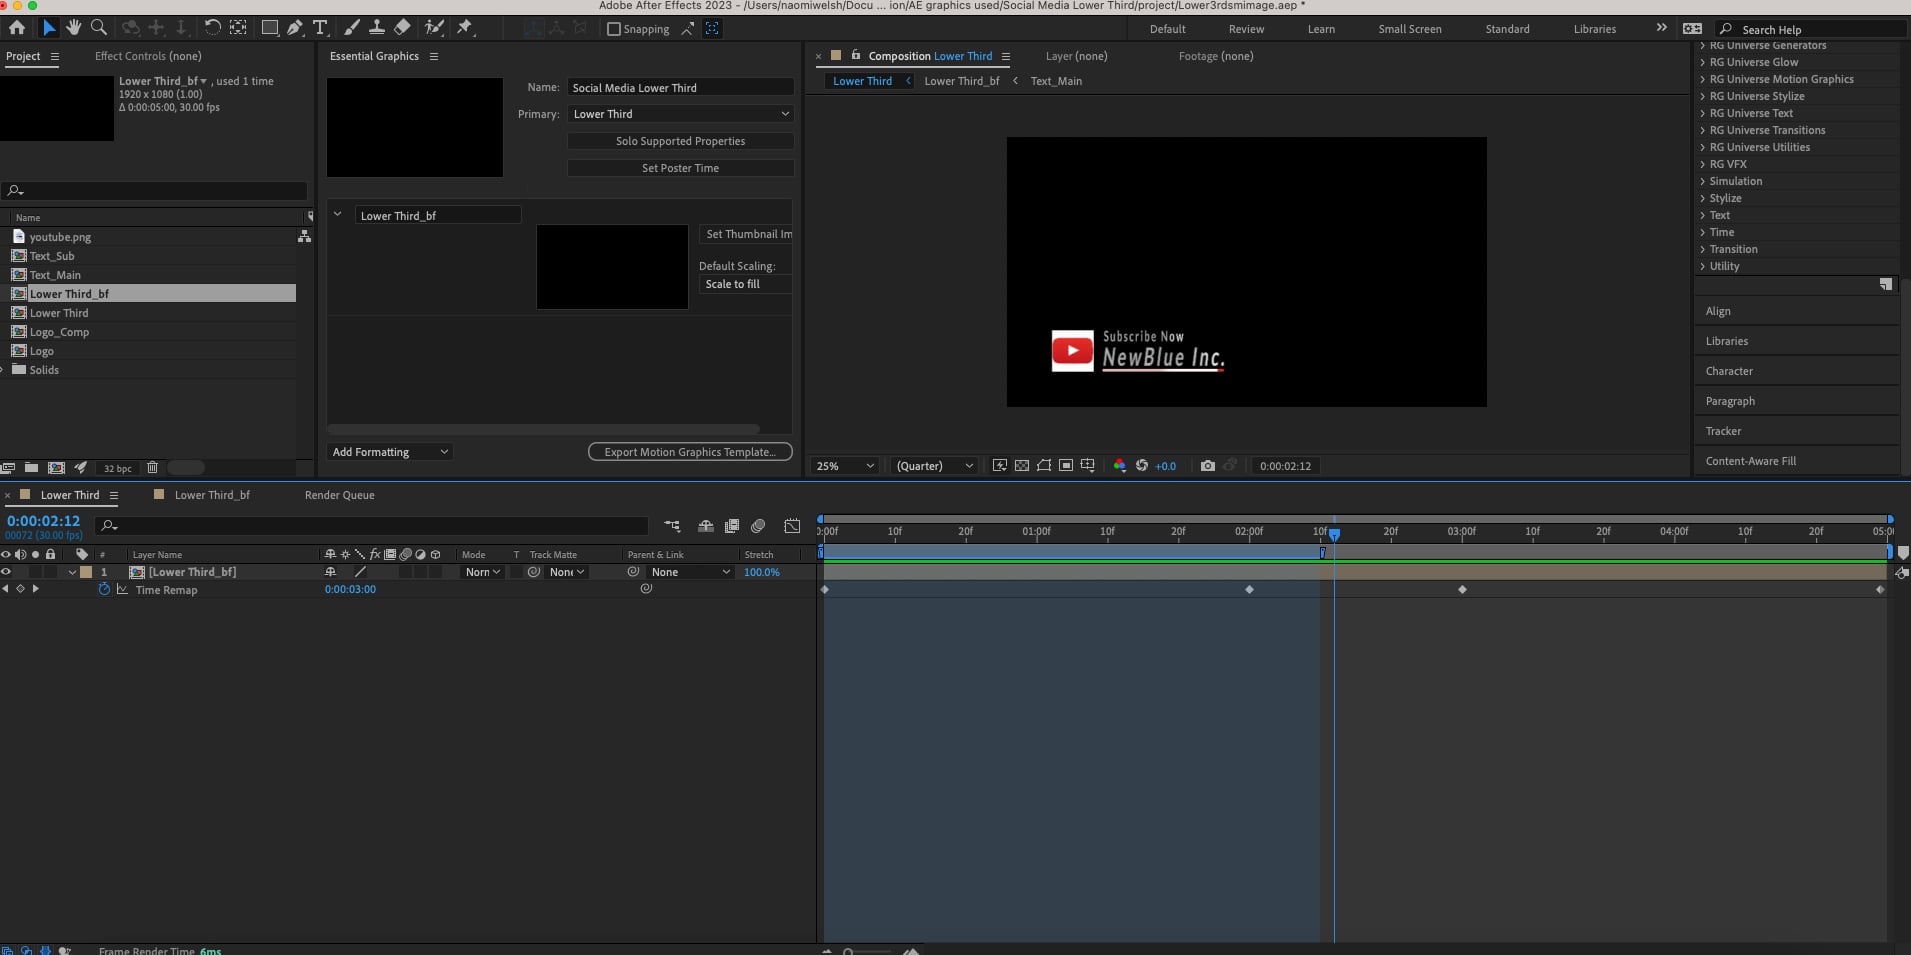
1. Go to **Composition** > **Responsive Design - Time** > **Create Intro**.
2. Drag the right side of the shaded region to cover all of the Intro animations.
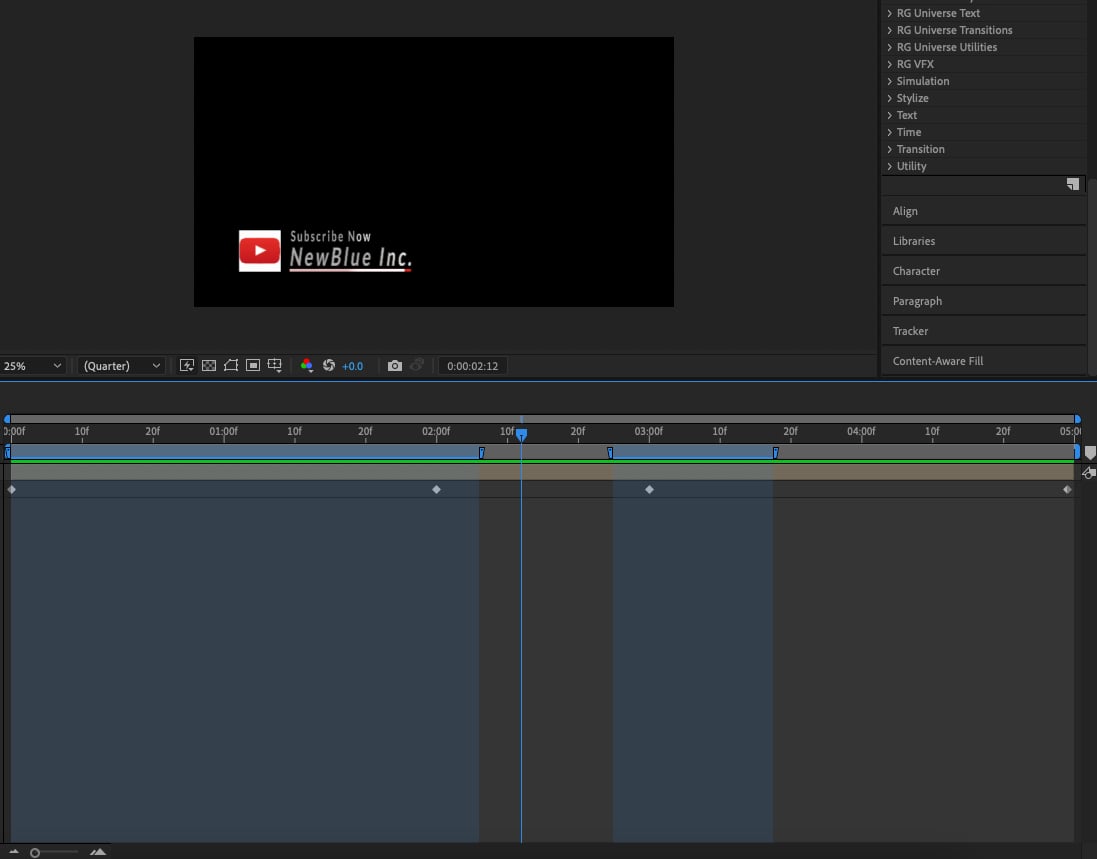
3. Then go to **Composition** > **Responsive Design - Time** > **Create Outro**.
4. To expand the Outro you will need to click and drag, then expand the right side of the shaded region to cover all of the Outro animations.
### Allow Captivate to set a default Pause Point
Captivate will establish a Pause Point in your composition in the following order of priority:
1. A Composition Marker labeled "Pause" (not case-sensitive).
2. If the above is not found, the frame before the "Outro" region.
3. If none of the above are found, the frame after the "Intro" region.
4. If none of the above are found, the midpoint of the composition’s duration.
{% hint style="info" %}
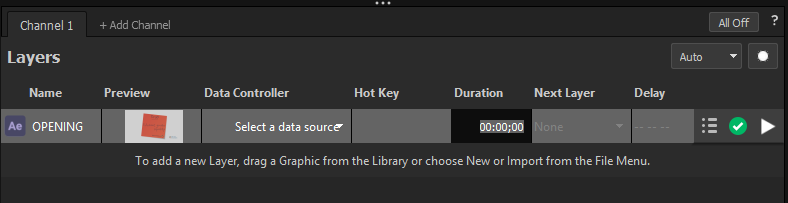
When Captivate automatically establishes a Pause Point in this way, the imported layer’s duration will be matched to the comp’s original duration in the Layers list. This will cause the graphic to play for the full duration of the imported comp and immediately go off-air. You can choose to have the graphic stay on-air indefinitely, at the generated Pause Point, by setting the duration to 00;00.
{% endhint %}
---
# Agent Instructions
This documentation is published with GitBook. GitBook is the documentation platform designed so that both humans and AI agents can read, navigate, and reason over technical content effectively. Learn more at gitbook.com.
## Querying This Documentation
If you need additional information that is not directly available in this page, you can query the documentation dynamically by asking a question.
Perform an HTTP GET request on the current page URL with the `ask` query parameter, and the optional `goal` query parameter:
```
GET https://captivatehelp.newbluelive.com/design-and-customize-graphics/chapter-index-6/preparing-your-after-effects-designs-for-import.md?ask=&goal=
```
`ask` is the immediate question: it should be specific, self-contained, and written in natural language.
`goal` is optional and describes the broader end goal you are ultimately trying to accomplish on behalf of the user. GitBook uses it to tailor the answer towards what is most useful for that goal.
The response will contain a direct answer to the question and relevant excerpts and sources from the documentation.
Use this mechanism when the answer is not explicitly present in the current page, you need clarification or additional context, or you want to retrieve related documentation sections.