> For the complete documentation index, see [llms.txt](https://captivatehelp.newbluelive.com/llms.txt). Markdown versions of documentation pages are available by appending `.md` to page URLs; this page is available as [Markdown](https://captivatehelp.newbluelive.com/design-and-customize-graphics/chapter-index-4/create-variables-in-graphics.md).
# Create variables in graphics
When you customize graphics in the Designer, you can create variables for design layers that allow manual entry or data sources to display custom information in a graphic, including variables for text, colors, gradients, images/videos, looping media files, and live video sources. You can also create variables for data-driven design layers including polls, scoreboards, and data graphs.
1. In Captivate’s playout interface, open a project and select a graphic layer in the Project List.
**💡 TIP**\
Want to create a new graphic? Open the Graphics Library panel and drag a design from the library to the Project List.
2. Click **Edit Graphic** in the Preview panel. The graphic opens in the Designer. Variables are managed across a few tabs in the Properties panel: the **Variables** tab is the central list for object-level variable bindings, but style-fill variables are created on the **Style** tab and conductor/NTX-style controls live on the **Special** tab. Each section below points to the tab it uses.
**💡 TIP**\
To change the order of variables, drag the reorder button. The order is reflected in your Layer Properties panel.
3. Create variables (see sections below).
**❗ IMPORTANT**\
Click the green checkmark at the bottom of the Timeline panel to confirm any changes from the Designer.
## Create color, gradient, image, and pre-recorded video variables
1. Select an object in the Designer’s Workspace or Timeline.
2. Click the **Properties > Style** tab.
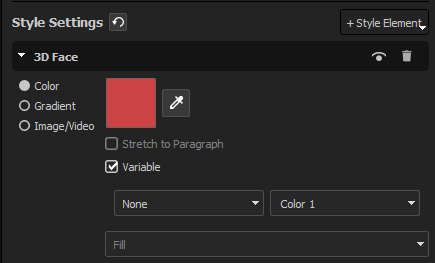
3. Select **Color**, **Gradient**, or **Image/Video** within a style element in **Style Settings**.
4. Mark the **Variable** checkbox.
5. If connecting to a data source, select it from the first dropdown below the checkbox. Otherwise leave it blank or set to **None**.
6. In the dropdown to the right of the checkbox, select a variable name or enter your own.
**💡 TIP**\
If your graphic is already connected to a data source, the left dropdown shows that data source and the right shows its variable names.
7. **Image/video variables only:** select a fit mode from the dropdown below the variable dropdowns:
* **Fill** — fills the bounding box, maintains proportions.
* **Fit** — fits inside dimensions without cropping, retains aspect ratio.
* **Stretch** — resizes to fit, may not maintain aspect ratio.
## Translate color, image/video variables
{% hint style="info" %}
Gradient variables cannot be translated.
{% endhint %}
1. Create a variable as described above.
2. In **Properties > Style**, mark **Variable Translation** in the 3D or 2D style layer section.
3. Double-click the **Value In** field and enter the incoming value.
4. Double-click the **Value Out** field and enter the value to display.
5. Repeat for each translation.
## Create text variables
1. Select a text layer in the timeline.
2. Click **Properties > Variables**.
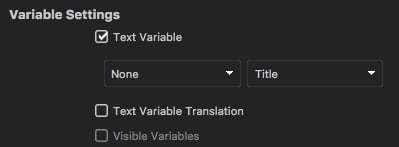
3. Mark **Text Variable** in **Variable Settings**.
4. If connecting to a data source, select it from the left dropdown. Otherwise leave blank or **None**.
5. In the right dropdown, select or create a variable name.
**💡 TIP**\
To create a new variable name, double-click the selected name, type a new one, and press Tab.
## Translate text variables
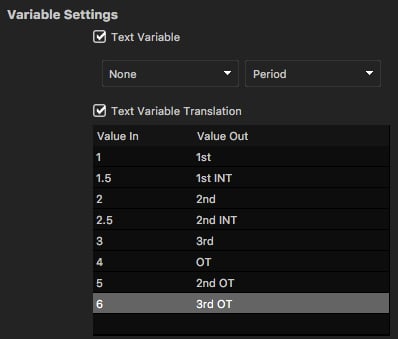
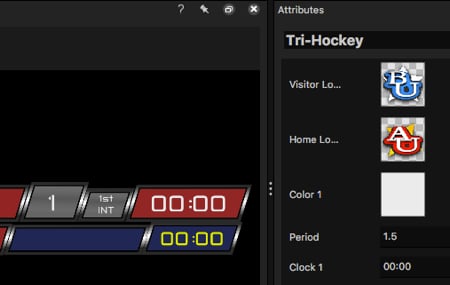
Captivate can read incoming data and display alternate text. For example, in a hockey scoreboard, intermissions often arrive as 1.5 and 2.5 — you can translate those to "1st INT" and "2nd INT".
1. Create a text variable first.
2. In **Properties > Variables**, mark **Text Variable Translation**.
3. Double-click **Value In** and enter the incoming value.
4. Double-click **Value Out** and enter the value to display.
5. Repeat for each translation.
## Create data graph variables
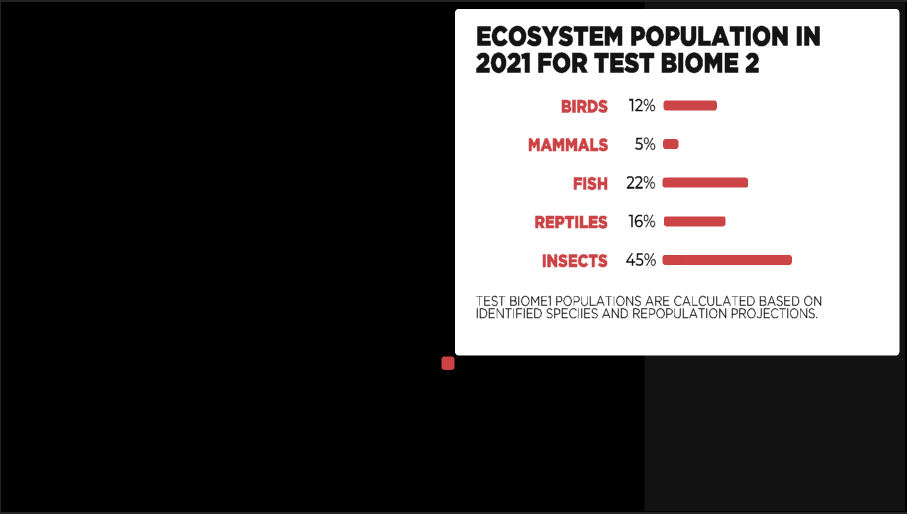
Use data graph variables with text or shape layers to show a percentage or quantity that changes dynamically with incoming data.
1. Select an object with a starting animation, transition, or keyframe.
**📌 NOTE**\
If the object isn’t connected to a numeric data source (or is connected to a Facebook poll), the variable can only represent percentages by text or image.
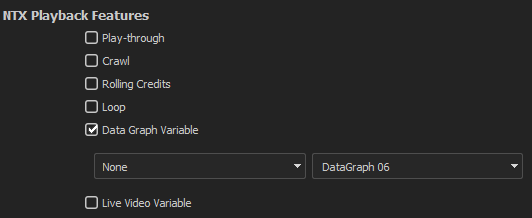
2. Click **Properties > Special**.
3. In **Properties > Special**, set **NTX Feature** to **Data Graph**.
4. Select a data source (or leave blank) and pick a variable name.
## Create live video variables
Live video variables link to a webcam or NDI-enabled camera.
1. Select a layer. Confirm dimensions match the live video aspect ratio.
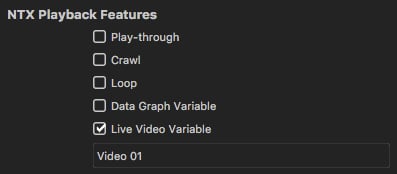
2. Click **Properties > Special**.
3. In **Properties > Special**, set **NTX Feature** to **Live Video Variable**.
4. Set **Fit Mode** — **Fill**, **Fit**, or **Stretch** — for how the live video scales into the layer.
5. Enter a variable name.
After saving (green checkmark), select the video source from the Layer Properties panel in the playout interface.
## Create a Media File variable
A **Media File** variable plays a local media file — a video, an animated GIF or animated WebP, or a still image — looped on the layer as a live source. The file starts from its beginning each time the graphic is taken, and any audio in the file mixes into the title. It differs from the image/video fill variable above: that one lives on the **Style** tab and binds a style element’s fill, while a Media File variable is an NTX feature that drives the whole layer and runs on its own loop, independent of the title’s timeline. It also differs from a **Live Video Variable**, whose source is a live camera or NDI input rather than a file.
1. Select a layer.
2. Click **Properties > Special**.
3. In **Properties > Special**, set **NTX Feature** to **Media File**.
4. Click **Choose File** next to **Media File** — the **Choose Media** picker opens, listing video files first — and pick the video, animated GIF or WebP, or image to play.
5. Set **Fit Mode** — **Fill**, **Fit**, or **Stretch** — for how the media scales into the layer. The fit is authored here in the design; the variable’s value is just the file.
6. Enter a **Variable Name**.
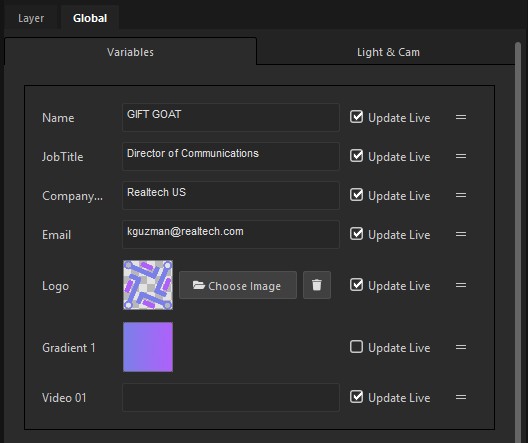
The file you choose is the variable’s design-time value, and changing it — here or in the Global Variables list, which shows the same file chooser — takes effect immediately at playout: the on-air layer switches to the new file, starting from its beginning. On the playout side, the variable appears in the **Live Values** tab and the Values Grid with a thumbnail and the same **Choose Media** picker, and because the value is a plain file path, a data source or the API can drive it too. See [Live Values tab — Media files](https://github.com/NewBlueFX/help-docs/tree/gitbook-test/gitbook/design-graphics/variables-and-linked-data/control-your-show/cue-and-take-live/live-data-tab.adoc#media-files).
## Create visibility variables
A visibility variable is a layer that appears in a graphic only when data is present.
1. Select an object.
2. Click **Properties > Variables**.
3. Mark **Visibility Variable** in **Variable Settings**.
4. Select a data source (or leave blank) and pick a variable name.
{% hint style="info" %}
**Image Variable and Visibility Variable are mutually exclusive on the same layer.** Enabling **Visibility Variable** on the Variables tab disables the **Image Variable** control on the Style tab, and vice versa. To get visibility-controlled imagery, either use an Image Variable with a transparent fallback image, place the image on its own layer and put the Visibility Variable on that layer, or split the design so each behavior lives on a different layer.
{% endhint %}
## Toggle visibility from the playout interface
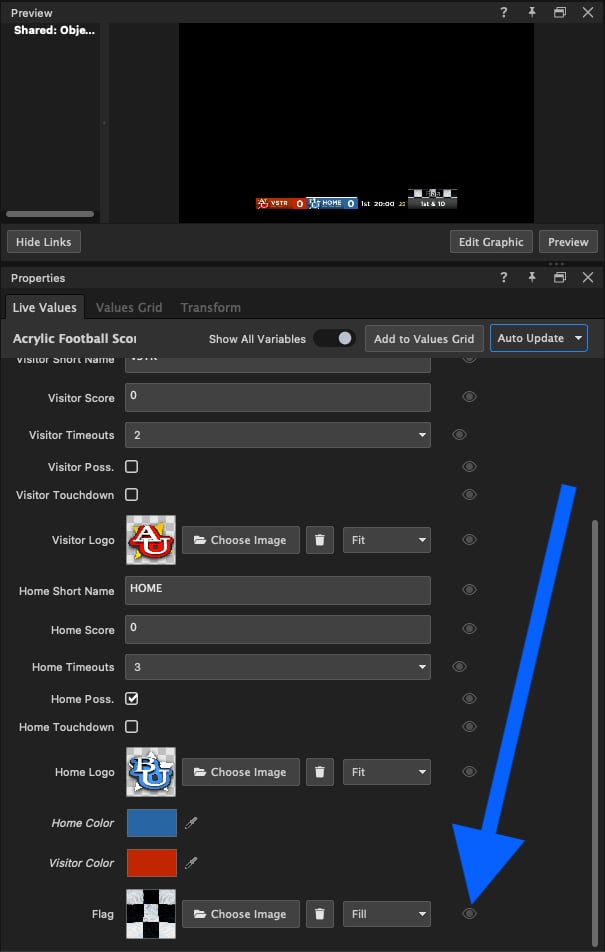
After saving (green checkmark), the eyeball icon in the main playout UI lets you toggle the visibility variable on and off without opening the Designer.
## Variable types and mutual exclusivity
A single layer can host more than one kind of variable, but some kinds are mutually exclusive. This matters when you build complex layers that mix text content, fill, and visibility behavior.
| Variable type | Where it lives |
| ----------------------------------- | ------------------------------------------------------------------------------------------------------------------------- |
| **Text Variable** | **Properties > Variables**. Binds the paragraph’s string content. |
| **Pattern Variable** | **Properties > Variables**. A text variable with a per-character pattern mask, used for clocks and scoreboards. |
| **Visibility Variable** | **Properties > Variables**. Binds the layer’s visible/hidden state. |
| **Text Variable Translation** | **Properties > Variables**. Translates incoming text values to designer-substituted text. |
| **Image, Video, or Color Variable** | **Properties > Style**, per style layer. Binds a style element’s fill. |
| **Data Graph Variable** | **Properties > Special**. Scales a layer’s geometry by a 0..1 value. |
| **Live Video Variable** | **Properties > Special**. Binds the layer’s content to a live video input. |
| **Media File Variable** | **Properties > Special**. Plays a looping local media file (animated GIF, video, or image) as a live source on the layer. |
The following combinations are mutually exclusive:
* **Text Variable** and **Visibility Variable** — enabling one disables the other. A single text layer cannot bind both its string and its visibility to the same source.
* **Visibility Variable** is also disabled when the layer has an **Image** or **Color Variable** enabled in **Properties > Style**, or when the layer is set up for **Object Following**.
* In **Properties > Special**, under **Special (NTX) Settings**, the **NTX Feature** dropdown is the mutually-exclusive selector. Options are **None**, **Play-through**, **Loop**, **Data Graph**, (on licenses that include video input) **Live Video Variable**, and **Media File**. A layer can use only one at a time. See [Loop videos and animations in a graphic](/design-and-customize-graphics/chapter-index-3/loop-videos-and-animations-in-a-graphic.md).
{% hint style="info" %}
Gradient variables cannot be translated. Color and image/video variables can be translated, and text variables can use a separate translation list.
{% endhint %}
{% hint style="info" %}
A small set of variable names is reserved by the engine: **Duration**, **Position**, and **Scale** (case-insensitive). If you try to use a reserved name, Captivate shows a **Reserved Name** warning. Pick a different name.
{% endhint %}
## Variable name flow to playout
The variable name you enter in the Designer becomes the binding key on the playout side. The Live Values tab and Data Controller mappings look variables up by this name.
If you rename a variable in the Designer after a Data Controller is already wired to it, the controller’s binding silently breaks — Captivate does not show a warning. Re-wire the controller after any rename.
---
# Agent Instructions
This documentation is published with GitBook. GitBook is the documentation platform designed so that both humans and AI agents can read, navigate, and reason over technical content effectively. Learn more at gitbook.com.
## Querying This Documentation
If you need additional information that is not directly available in this page, you can query the documentation dynamically by asking a question.
Perform an HTTP GET request on the current page URL with the `ask` query parameter, and the optional `goal` query parameter:
```
GET https://captivatehelp.newbluelive.com/design-and-customize-graphics/chapter-index-4/create-variables-in-graphics.md?ask=&goal=
```
`ask` is the immediate question: it should be specific, self-contained, and written in natural language.
`goal` is optional and describes the broader end goal you are ultimately trying to accomplish on behalf of the user. GitBook uses it to tailor the answer towards what is most useful for that goal.
The response will contain a direct answer to the question and relevant excerpts and sources from the documentation.
Use this mechanism when the answer is not explicitly present in the current page, you need clarification or additional context, or you want to retrieve related documentation sections.