> For the complete documentation index, see [llms.txt](https://captivatehelp.newbluelive.com/llms.txt). Markdown versions of documentation pages are available by appending `.md` to page URLs; this page is available as [Markdown](https://captivatehelp.newbluelive.com/design-and-customize-graphics/chapter-index-3/animate-design-layers-with-keyframes.md).
# Animate design layers with keyframes
When you customize graphics in the Designer, you can create keyframes to animate various properties of a graphic, including a design layer’s position, rotation, scale, opacity, effects, and transitions, as well as the lighting for the entire scene.
1. In Captivate’s playout interface, select a graphic layer and click **Edit Graphic**.
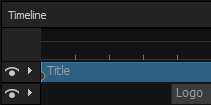
2. In the Designer’s canvas or Timeline, select a design layer or [group of design layers](/design-and-customize-graphics/chapter-index-2/group-design-layers-in-a-graphic.md) to animate.
**💡 TIP**\
Keyframe a group when you need to animate multiple objects while maintaining their relative position.
3. Navigate to one of the following tabs in the Properties panel for the type of property to animate:
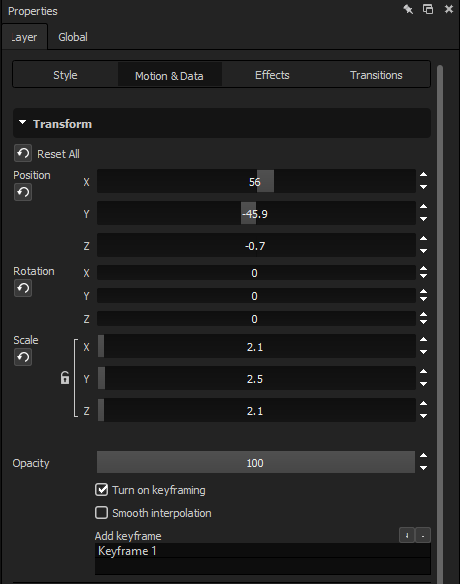
* **Properties > Transform** — position, scale, rotation, anchor.
* **Properties > Variables** — text and image variables.
* **Properties > Special** — NTX features (Play-through, Loop, Data Graph, Live Video Variable).
* **Properties > Audio** — audio level and source.
* **Properties > Effects**
* **Properties > Transitions**
* **Properties > Global > Light & Cam**
4. Mark the **Turn on keyframing** checkbox in the section for the property to animate.
When you mark **Turn on keyframing**, Captivate automatically adds the first keyframe at the beginning of the design layer within the timeline.
**📌 NOTE**\
The first keyframe at position 0 is not drawn on the timeline. It represents the starting values of the layer; subsequent keyframes appear normally.
Each keyframe records all properties for the keyframed property.
5. If you want the first keyframed animation to start later, **don’t** try to drag the hidden origin keyframe — it’s not drawn and not draggable. Instead, move the playhead to where the change should begin, click **Add keyframe** there with the current values, then move the playhead later and add the destination keyframe. The animation now runs between those two visible keyframes.
6. Add more keyframes:
1. Click the playhead in the timeline and drag it to the moment when you want the next keyframe.
**💡 TIP**\
If you want the last keyframe to look the same as the first, add it now before changing any properties. Move the playhead to the desired moment and click **Add keyframe**.
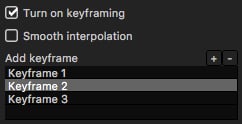
2. Change properties to reflect how the animation should change between the previous keyframe and the current playhead position. Captivate automatically adds a keyframe when you change a property (if an existing keyframe isn’t selected).
3. Repeat to add more keyframes.
**💡 TIP**\
To edit settings for an existing keyframe, select the keyframe in the list and adjust.
**💡 TIP**\
To delete a keyframe, select it and click **Remove keyframe**.
**📌 NOTE**\
Clearing the **Turn on keyframing** checkbox stops the layer from using the keyframes you’ve added. Re-enable keyframing and the existing keyframes apply again; the data is preserved while keyframing is off, so use the checkbox as a toggle rather than a delete.
7. To animate smoothly at each keyframe, mark **Smooth interpolation**.
**📌 NOTE**\
Some keyframed animations may appear slower than animations between keyframes when Smooth interpolation is on. Always preview to verify. The graphic will take longer to render. Keyframes can only be mapped to specific frames along the Timeline.
8. Preview the keyframed animation.
9. After you finish editing, click **Keep** in the bottom-right corner of the Timeline panel to save and update the graphic.
---
# Agent Instructions
This documentation is published with GitBook. GitBook is the documentation platform designed so that both humans and AI agents can read, navigate, and reason over technical content effectively. Learn more at gitbook.com.
## Querying This Documentation
If you need additional information that is not directly available in this page, you can query the documentation dynamically by asking a question.
Perform an HTTP GET request on the current page URL with the `ask` query parameter, and the optional `goal` query parameter:
```
GET https://captivatehelp.newbluelive.com/design-and-customize-graphics/chapter-index-3/animate-design-layers-with-keyframes.md?ask=&goal=
```
`ask` is the immediate question: it should be specific, self-contained, and written in natural language.
`goal` is optional and describes the broader end goal you are ultimately trying to accomplish on behalf of the user. GitBook uses it to tailor the answer towards what is most useful for that goal.
The response will contain a direct answer to the question and relevant excerpts and sources from the documentation.
Use this mechanism when the answer is not explicitly present in the current page, you need clarification or additional context, or you want to retrieve related documentation sections.