> For the complete documentation index, see [llms.txt](https://captivatehelp.newbluelive.com/llms.txt). Markdown versions of documentation pages are available by appending `.md` to page URLs; this page is available as [Markdown](https://captivatehelp.newbluelive.com/design-and-customize-graphics/chapter-index-2/customize-motion-and-additional-properties.md).
# Customize a design layer's motion and additional properties
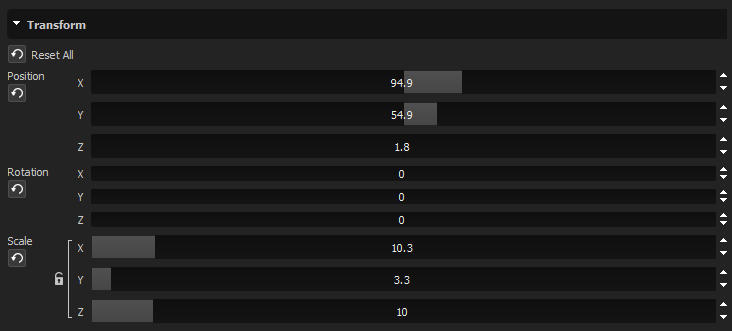
When you customize graphics in the Designer, you can use the Transform tab to access a design layer’s position, rotation, scale, transparency, and additional properties such as a shape layer’s skew or a text layer’s column width.
1. In Captivate’s playout interface, select a graphic in the Project List, then click **Edit Graphic**.
2. In the Designer, select a layer or group in the canvas or timeline workspace.
3. Click **Properties > Transform**.
**💡 TIP**\
You can use keyframes to animate Transform settings. See [Animate design layers with keyframes](/design-and-customize-graphics/chapter-index-3/animate-design-layers-with-keyframes.md).
## Transform the position, rotation, and scale of layers
In the Transform section, click the **Position**, **Rotation**, or **Scale** slider or arrows, or double-click the value and enter a new value.
**💡 TIP**\
Click the lock icon (tooltip: Lock aspect ratio) next to the Scale settings to adjust X, Y, and Z simultaneously and preserve aspect ratio. image::captivate-fusion-3/design-graphics/build-from-scratch/customize-motion-and-additional-properties/image\_6576.png\[Lock button]
**💡 TIP**\
Click **Reset All** to reset all Transform settings, or click the reset icon next to Position, Rotation, or Scale to reset that group only. image::captivate-fusion-3/design-graphics/build-from-scratch/customize-motion-and-additional-properties/image\_8829.png\[Reset button]
## Set transparency
Click the **Opacity** slider or arrows, or double-click the value.
{% hint style="info" %}
Adjusting Opacity from the Transform tab applies across all style elements of that design layer.
{% endhint %}
## Hide design layers
Mark **Hide shape** or **Hide paragraph** to hide a layer.
## Isolate design layers
Mark **Isolate Layer** to prevent the design layer from cutting into other design layers.
{% hint style="info" %}
Isolated design layers render separately, which takes longer to render the design.
{% endhint %}
## Render effects inside a paragraph box
Mark **Clip to Paragraph Box** to limit the render area of effects to within the boundary of a text box.
## Adjust margins
When **Clip to Paragraph Box** is marked, click the **Margin** slider or arrows to change the clip margin.
## Adjust the width of columns
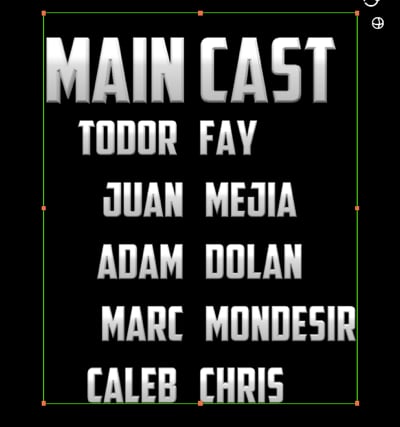
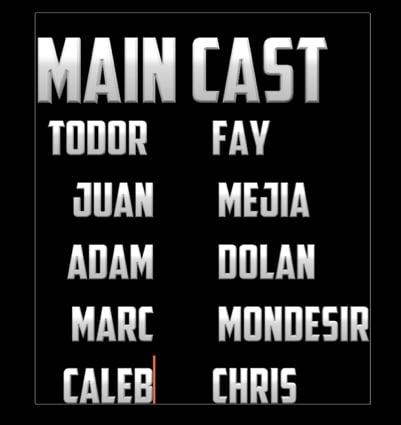
Click the **Column Width** slider or arrows, or double-click the value, to change the tabbed spacing between columns of text.
**💡 TIP**\
To create two columns: enter the first line for the first column, press **Tab**, then the first line for the second column. Repeat for each line.
Example with column width 0:
Example with column width 26:
---
# Agent Instructions
This documentation is published with GitBook. GitBook is the documentation platform designed so that both humans and AI agents can read, navigate, and reason over technical content effectively. Learn more at gitbook.com.
## Querying This Documentation
If you need additional information that is not directly available in this page, you can query the documentation dynamically by asking a question.
Perform an HTTP GET request on the current page URL with the `ask` query parameter, and the optional `goal` query parameter:
```
GET https://captivatehelp.newbluelive.com/design-and-customize-graphics/chapter-index-2/customize-motion-and-additional-properties.md?ask=&goal=
```
`ask` is the immediate question: it should be specific, self-contained, and written in natural language.
`goal` is optional and describes the broader end goal you are ultimately trying to accomplish on behalf of the user. GitBook uses it to tailor the answer towards what is most useful for that goal.
The response will contain a direct answer to the question and relevant excerpts and sources from the documentation.
Use this mechanism when the answer is not explicitly present in the current page, you need clarification or additional context, or you want to retrieve related documentation sections.