> For the complete documentation index, see [llms.txt](https://captivatehelp.newbluelive.com/llms.txt). Markdown versions of documentation pages are available by appending `.md` to page URLs; this page is available as [Markdown](https://captivatehelp.newbluelive.com/design-and-customize-graphics/chapter-index-2/customize-lighting-and-camera-settings.md).
# Customize lighting and camera settings
When you customize graphics in the Designer, you can control a scene’s lighting, camera angle, camera depth, and more.
1. In Captivate’s playout interface, select a graphic layer and click **Edit Graphic**.
2. In the Designer, click **Properties > Global > Light & Cam**.
**💡 TIP**\
You can use keyframes to change lighting. See [Animate design layers with keyframes](/design-and-customize-graphics/chapter-index-3/animate-design-layers-with-keyframes.md).
{% hint style="info" %}
The Camera Settings section is hidden when Captivate runs inside Adobe After Effects. The host composition’s camera takes over instead.
{% endhint %}
## Customize the camera angle
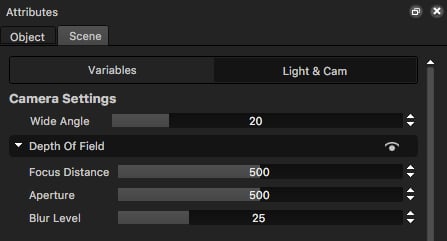
Drag the **Wide Angle** slider, click its steppers, or double-click the value, to distort objects as if viewed through a wide-angle lens.
## Customize the camera depth
1. If **Depth Of Field** isn’t enabled, click the eye icon in the Depth Of Field section header to enable it.
2. Expand **Depth Of Field** and adjust:
* **Focus Distance** — distance from the camera that’s in focus.
* **Aperture** — how broad the in-focus area is. Larger values broaden the in-focus area, which reduces **Blur Level**'s visible effect; smaller values narrow it and emphasize the blur.
* **Blur Level** — amount of blur applied to out-of-focus areas.
## Preview and add preset lighting effects
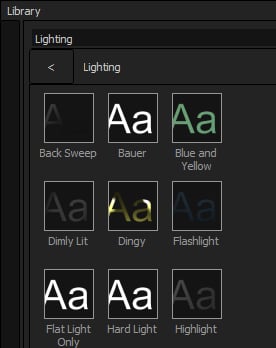
1. In the Designer, open the Library panel and select **Lighting** from the dropdown.
2. Hover to preview a lighting effect.
3. Double-click to apply.
When you add a lighting effect, **Properties > Global > Light & Cam** opens with editable attributes.
{% hint style="info" %}
Selecting a different preset discards changes to the previously selected preset.
{% endhint %}
## Customize lighting effects
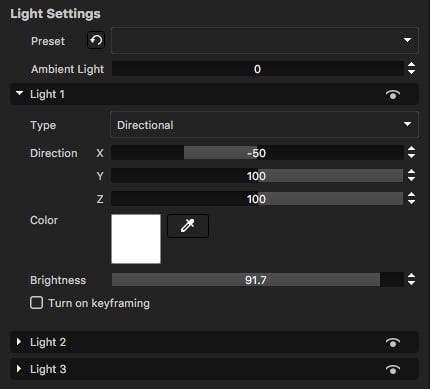
You can include up to three lights in a design and set each light’s color. Depending on the type of light, you may also be able to set direction and distance.
**💡 TIP**\
To reset a preset effect, click the **Reset** icon (circular arrow next to the Preset dropdown). image::captivate-fusion-3/design-graphics/build-from-scratch/customize-lighting-and-camera-settings/image\_6931.png\[Reset preset]
1. Select a **Type** of light from the dropdown in any of the available light slots (Light 1 through Light 3):
* **Point** — light in all directions from the chosen position.
* **Directional** — constant beam across a scene from a direction.
* **Spotlight** — illuminates a specific section from a position and direction.
2. Adjust the light’s settings either via the X, Y, Z sliders or via the Workspace controls:
1. Select an object in the Workspace or Timeline.
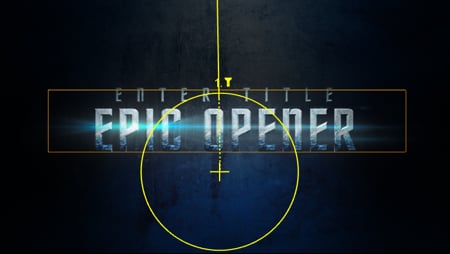
2. Click a light layer heading (Light 1) in **Properties > Global > Light & Cam**. A light settings globe appears over the object.
3. Drag the line inside the globe to change angle.
4. Drag the line away from or toward the center to change brightness.
**💡 TIP**\
Use **Soften** to blend spotlight edges. 0 creates a hard edge. Lower brightness on a Point light to localize it. If a light turns gray, it’s behind the objects.
3. To change a light’s color, click the color picker and pick a color, or open a color swatch:
* Click a color on the wheel.
* Click **Hex** or **Dec** and enter values.
* Use the color picker to pick from your screen. (Esc cancels.)
* Drag horizontal sliders for hue and opacity.
---
# Agent Instructions
This documentation is published with GitBook. GitBook is the documentation platform designed so that both humans and AI agents can read, navigate, and reason over technical content effectively. Learn more at gitbook.com.
## Querying This Documentation
If you need additional information that is not directly available in this page, you can query the documentation dynamically by asking a question.
Perform an HTTP GET request on the current page URL with the `ask` query parameter, and the optional `goal` query parameter:
```
GET https://captivatehelp.newbluelive.com/design-and-customize-graphics/chapter-index-2/customize-lighting-and-camera-settings.md?ask=&goal=
```
`ask` is the immediate question: it should be specific, self-contained, and written in natural language.
`goal` is optional and describes the broader end goal you are ultimately trying to accomplish on behalf of the user. GitBook uses it to tailor the answer towards what is most useful for that goal.
The response will contain a direct answer to the question and relevant excerpts and sources from the documentation.
Use this mechanism when the answer is not explicitly present in the current page, you need clarification or additional context, or you want to retrieve related documentation sections.