> For the complete documentation index, see [llms.txt](https://captivatehelp.newbluelive.com/llms.txt). Markdown versions of documentation pages are available by appending `.md` to page URLs; this page is available as [Markdown](https://captivatehelp.newbluelive.com/design-and-customize-graphics/chapter-index-2/add-styles-to-design-layers.md).
# Add styles to design layers
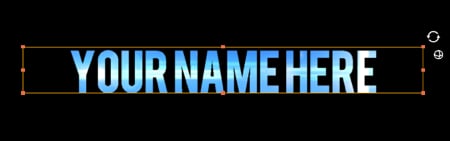
When you customize graphics in the Designer, you can use the style settings to control the look and feel of 2D and 3D objects with attributes such as fonts, alignment, kerning, colors, transparencies, bevels, extrusions, and more.
1. In Captivate’s playout interface, select a graphic layer and click **Edit Graphic**.
2. In the Designer, select an object or group in the Workspace or Timeline.
**💡 TIP**\
To add text or shapes, see [Add and modify text layers](/design-and-customize-graphics/chapter-index-2/add-and-modify-text-layers.md) and [Add and modify shape layers](/design-and-customize-graphics/chapter-index-2/add-and-modify-shape-layers.md).
3. To apply predesigned style presets from the library:
1. Open the Library panel.
2. Select **Styles** from the dropdown at the top.
3. Double-click a collection to view its style designs.
4. Hover over a preset to preview on the selected layer.
5. Double-click a preset to apply.
4. To customize style presets, click the **Properties > Style** tab.
## Customize text
### Set common text options (font, size, alignment, etc.)
To customize text from **Properties > Style**, select a character or paragraph in the Workspace, then use the Style tab’s formatting toolbar.
To scale text from within the Workspace, select characters and drag the text box to the desired size.
### Set kerning
Adjust the horizontal and vertical space between characters, lines of text, and objects.
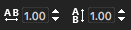
* In **Properties > Style**, enter new values in the kerning fields.
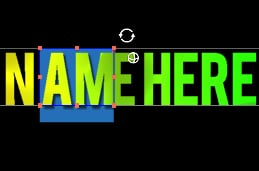
* In the Workspace, double-click a text layer, select characters, and either move the blue bounding box or press **Alt + Left/Right** arrow keys. (Alt + Up/Down adjusts leading, not kerning.)
### Fit text
Select a text layer in the Workspace or Timeline, then select one of the following from the **Fit Mode** dropdown:
* **Fit Box to Text** — The bounding box’s size changes with font size.
* **Fit Text to Box** — Text scales to fit inside the bounding box.
* **Fit Text to Box Width** — Text scales to fit the bounding box width (useful for lists and credit rolls).
* **Cut Text to Box** — Text is limited to the bounding box size.
## Add and customize 3D and 2D style elements
### Add 3D and 2D style elements
Select a layer in the Workspace or Timeline, then click the **+ Style Element** tool button in **Properties > Style** and pick one of the following from its popup menu (note the hyphen separator in the actual labels):
* **3D - Outline** — outline with extrusion and beveling.
* **3D - Face** — new 3D face with 3D properties.
* **3D - Gloss Face** — new 3D face with a preset gloss gradient.
* **2D - Shadow** — 2D shadow with 2D properties.
* **2D Outline Glow** — 2D glow.
* **2D Blurred Face** — colored 2D blur.
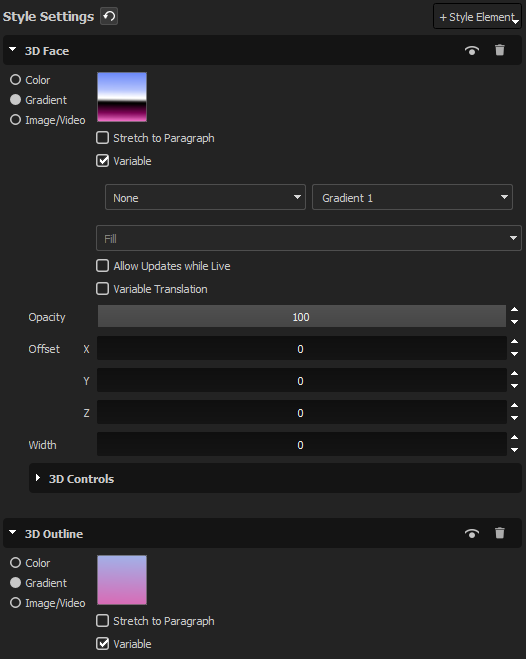
When you add a 3D style layer, two sections appear:
* **3D Outline / 3D Face / 3D Gloss Face** — change colors, gradients, map videos, enable variables, control transparency, offset, depth, and width.
* **3D Controls** — set depth, bevels, and shine.
Many 2D settings are the same as 3D, but extrusion is 3D-only.
### Add color
1. Select the **Color** option in a style element section of **Properties > Style**.
2. Click the color swatch.
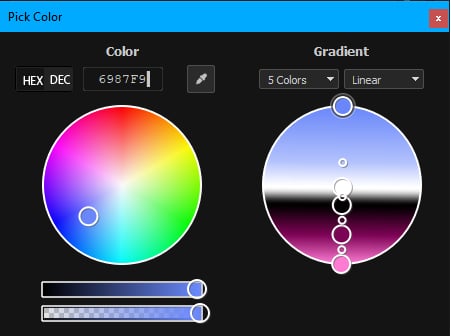
3. In the Pick Color dialog:
* Click a color on the wheel.
* Click **Hex** or **Dec** and enter values.
* Click the color picker, then click a color on your screen. (Press Esc to cancel.)
* Drag the horizontal sliders for hue and opacity.
**💡 TIP**\
To allow an operator or data source to set the color, create a color variable. See [Create variables in graphics](/design-and-customize-graphics/chapter-index-4/create-variables-in-graphics.md).
### Add gradients
1. Select the **Gradient** option in a style layer section.
2. Click the color swatch and pick a color.
3. In the Gradient section, select the number of colors and gradient type from the two dropdowns.
4. In the gradient color wheel, drag the large circles to adjust the color range and the small circles to adjust the transition.
### Add images and videos
1. Select **Image/Video** in the Style Settings of **Properties > Style**.
2. Select an image or video from your computer.
3. To map the whole image across the entire text layer (not repeating per character), mark **Stretch to Paragraph**.
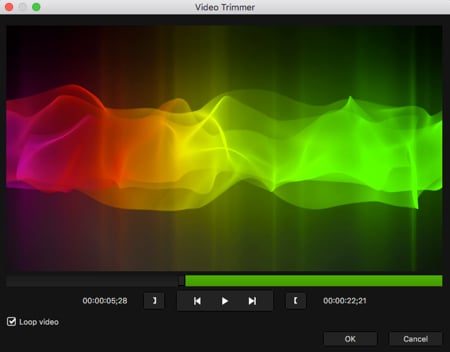
### Trim videos
1. Right-click (Win) or Control+click (Mac) on the video swatch and choose **Trim Video**.
2. Slide the playhead to the start and click **Mark In**.
3. Slide the playhead to the end and click **Mark Out**.
4. Mark **Loop Video** if desired.
5. Click **OK**.
### Set transparency, offset, depth, and width
Use the **Opacity**, **Offset**, **Z**, and **Width** sliders or arrows in a Style Settings section, or double-click a value and type a new one.
### Extrude a style element (3D only)
Use **Extrusion** to add depth.
### Add shine (3D only)
Use **Shininess** in 3D Controls.
### Map images or videos to sides (3D only)
Mark **Map to Sides** in 3D Controls.
### Create a reflective surface (3D only)
Mark **Environment Map** in 3D Controls.
### Bevel an object (3D only)
In 3D Controls:
* Adjust **Bevel Size**.
* Click a **Bevel** tile or drag the bevel grid points.
* Mark **Include Back Side** to bevel the backside.
### Add texture
Click **Normal Map Surface** in a 2D Style Settings section or in 3D Controls, then double-click a texture.
**💡 TIP**\
Hover the pointer over a texture in the library to preview it on the style element.
### Set blur (2D only)
Use **Blur** in a 2D Style Settings section. 0 is sharp; 100 is soft.
### Add an effect (2D only)
Click **Add Effect** in a 2D Style Settings section, then double-click an effect.
**💡 TIP**\
Hover the pointer over an effect in the library to preview.
## Save a style as a Library preset
You can save the style stack from any paragraph or shape to the Library as a reusable preset. There are four entry points:
1. **File > Save to Library > Style...** — saves the selected object’s full style stack.
2. Right-click on the canvas, then choose **Save to Library > Style...**.
3. Right-click on a layer in the Timeline, then choose **Save to Library > Style...**.
4. In the Style tab, right-click in the style stack and choose **Save preset...** (or **Save paragraph preset...** / **Save shape preset...** depending on the selection type).
All four paths save to the same Library location. Pick the entry point that matches your current focus.
{% hint style="info" %}
Applying a Style preset replaces the target’s entire style stack. There is no merge option. If you want to keep some existing layers, apply the preset only to a specific style layer by dropping the preset directly onto that layer in the Style tab.
{% endhint %}
{% hint style="info" %}
Style presets cannot be dragged onto a Conductor (Crawl, Roll, Leaderboard, or Grid). The drop is silently rejected. To restyle a conductor’s source group, edit the underlying paragraph or shape directly.
{% endhint %}
---
# Agent Instructions
This documentation is published with GitBook. GitBook is the documentation platform designed so that both humans and AI agents can read, navigate, and reason over technical content effectively. Learn more at gitbook.com.
## Querying This Documentation
If you need additional information that is not directly available in this page, you can query the documentation dynamically by asking a question.
Perform an HTTP GET request on the current page URL with the `ask` query parameter, and the optional `goal` query parameter:
```
GET https://captivatehelp.newbluelive.com/design-and-customize-graphics/chapter-index-2/add-styles-to-design-layers.md?ask=&goal=
```
`ask` is the immediate question: it should be specific, self-contained, and written in natural language.
`goal` is optional and describes the broader end goal you are ultimately trying to accomplish on behalf of the user. GitBook uses it to tailor the answer towards what is most useful for that goal.
The response will contain a direct answer to the question and relevant excerpts and sources from the documentation.
Use this mechanism when the answer is not explicitly present in the current page, you need clarification or additional context, or you want to retrieve related documentation sections.