> For the complete documentation index, see [llms.txt](https://captivatehelp.newbluelive.com/llms.txt). Markdown versions of documentation pages are available by appending `.md` to page URLs; this page is available as [Markdown](https://captivatehelp.newbluelive.com/design-and-customize-graphics/chapter-index-2/add-and-modify-text-layers.md).
# Add and modify text layers
When you customize graphics in the Designer, you can add text and control every aspect of how it renders — typeface, size, weight, alignment, kerning, leading, and how it fits inside its bounding box. Text layers are a paragraph object that holds the typed string plus a per-character style record.
* [Add text](#add-text)
* [Edit text](#edit-text)
* [Use font controls](#use-font-controls)
* [Set alignment](#set-alignment)
* [Set kerning and leading](#set-kerning-and-leading)
* [Choose a fit mode](#choose-a-fit-mode)
* [Use Caps modes](#use-caps-modes)
* [Use Style Breaks](#use-style-breaks)
* [Design the font style](#design-the-font-style)
* [Style individual characters](#style-individual-characters-advanced)
## Add text
You can add a text layer from two places:
1. The top toolbar’s **Add Text** button. Choose **Static text** (a fixed string) or **Variable text** (a string the playout operator or data controller updates).
2. The Workspace or Timeline right-click menu. Right-click an empty area and choose **Add Text > Static Text** or **Add Text > Dynamic Text**.
{% hint style="info" %}
Static and dynamic text differ only at creation. After creation, you can toggle a paragraph between static and dynamic by clearing or marking **Text Variable** in **Properties > Variables**.
{% endhint %}
## Edit text
1. Open a graphic in the Designer.
2. Double-click a text layer in the Workspace or Timeline to enter inline edit mode.
3. Type to update the text.
4. Click outside the layer to commit the edit.
## Use font controls
The **Style** tab in the Properties panel shows the **Font Controls** section at the top.
Select a character, paragraph, or group of characters, then use the controls:
* **Font family** — typeface selector.
* **Font style** — weight or variant available within the family.
* **Font size** — point size.
* **Bold**, **Italic**, **Underline** — toggleable style buttons.
Each control applies to whatever is selected. If no characters are selected, the change applies to the entire paragraph.
## Set alignment
The Font Controls section includes two alignment menus:
* **Horizontal alignment** — **Left**, **Center**, **Right**, or **Justify** (also labeled **Left and Right** in some contexts).
* **Vertical alignment** — **Top**, **Middle**, or **Bottom**.
Vertical alignment matters when the paragraph’s bounding box is taller than the rendered text.
## Set kerning and leading
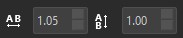
* **Kerning** controls horizontal spacing between characters. Enter a value in the kerning spin box in **Properties > Style**, or select characters in the Workspace and press Alt + Left/Right arrow.
* **Leading** controls vertical spacing between lines. Enter a value in the leading spin box.
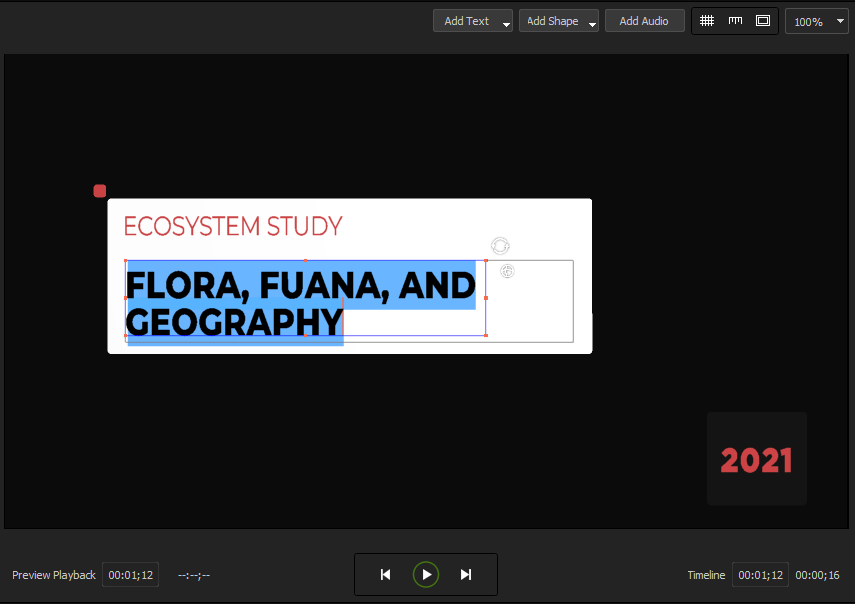
You can also drag the blue bounding box around selected characters in the Workspace to adjust kerning visually.
## Choose a fit mode
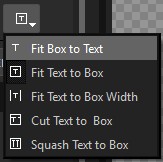
The **Fit Mode** dropdown in **Properties > Style** controls how the paragraph relates to its bounding box:
* **Fit Box to Text** — the bounding box grows or shrinks to match the rendered text. This is the default for new paragraphs.
* **Fit Text to Box** — the text scales to fit inside a fixed bounding box.
* **Fit Text to Box Width** — text scales to fit the box width. Useful for credit rolls and lists.
* **Cut Text to Box** — text is clipped at the bounding box edges.
* **Squash Text to Box** — text stretches non-uniformly to fill the box.
Pick **Fit Box to Text** when the content drives the size, and one of the others when the bounding box is fixed by the design.
## Use Caps modes
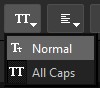
The **Caps** menu in Font Controls transforms how text renders without changing the stored string:
* **Normal** — render exactly as typed.
* **All Caps** — render in uppercase.
Because Caps is a render-time transform, a **Text Variable** round-trip preserves the original case. The playout operator types `Smith` and the graphic shows `SMITH` when Caps is **All Caps**.
## Use Style Breaks
Style Breaks let a single paragraph hold multiple styles separated by a special character. The runtime swaps styles at each delimiter.
1. With a text layer selected, open **Properties > Variables**.
2. Mark **Style Break**.
3. In the **Change style with a** combobox, choose a delimiter character (for example, `|`).
4. Type some test text using the delimiter to separate segments.
5. Set up the style you want for the first segment in **Properties > Style**.
6. Click **Record Styles** to capture the active style for that segment.
7. Move the caret past the next delimiter and repeat.
At playout time, the operator types `Home|Away` and the rendered text uses Style A for `Home` and Style B for `Away`.
{% hint style="info" %}
Style Break availability depends on your license. If the **Style Break** checkbox does not appear, the feature is not enabled in your license.
{% endhint %}
## Design the font style
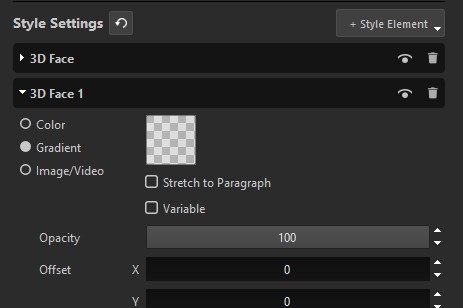
A text layer’s look is built on the **Style** tab, and it’s a deep toolset. You stack style elements — 3D faces, outlines, shadows, glows, bevels, and extrusions — give each its own color, gradient, image, or video fill, and animate any of it. Between them you can build out just about any text design you can imagine.
For the full set of style elements and how to edit each one, see [Add styles to design layers](/design-and-customize-graphics/chapter-index-2/add-styles-to-design-layers.md).
## Style individual characters (advanced)
You can give individual characters their own style, position, size, or rotation. Select characters by dragging across them, or by holding Shift and pressing the arrow keys, then apply any of the controls above to just that selection. This is powerful for fixed designs where each letter is placed by hand.
Reserve per-character styling for **Static text**. When you change a **Text Variable** at playout time, the paragraph’s default style is applied to the new string, so any mid-paragraph per-character styling is lost on update. Author a variable-driven paragraph so the entire string shares one style.
## Related
* [Add styles to design layers](/design-and-customize-graphics/chapter-index-2/add-styles-to-design-layers.md)
* [Create variables in graphics](/design-and-customize-graphics/chapter-index-4/create-variables-in-graphics.md)
* [Add and modify shape layers](/design-and-customize-graphics/chapter-index-2/add-and-modify-shape-layers.md)
---
# Agent Instructions
This documentation is published with GitBook. GitBook is the documentation platform designed so that both humans and AI agents can read, navigate, and reason over technical content effectively. Learn more at gitbook.com.
## Querying This Documentation
If you need additional information that is not directly available in this page, you can query the documentation dynamically by asking a question.
Perform an HTTP GET request on the current page URL with the `ask` query parameter, and the optional `goal` query parameter:
```
GET https://captivatehelp.newbluelive.com/design-and-customize-graphics/chapter-index-2/add-and-modify-text-layers.md?ask=&goal=
```
`ask` is the immediate question: it should be specific, self-contained, and written in natural language.
`goal` is optional and describes the broader end goal you are ultimately trying to accomplish on behalf of the user. GitBook uses it to tailor the answer towards what is most useful for that goal.
The response will contain a direct answer to the question and relevant excerpts and sources from the documentation.
Use this mechanism when the answer is not explicitly present in the current page, you need clarification or additional context, or you want to retrieve related documentation sections.