> For the complete documentation index, see [llms.txt](https://captivatehelp.newbluelive.com/llms.txt). Markdown versions of documentation pages are available by appending `.md` to page URLs; this page is available as [Markdown](https://captivatehelp.newbluelive.com/design-and-customize-graphics/chapter-index-1/designer-timeline-overview.md).
# Designer Timeline panel
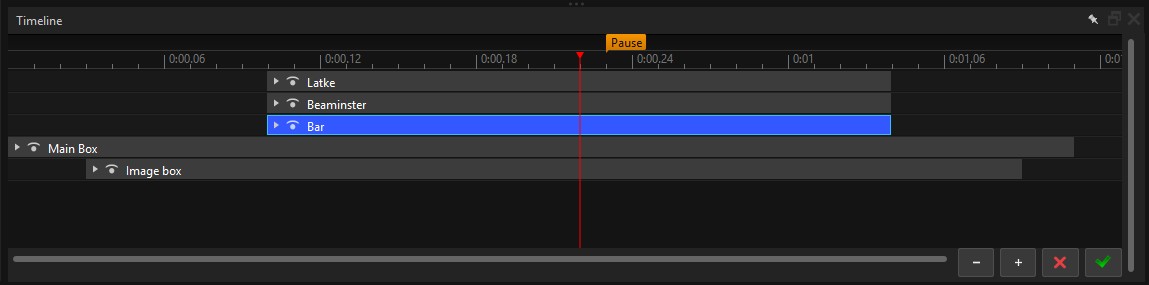
The **Timeline** is where you build a graphic and organize how it behaves over time. Every design layer — text, shapes, images, video, and the scene lights — has its own track here, stacked in render order and laid out along a time ruler. This is where you set when each layer appears and for how long, arrange which layer sits in front of which, and attach and retime the transitions, effects, and keyframes that animate the graphic. Setting a graphic’s overall duration is just one small part of the work you do here.
* [Set a graphic’s playback duration](#set-a-graphics-playback-duration)
* [Customize durations for design layers](#customize-duration-for-design-layers)
* [Order design layers](#order-design-layers)
* [Show and hide design layers](#show-and-hide-design-layers)
* [Show and hide a design layer’s details](#show-and-hide-a-design-layers-details)
* [Zoom and scroll](#zoom-and-scroll)
* [Light tracks](#light-tracks)
* [Pause Points and timeline markers](#pause-points-and-timeline-markers)
* [Adding layers from the Timeline](#adding-layers-from-the-timeline)
## Set a graphic’s playback duration
Enter a duration in the **Timeline** field near the bottom-right of the canvas. Format is MM:SS;FF.
{% hint style="info" %}
If the timeline includes a **Pause** point (orange marker), Captivate pauses the graphic at that moment during broadcast until the operator animates it out. See [Create custom designs with flexible durations](/design-and-customize-graphics/chapter-index-3/create-custom-designs-with-flexible-durations.md).
{% endhint %}
## Customize duration for design layers
Text and shapes appear in playback based on the design layer’s position and duration in the timeline.
* To move a layer, drag it left or right in the timeline, or press Ctrl/Cmd + left/right arrow to nudge by one frame.
* To trim or extend, drag the layer’s start or end.
## Order design layers
Click a layer and drag it up or down to a different track. There is no keyboard shortcut for moving a layer between tracks.
## Show and hide design layers
Click the **show/hide** (eye) icon at the top-left of a layer to turn the layer on and off. Hidden layers are not included in rendered graphics.
## Show and hide a design layer’s details
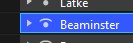
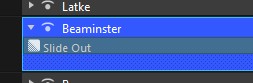
Click the triangle next to the show/hide icon to show or hide a layer’s transitions, effects, and keyframes.
When you expand a layer, the Timeline reveals:
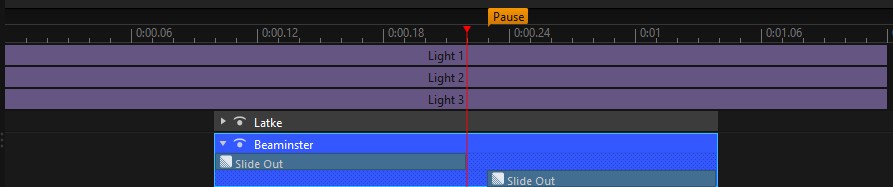
* The layer’s **transition strip** — bars representing the in/out transitions, draggable to retime.
* The layer’s **effect strip** — bars representing attached effects.
* **Keyframe diamonds** on each keyframable channel. Right-click a diamond for **Copy Keyframe**, **Paste Keyframe**, or **Delete Keyframe**.
{% hint style="info" %}
You must click directly on a keyframe diamond for **Copy Keyframe** and **Delete Keyframe** to appear in the context menu. **Paste Keyframe** additionally requires clicking in the upper portion of the layer row.
{% endhint %}
## Zoom and scroll
Use the **Zoom In** and **Zoom Out** buttons in the Timeline toolbar to change the horizontal scale. The Timeline opens fully zoomed-out so the entire title fits.
## Light tracks
When you open the **Properties > Global > Light & Cam** tab, the scene-level light tracks — **Light 1**, **Light 2**, and **Light 3** — appear at the top of the Timeline, above the design-layer tracks, one per light slot and animatable independently. They show only while that tab is open. See [Customize lighting and camera settings](/design-and-customize-graphics/chapter-index-2/customize-lighting-and-camera-settings.md).
Each light track shows keyframe diamonds when keyframing is enabled for that channel.
## Pause Points and timeline markers
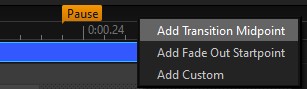
Right-click the ruler at the top of the Timeline to add a marker.
The Designer supports five marker types: **Pause Point**, **Transition Midpoint**, **Fade In Endpoint**, **Fade Out Startpoint**, and **Custom**. See [Create custom designs with flexible durations](/design-and-customize-graphics/chapter-index-3/create-custom-designs-with-flexible-durations.md) for marker semantics and authoring guidance.
## Adding layers from the Timeline
Right-click in an empty area of the Timeline to add a layer:
* **Add Text** — submenu of **Static Text** and **Dynamic Text**.
* **Add Shape** — submenu of **Ellipse** and **Rectangle**.
* **Add Image/Video...** — opens a file dialog.
{% hint style="info" %}
**Star** shapes are added from the top toolbar’s **Add Shape** button only. The Timeline right-click **Add Shape** submenu lists Ellipse and Rectangle.
{% endhint %}
{% hint style="info" %}
The Timeline’s **Add Image/Video...** dialog filters for common formats: PNG, JPG, JPEG, GIF, BMP, TGA, DDS, plus the video formats MP4, MPG, MPEG, MOV, AVI, WEBM. TIFF and WEBP image files are not supported as design-layer images; convert them to PNG or JPG first.
{% endhint %}
---
# Agent Instructions
This documentation is published with GitBook. GitBook is the documentation platform designed so that both humans and AI agents can read, navigate, and reason over technical content effectively. Learn more at gitbook.com.
## Querying This Documentation
If you need additional information that is not directly available in this page, you can query the documentation dynamically by asking a question.
Perform an HTTP GET request on the current page URL with the `ask` query parameter, and the optional `goal` query parameter:
```
GET https://captivatehelp.newbluelive.com/design-and-customize-graphics/chapter-index-1/designer-timeline-overview.md?ask=&goal=
```
`ask` is the immediate question: it should be specific, self-contained, and written in natural language.
`goal` is optional and describes the broader end goal you are ultimately trying to accomplish on behalf of the user. GitBook uses it to tailor the answer towards what is most useful for that goal.
The response will contain a direct answer to the question and relevant excerpts and sources from the documentation.
Use this mechanism when the answer is not explicitly present in the current page, you need clarification or additional context, or you want to retrieve related documentation sections.