> For the complete documentation index, see [llms.txt](https://captivatehelp.newbluelive.com/llms.txt). Markdown versions of documentation pages are available by appending `.md` to page URLs; this page is available as [Markdown](https://captivatehelp.newbluelive.com/control-your-show/chapter-index-4/assigning-buttons-for-project-navigation.md).
# Assign buttons for project navigation
Bitfocus Companion directly controls navigation, basic operations, and Play/Queue actions in Captivate. The team has developed preset, identifiable icons with feedback for quick setup, so you can operate the Layers panel from a mobile, tablet, or browser device.
* [Setting Up Preset Layers Navigation Buttons](#setting-up-preset-layers-navigation-buttons)
* [Preset Layers Navigation Buttons Available](#preset-layers-navigation-buttons-available)
* [Preset Layer Buttons Available](#preset-layer-buttons-available)
* [Preset Playout Buttons Available](#preset-playout-buttons)
## Setting Up Preset Layers Navigation Buttons
1. Have your Captivate project open with channels and layers set up.
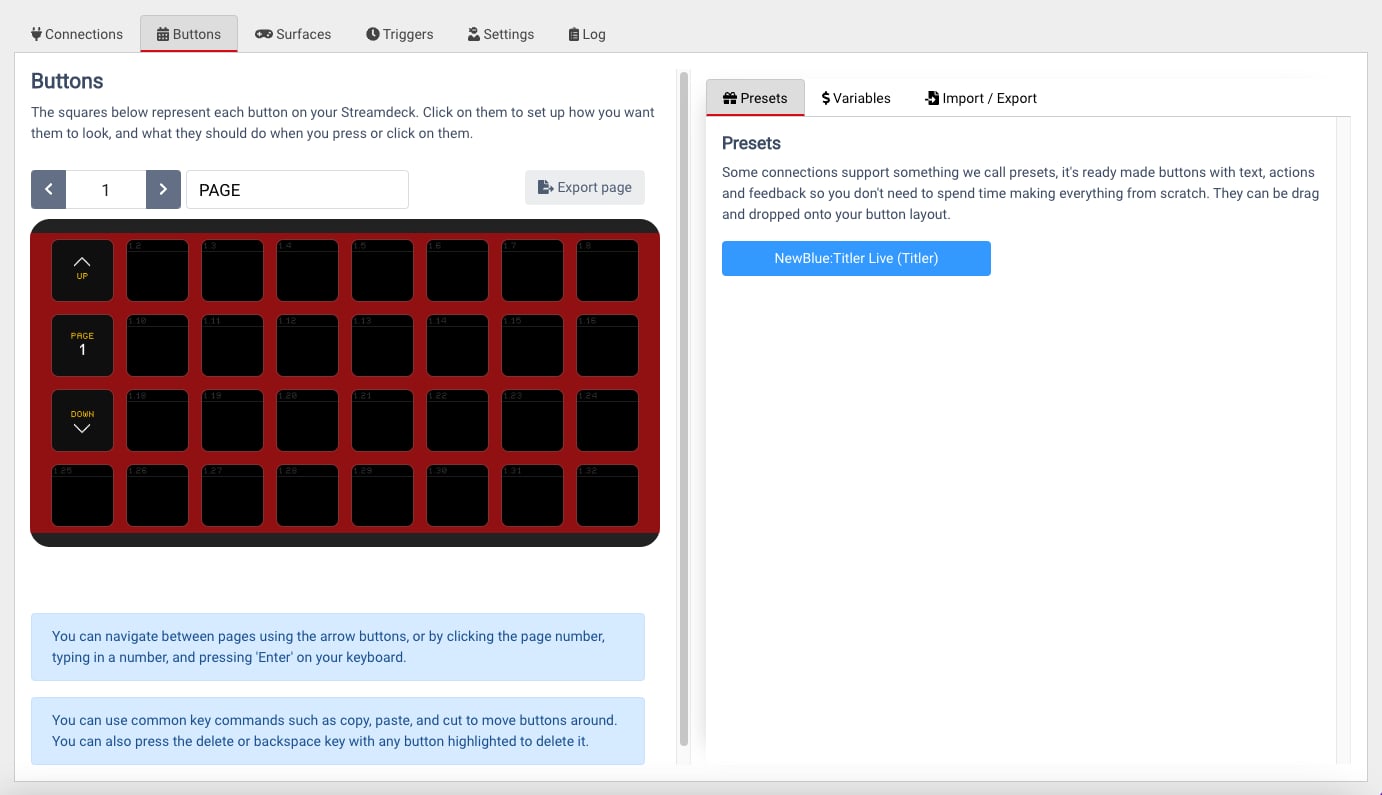
2. Navigate to the **Buttons** tab in the top-center menu.
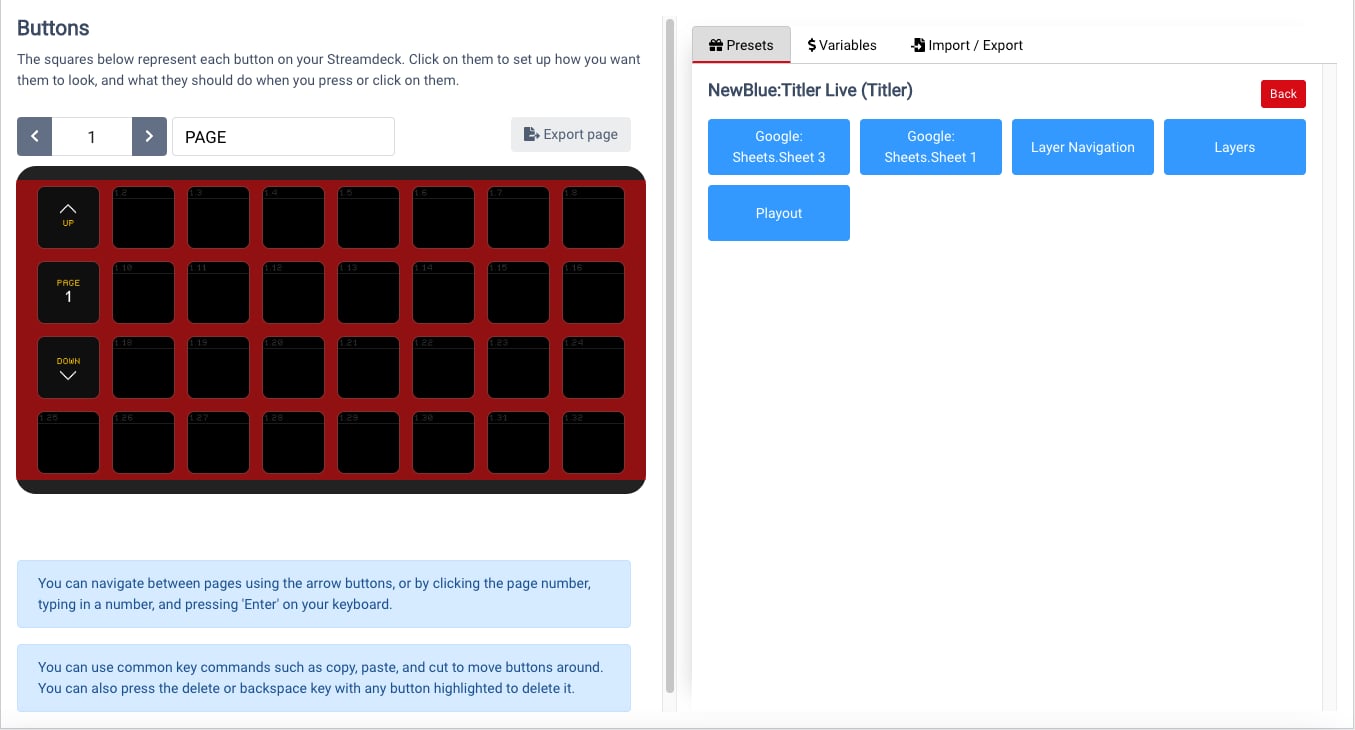
3. On the **Presets** tab in the right side menu, select **NewBlue: Captivate (Titler)**.
**📌 NOTE**\
Do not choose Titler Live 4.
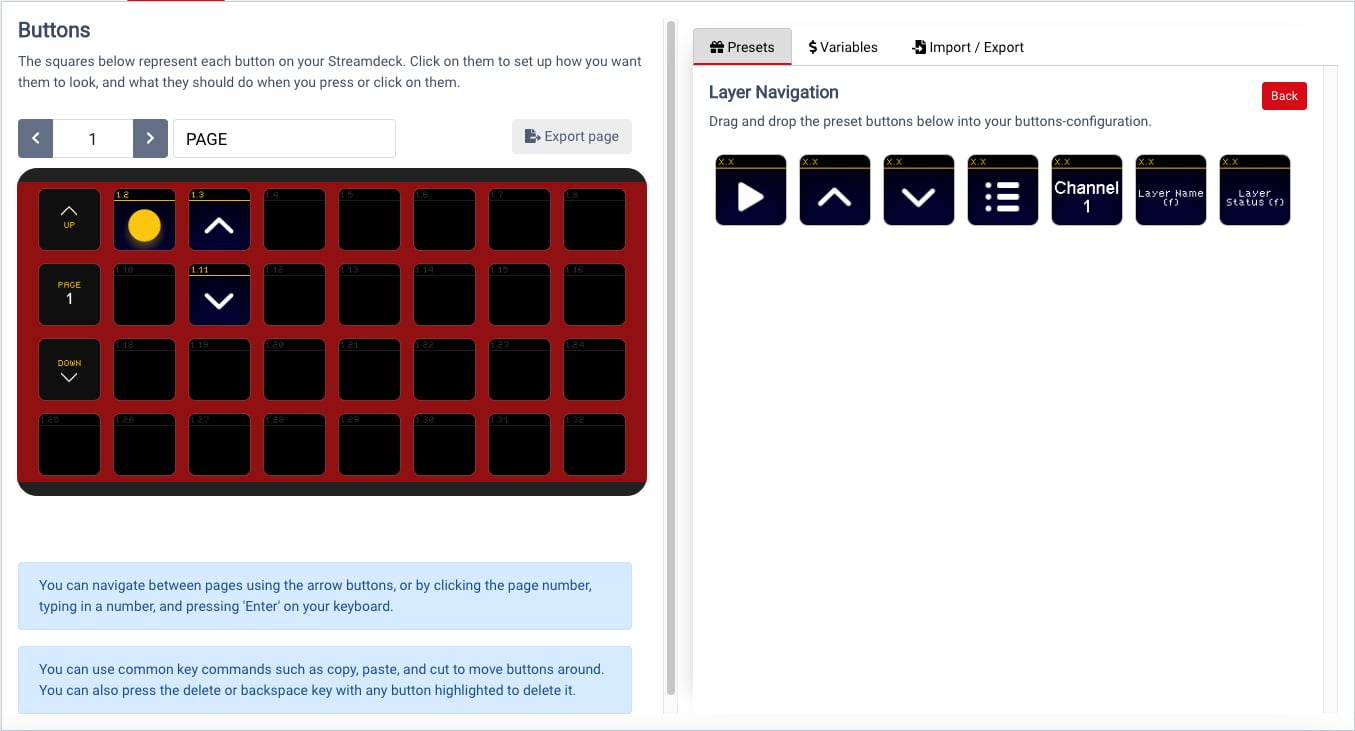
4. Select the **Layer Navigation** preset folder.
5. Drag and drop the Preset Layers Buttons to your desired location on the Buttons Configuration Board.
6. Choose the **Back** button in the **Presets** panel.
7. Repeat for **Layers** and **Playout**.
Test by selecting the button on the Configuration Panel and pressing **Test actions** to play live in the Program Monitor.
**💡 TIP**\
To customize button text, navigate to **Play Layer presets > Feedback**. Delete the current entry and set to the desired text.
## Preset Layers Navigation Buttons Available
| Action | Description | Equivalent action |
| ------------------------------------- | ----------------------------------------------------------------------------------------- | ------------------------------------------------------------ |
| **Play/Queue Selected Layer** | AutoLive: play the selected layer on/off-air. Queue: manage queue for the selected layer. | Clicking the Play icon next to the selected layer in Layers. |
| **Select Previous Layer** | Select the previous layer. | Up arrow on the keyboard. |
| **Select Next Layer** | Select the next layer. | Down arrow. |
| **Toggle Selected Layer Exclusivity** | Toggle whether the selected layer plays independently or as part of a Project List. | Clicking the exclusivity icon next to a layer. |
| **Select Channel** | Select a channel from your project. | Clicking a Channel tab. |
| **Selected Layer’s Name** | Feedback: reports the currently selected layer name. | (feedback only) |
| **Selected Channel** | Feedback: reports the currently selected channel. | (feedback only) |
## Preset Layer Buttons Available
| Action | Description | Equivalent action |
| -------------- | ------------------------------------------------------------------------------------------------------------------------------------------------------------------- | ------------------------------------------------------------------------------------------------- |
| **Play Layer** | AutoLive: play any particular layer with a dedicated button. Queue: manage queues with a dedicated button. Button overlays change based on AutoLive or Queue state. | AutoLive: clicking the Play icon next to the layer. Queue: clicking the circle next to the layer. |
## Preset Playout Buttons
| Action | Description | Equivalent action |
| -------------------------- | ------------------------------------------------------------------------------------------------------------------------------- | ------------------------------------------------------- |
| **All Off (Panic)** | Take all layers in all channels off-air. | Clicking "All off" in Layers. |
| **AutoLive** | Toggle between Auto Live and Queue mode. | Clicking the white circle button (AutoLive) in Layers. |
| **Play Action Out and In** | AutoLive: play selected on/off-air with the specified action. Queue: execute on Queue. Presets include Auto, Auto-in, and Take. | Spacebar (AutoLive) or specified action button (Queue). |
| **Play Action In** | AutoLive: play selected on-air with the specified action. Queue: execute on Queue. | Spacebar (on) or action button (Queue). |
| **Play Action Out** | AutoLive: play selected off-air with the specified action. Queue: execute on Queue. | Spacebar (off) or action button (Queue). |
**💡 TIP**\
All buttons configured in Companion can also be played by your Elgato Stream Deck. See [Set up Bitfocus Companion](/control-your-show/chapter-index-4/bitfocus-companion-setup.md).
For connecting your Spreadsheet Controllers to Companion, see [Spreadsheet Controller Operation](/control-your-show/chapter-index-4/tables-controller-with-companion.md).
---
# Agent Instructions
This documentation is published with GitBook. GitBook is the documentation platform designed so that both humans and AI agents can read, navigate, and reason over technical content effectively. Learn more at gitbook.com.
## Querying This Documentation
If you need additional information that is not directly available in this page, you can query the documentation dynamically by asking a question.
Perform an HTTP GET request on the current page URL with the `ask` query parameter, and the optional `goal` query parameter:
```
GET https://captivatehelp.newbluelive.com/control-your-show/chapter-index-4/assigning-buttons-for-project-navigation.md?ask=&goal=
```
`ask` is the immediate question: it should be specific, self-contained, and written in natural language.
`goal` is optional and describes the broader end goal you are ultimately trying to accomplish on behalf of the user. GitBook uses it to tailor the answer towards what is most useful for that goal.
The response will contain a direct answer to the question and relevant excerpts and sources from the documentation.
Use this mechanism when the answer is not explicitly present in the current page, you need clarification or additional context, or you want to retrieve related documentation sections.