> For the complete documentation index, see [llms.txt](https://captivatehelp.newbluelive.com/llms.txt). Markdown versions of documentation pages are available by appending `.md` to page URLs; this page is available as [Markdown](https://captivatehelp.newbluelive.com/control-your-show/chapter-index-1/creating-shot-layouts.md).
# Create Shot Layouts
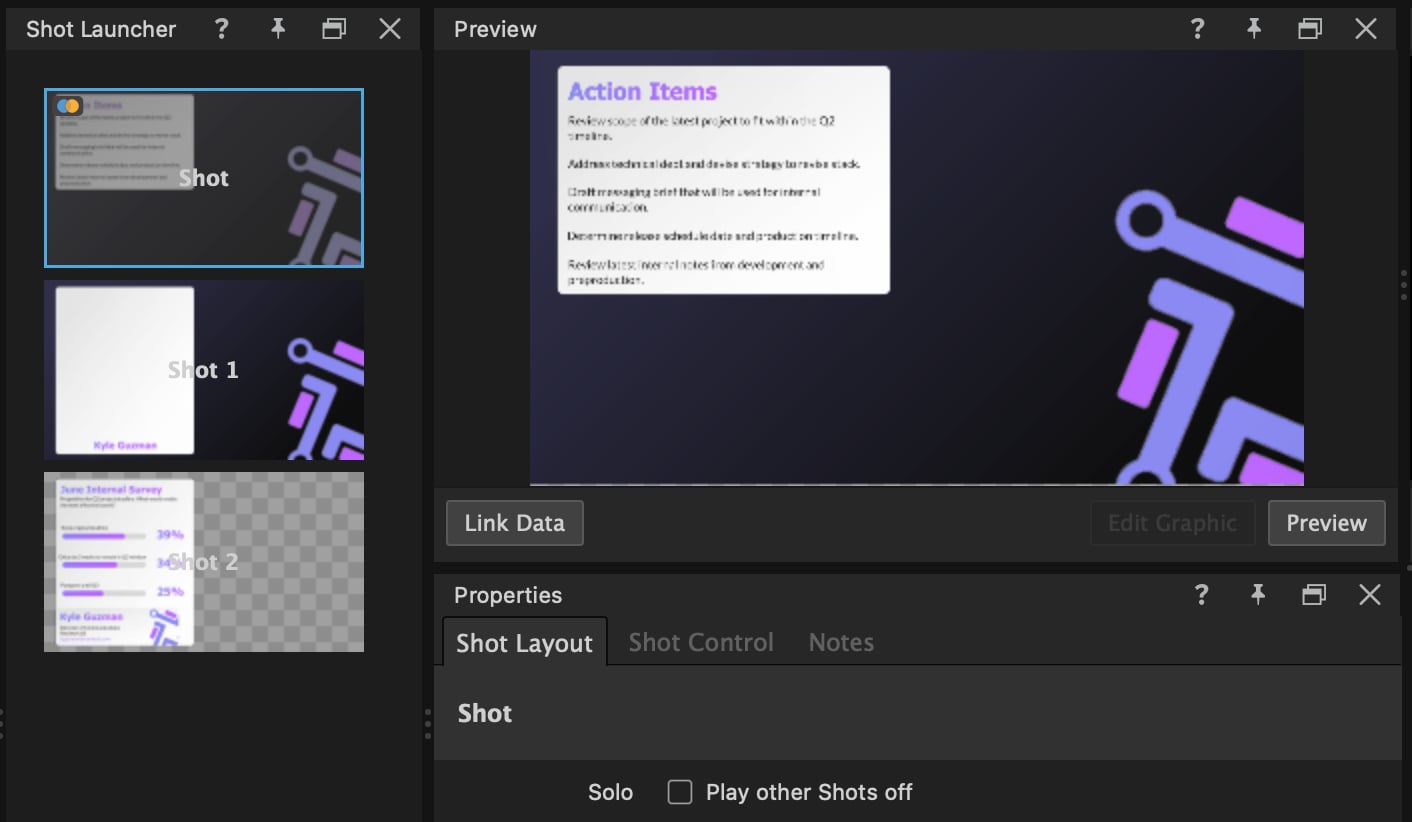
A **Shot Layout** combines multiple graphics into one playable composite. Trigger the shot from the Shot Launcher panel or the Project List and Captivate plays every graphic in the shot together as a single graphic.
* [Group graphics into a single shot](#group-graphics-into-a-single-shot)
* [Shot Properties](#shot-properties)
* [Shot Values](#shot-values)
* [Shot Audio](#shot-audio)
* [Shot transitions](#shot-transitions)
## Group graphics into a single shot
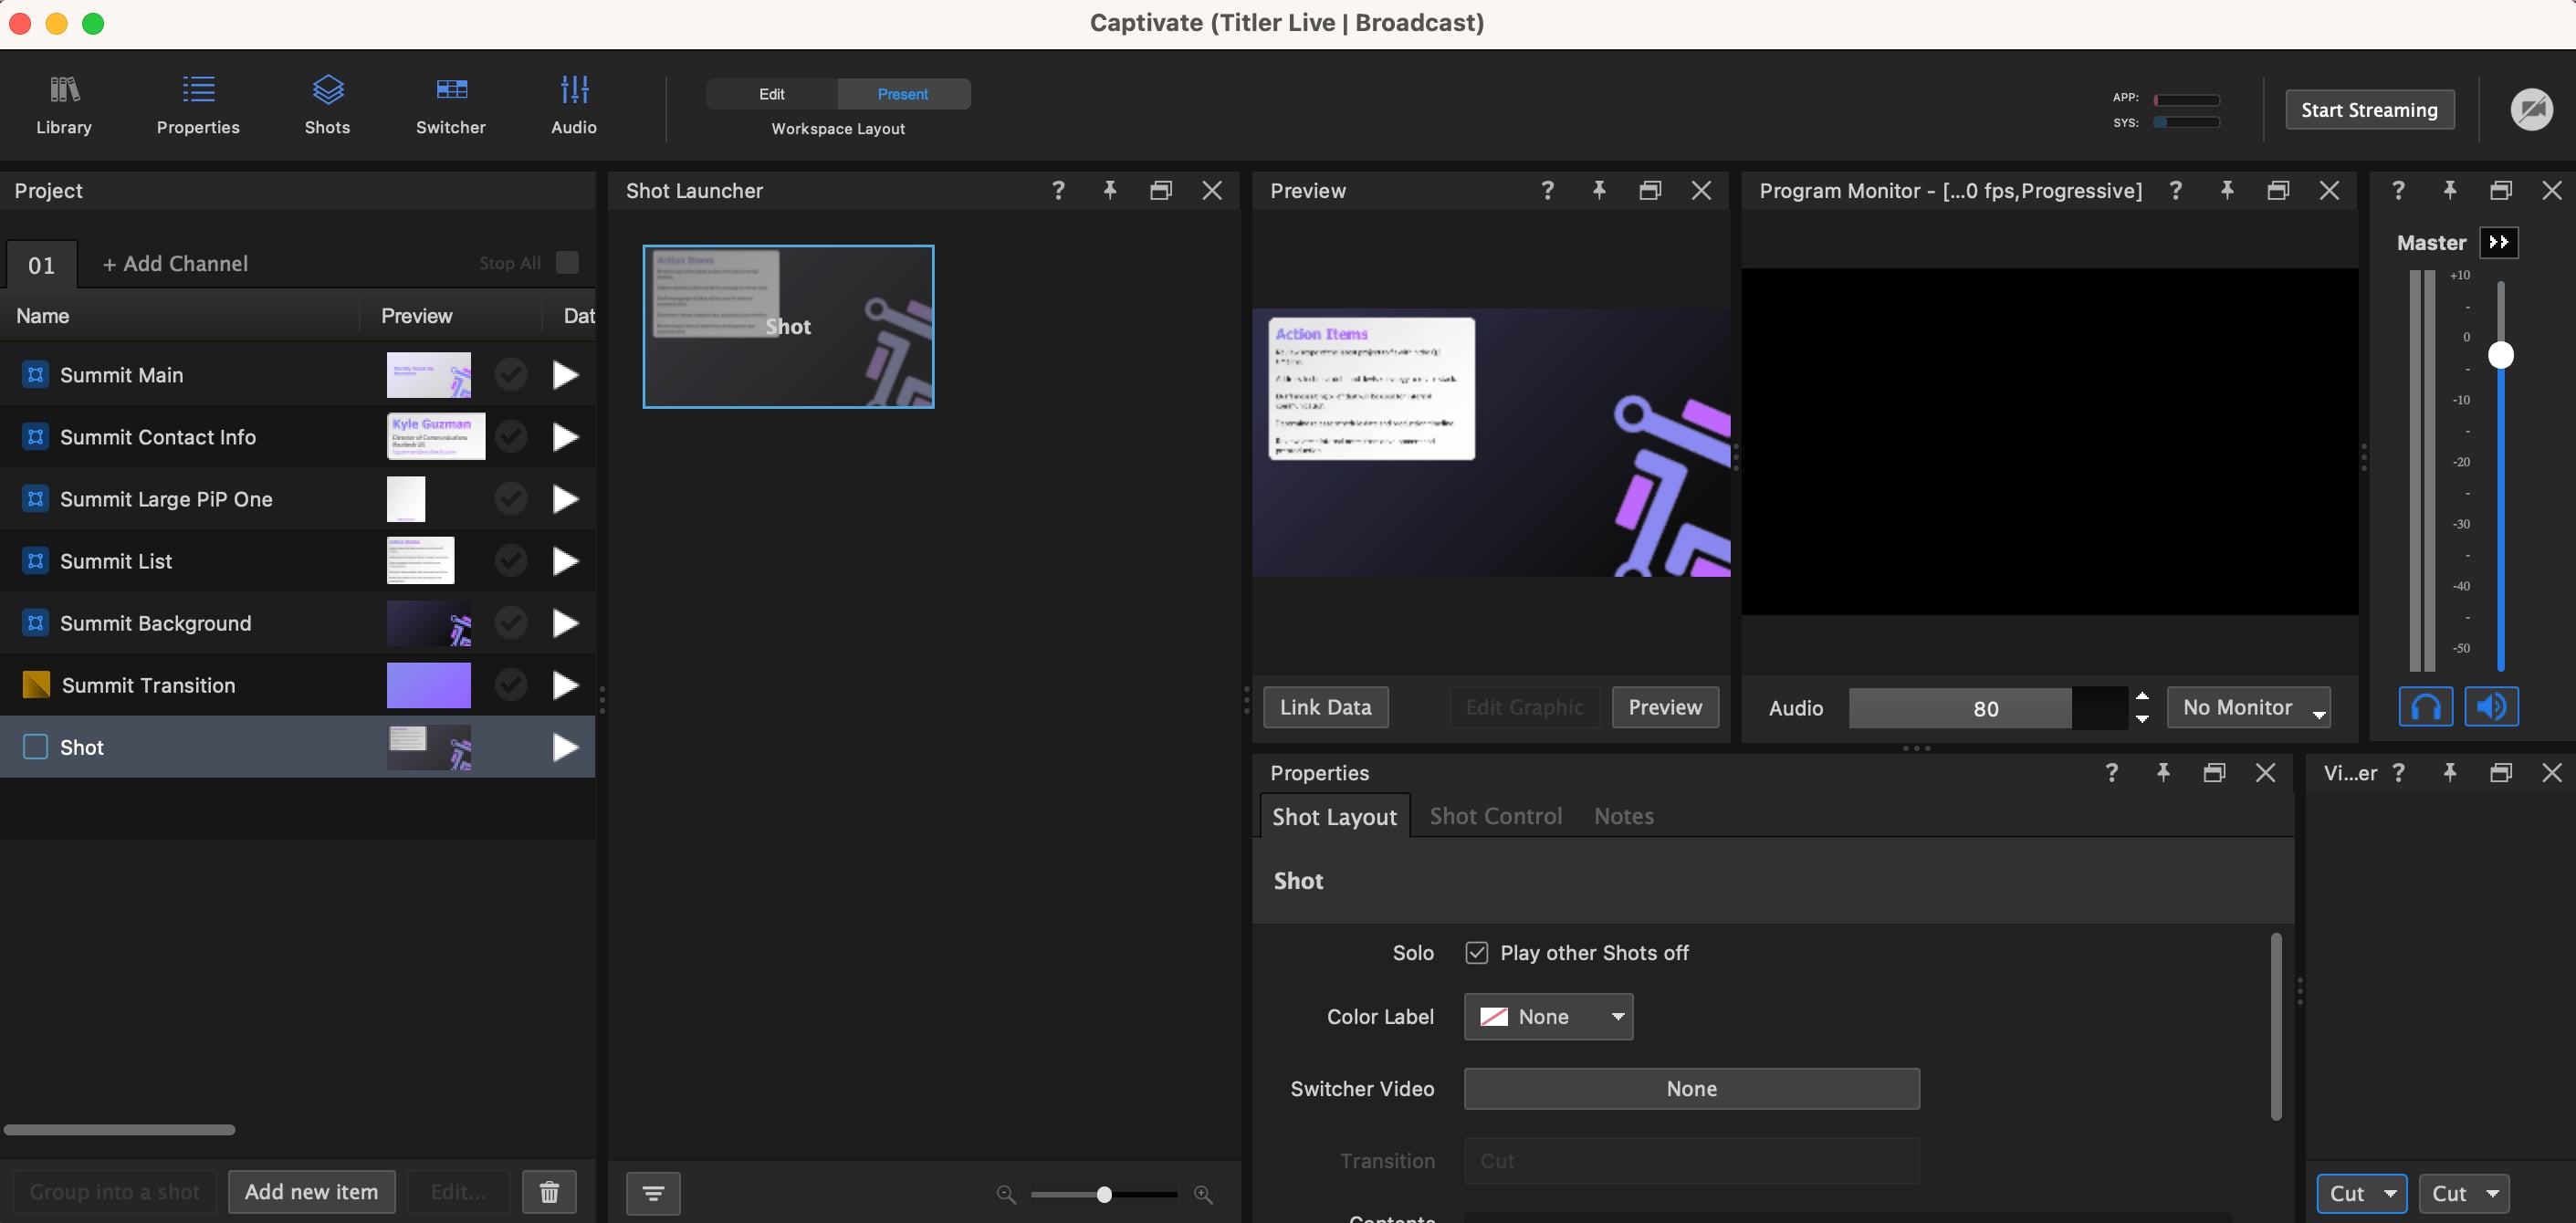
In the standard workspace layouts, the Shot Launcher is tabbed together with the Project List — click its tab, press **F9**, or click the **Shots** icon on the top bar to bring it forward.
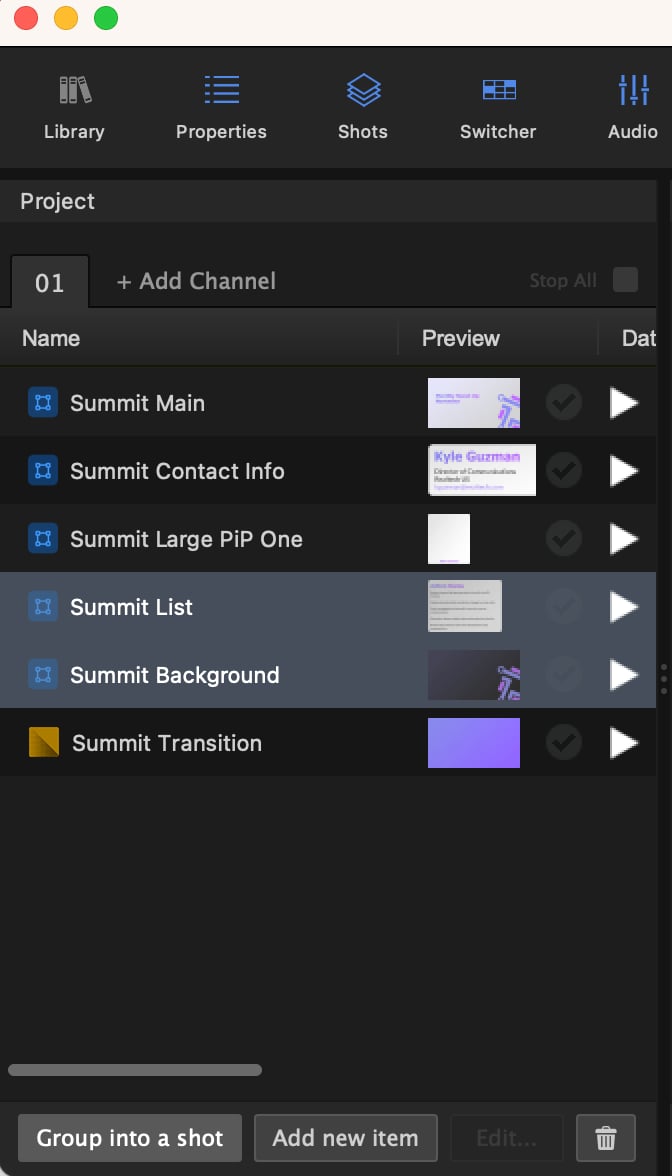
1. Select two or more graphics in your Project List that you want in the Shot.
2. Click **Group into a shot** at the bottom of the Shot Launcher panel, or drag-and-drop the selected graphics into the Shot Launcher.
3. The new Shot is added to the Shot Launcher.
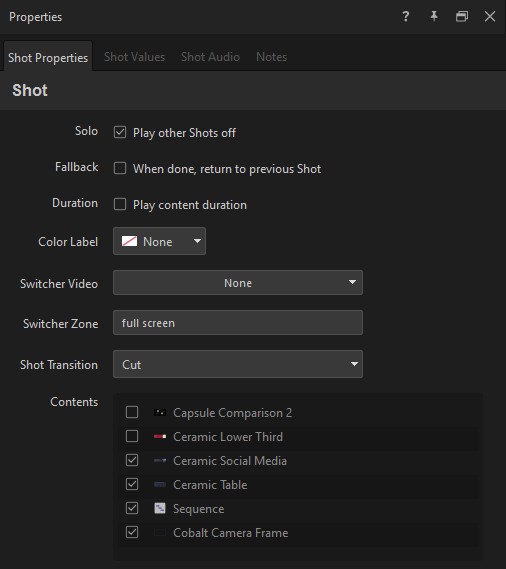
4. With the Shot selected, open the **Shot Properties** tab in the Properties panel and confirm that all graphics you want included are listed under **Contents**.
You can add as many graphics as you need.
{% hint style="info" %}
Graphics that should appear over other graphics in the Shot must be positioned above the background graphics in your Project List. Adjust the order in the Project List if needed.
{% endhint %}
## Shot Properties
Open the **Shot Properties** tab to control how the Shot behaves as a whole.
{% hint style="info" %}
*(In Captivate 2025 and earlier, this tab was called "Shot Layout".)*
{% endhint %}
### Contents
The list of graphics included in the Shot. Add or remove graphics here. For each graphic, you can also set its **zone** — which region of the project’s zone layout the graphic appears in — when the project uses a zone layout.
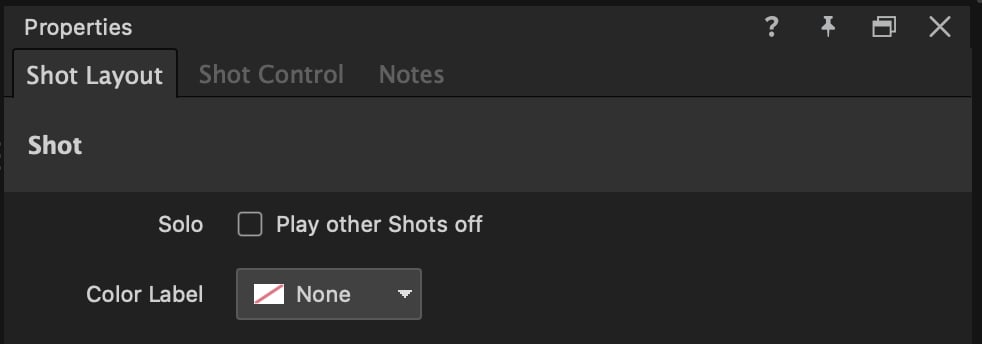
### Play other Shots off
When the Shot plays on-air, automatically take down any other Shot that’s currently live.
### Color label
Pick a color tint for the Shot’s tile in the Shot Launcher and Project List, for at-a-glance recognition during broadcast.
### When done, return to previous Shot
Acts as a fallback. When this Shot finishes its play-out and **Play other Shots off** is in effect, automatically restore whichever Shot was on-air before this one took over. Useful for quick interruptions — score updates, lower-thirds — that should hand control back to the long-running shot.
### Switcher Video
Use **Switcher Video** to pick the switcher source for this Shot — handy when a Shot should ride over a specific live input. The tooltip on the control reads "Choose the switcher video for this shot."
### Play content duration
Mark the **Play content duration** checkbox to end the Shot as soon as any contained title finishes; leave it unchecked (the default) to keep the Shot on-air until every contained title has finished.
## Shot Values
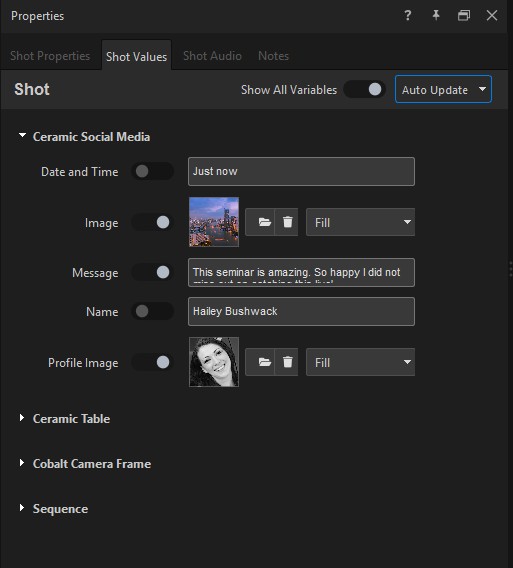
Open the **Shot Values** tab to override text and image variables for this Shot only.
{% hint style="info" %}
*(In Captivate 2025 and earlier, this tab was called "Shot Control".)*
{% endhint %}
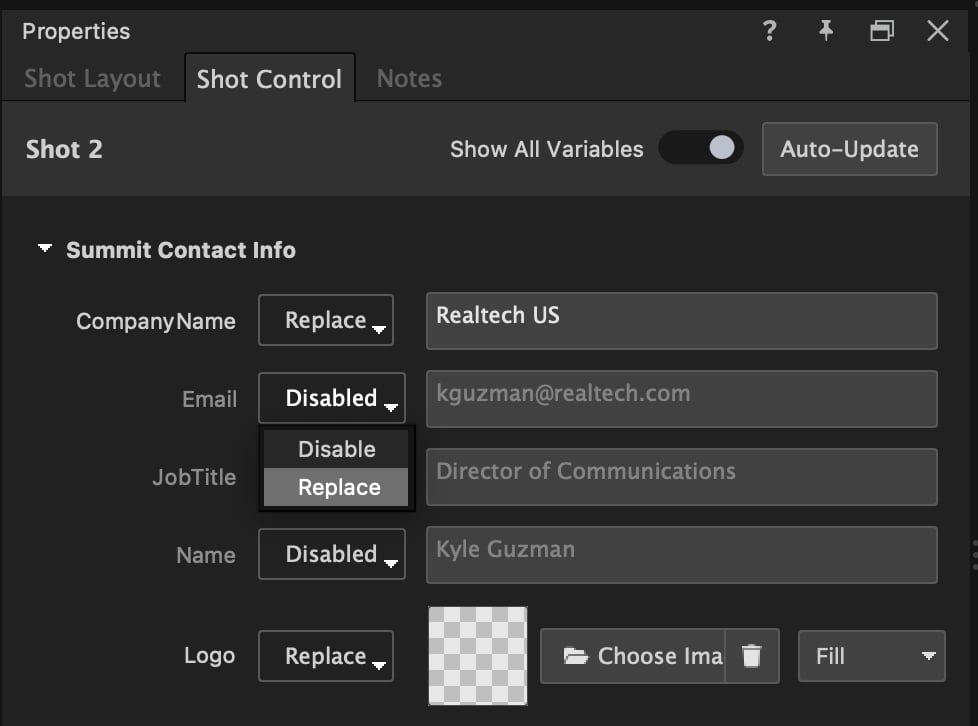
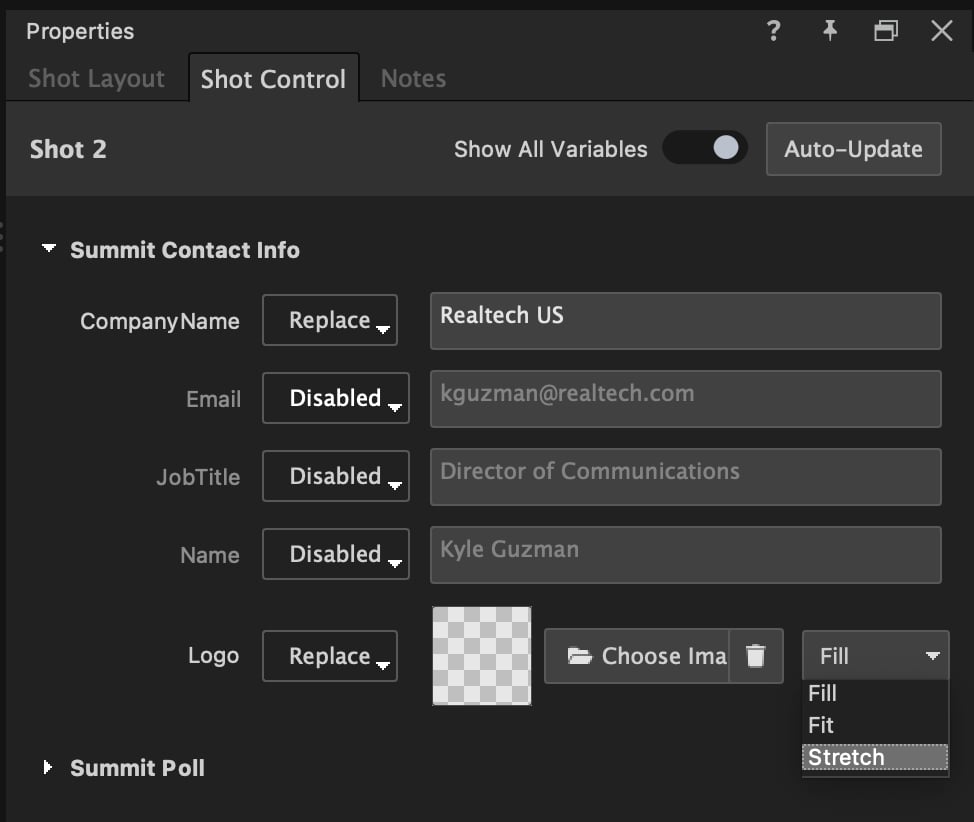
Every variable available in any contained graphic appears here, grouped by graphic. Click the small triangle next to a graphic name to expand or collapse its variables.
To override a variable for this Shot:
1. Click **Disabled** in the dropdown next to the variable, then choose **Replace**.
2. Edit the text in the Text input box, or pick a new image with the **Fill / Fit / Stretch** option.
The variable is now overridden for this Shot only — the original graphic is unchanged. To revert, open the dropdown again and choose **Disable**.
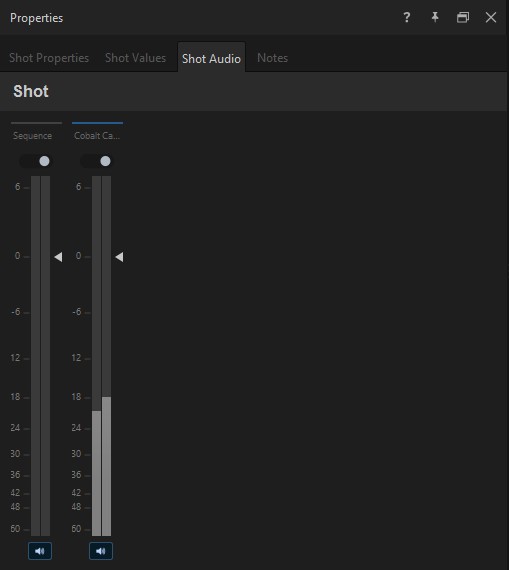
## Shot Audio
Open the **Shot Audio** tab to control audio per-Shot.
For each contained graphic, set:
* **Volume** — the audio volume of that graphic when this Shot is playing.
* **Mute** — silence that graphic in this Shot.
* **Override** — when on, the Shot’s audio settings replace the graphic’s normal audio behavior. When off, the graphic plays its normal audio.
Use Shot Audio to keep one Shot’s voice-over louder than another’s, mute background music in a sponsor card, or duck contained graphics' audio to make a presenter’s voice prominent.
## Notes
The **Notes** tab holds free-form operator notes attached to the Shot — cue reminders, talent names, timing hints. Notes save with the project and never appear on air.
## Shot transitions
The Shot Properties panel has two transition controls that sit alongside each other:
* **Shot Transition** — the transition Captivate uses when this Shot comes on-air. When set, this Shot Transition overrides whatever the Switcher would normally apply.
* **Video Transition** — the Switcher transition associated with this Shot’s **Switcher Video**. Use it to set a specific cut, dissolve, or stinger between the previous Switcher source and this Shot’s source.
Pick either transition from its dropdown in **Shot Properties**. When neither is set, the Switcher’s current transition is used as a normal cut between the previous Shot and this one. To learn more about transitions, see the Transitions article.
## Group and filter the Shot Launcher
On busy shows the Shot Launcher can group its shots into tabs. Open the **Filter** menu — the filter button in the launcher’s footer, or right-click an empty area of the shot grid — and choose **Group By**:
* **Tags** (the default) — one tab per design-intent tag carried by your shots. Design intents come from the graphic’s [Design Info](/design-and-customize-graphics/chapter-index-1/designer-properties-panel.md) in the Designer — tags like `lower-third` or `scoreboard` — so shots organize themselves.
* **Color** — one tab per color label in use.
* **None** — no grouping tabs.
The tab strip appears above the shot grid with **All** first; click a tab to show only that group’s shots. Turn on **Show Tab Counts** in the same menu to see how many shots each tab holds. When no shots carry tags or colors, the strip hides itself and the launcher looks unchanged. The **Filter** menu also carries the **Sort By** and **Filter By** options.
## Tips
* Drag a Shot into a position in the Shot Launcher to reorder it.
* Right-click a Shot for options like **Rename**, **Duplicate**, and **Delete**.
* The variables in **Shot Values** are the only changes that apply to "this Shot only" — Properties and Audio overrides apply to the Shot as a whole.
## See also
* [Assign playback roles for media clips](/design-and-customize-graphics/chapter-index-7/assigning-a-playback-role-for-media-clips.md) — how a Media Clip’s role affects whether it can be a Shot’s background or transition
* [Create a media sequence](/design-and-customize-graphics/chapter-index-7/create-a-media-sequence.md)
---
# Agent Instructions
This documentation is published with GitBook. GitBook is the documentation platform designed so that both humans and AI agents can read, navigate, and reason over technical content effectively. Learn more at gitbook.com.
## Querying This Documentation
If you need additional information that is not directly available in this page, you can query the documentation dynamically by asking a question.
Perform an HTTP GET request on the current page URL with the `ask` query parameter, and the optional `goal` query parameter:
```
GET https://captivatehelp.newbluelive.com/control-your-show/chapter-index-1/creating-shot-layouts.md?ask=&goal=
```
`ask` is the immediate question: it should be specific, self-contained, and written in natural language.
`goal` is optional and describes the broader end goal you are ultimately trying to accomplish on behalf of the user. GitBook uses it to tailor the answer towards what is most useful for that goal.
The response will contain a direct answer to the question and relevant excerpts and sources from the documentation.
Use this mechanism when the answer is not explicitly present in the current page, you need clarification or additional context, or you want to retrieve related documentation sections.